Meet Gertie the rotten 72 lowlight crossover :)

Early Bay Forum

Help Support Early Bay Forum:

This site may earn a commission from merchant affiliate links, including eBay, Amazon, and others.
gninnam said:
I like it - very 8)

Can I place an order then - especially if its free ;)

Oh, ok then! :lol:

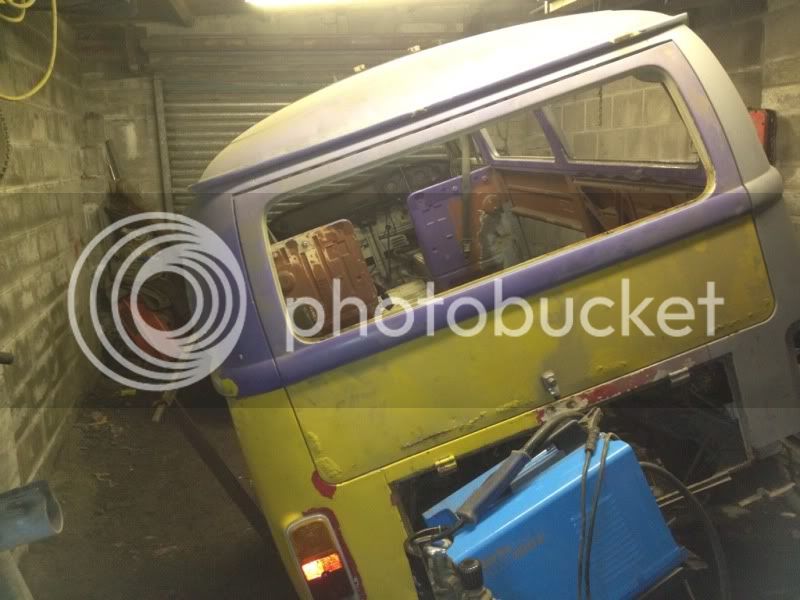
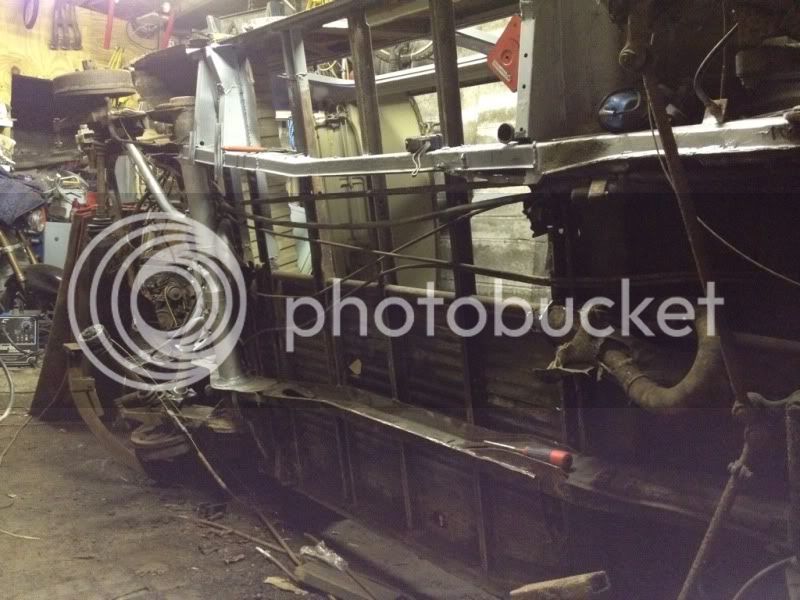
But seriously, I enjoyed making it and I was getting so fed up of lifting the welder and the gas bottle into and around the bus when working on it and this is gonna make things so accessible and much easier. 8)
 
Well, I borrowed a rollover frame which bolts to the hubs. The only issue is one of the front wheel bolts wouldn't move, I eventually sorted it by cutting through the nut with my disc cutter so I now need a new stud for the front hub but at least I was able to fit the frame. This is how it all looks. Just awaiting me getting in there with the welding set and plasma cutter when it arrives.

I jacked up the chassis section hoping that it was just gonna roll over. How wrong I was. Ended up I need to call my 2 brothers in to help. F**K me these vans are heavy. I had an added complication in that my garage isn't wide enough to tip it so I had to slide the van across as it was being tilted.

9A0CB4EE-06BA-4DBD-BA52-3E0BF19E9A59-6652-000011F9A182E232.jpg


A51ADAD2-C4F2-43BD-B60A-E8B0CA333667-6652-000011F99AD7AAE5.jpg


E6F09035-BEE3-4EC4-B618-1A03FC692280-6652-000011F9830FD8FB.jpg


5C5CB8B5-81F5-4FAF-8218-1930C8AE3877-6652-000011F9936B87CE.jpg


And this is the reason behind tipping it on it's side.

Told you it was bad didn't I?

6A80AAA6-9EC2-4C71-A139-B52EA122744A-6652-000011F98B4126F6.jpg
 
Haha,
Hopefully to be replaced with this section removed from a Californian bus from Schofields for £150.

IMG_1130.jpg


IMG_1132.jpg
 
Been up the garage for 8 hours today but it doesn't look like 8 hours worth of work. lol
The welder has had a mind of it's own today and I've spent loads of time messing around, it keeps burning back into the tip, no matter what setting or what I did with it. I ended up using 0.8mm tips with 0.6 wire and it seems to have settled down a little.

First I cut out the bellypan and tidied up the chassis where it was fitted then I went over old ground and re-did a few patches now that I have plenty of juice after redoing my electricity supply in the garage.

332D85B4-7ADD-471D-BB7E-1CDF1CAA007C-7068-000012D80B5720D0.jpg


I decided to fit the rear jacking point and rear most sill / chassis strengthener so thought I'd sleeve in the cable slot which lives under the jacking point, so I cut a piece of 20mm steel conduit across at an angle then welded it to the chassis.

3D49F3A5-6C7E-4D83-A5FB-6FD12AE58252-7068-000012D84925F269.jpg


1898C90D-1D1C-4C69-A4E5-640D8C103956-7068-000012D8327F3683.jpg


I then turned my attention to the jacking points.

E32680E6-DCC4-40F2-BBBB-B1A4E6F898FF-7068-000012D803B55ACE.jpg


4957AA5D-107F-40C9-B85F-37BA0EEAE3C5-7068-000012D7F747D238.jpg


25D74FD3-9894-40BA-B2B2-B6FBBE654E01-7068-000012D7EBBB5C31.jpg


47E661B3-6248-4720-B621-BCF54E56A1B7-7068-000012D7E657B931.jpg


Gearbox out tomorrow or Tuesday I think then the crossmembers as they've rotted out.
 
Managed to get 6 hours in today. Started removing the gearbox but found 3 bolts in the CV joints that seemed to be made of cheese! :laugh2:
I got them out with a mini stillsons. Took about 20 mins longer than it should have really to get the box out.

Looking a bit emptier.

843BE4F6-C429-4338-A35F-2D9491CE17F2-592-000000D7B592B6F9.jpg


Cleaned some of the rusty metal back with a wire cup and put some zinc rich paint on it.

4D6208F4-6C72-4549-BD71-6B2E48C9B087-592-000000D7B0BF795F.jpg


74EDBCFD-92E7-4E2D-926D-31ACE483CD96-592-000000D7A4979566.jpg


90C933F3-1A98-4180-9A7C-1EFAE27F17AC-592-000000D7AC5489CE.jpg


Got a little more welding done, plating some thin, holed metal.

576D520D-9035-4CC6-A074-A8F88A4CFB15-592-000000D7993F5508.jpg
 
thanks for reply about seals,I love my 2 crossovers but they did need a lot of rust removal n welding,but evrntually you get there,just a few bits every now n then pop up,thats all part of the fun,crack on
 
No worries chap. Cheers

Spent about 4 hours up there today. Got a few holes repaired in the chassis section behind the front wheel just aft of the beam. Then removed the handbrake lines from inside the bowden tubes and the clutch cable from out of it's tube, then chopped them out. Also made inroads to getting the rotten cross members off.

60F4DD6A-78AF-4574-B30D-CD4489A26900-1055-000001C0C23711CD.jpg


73534400-94EC-49EE-A0E1-193AAFB7F7AD-1055-000001C0EEB03624.jpg


Still need to make a small repair to the front of the chassis section behind the beam (and under this section I have just patched but it can wait until the beam is off.
 
Ploughing through with the repairs.
I'm struggling for time at the moment (Family/work keep getting in the way) so you are an inspiration for me.
Cheers :D
 
Thank you Andy. 8) Nice to hear that. :party0053:

Time not so much an issue for me, as I work offshore and my rota is 2 weeks on, 3 off. Lack of talent is my problem. :lol:

I can carry out the repairs ok but sometimes I wish my work was neater. I suppose as long as it is strong, I can hide it all with paint when complete.
 
Only managed to get in 1.5 hours before her indoors was hollering that food was ready lol so I left it at that. I Cleaned away some more of the front crossmember and cut some of the grot out behind it (the fillet piece) and prepared the new piece to fit tomorrow or Saturday. I also cut a piece of the chassis side rail which I will redo when the fillet is fitted.

654168DE-7358-4DFD-B034-CD8EBF79CACB-1450-0000029B016D4145.jpg


4BFD32CC-5D01-4067-8387-1BC3BEE48A82-1450-0000029B118C9272.jpg
 
2 Hours this evening, dressing up the fillet and clamping it in place. Not happy welding overhand (upside down) tho. Cleaned up ok and even with only one side welded, it won't go anywhere even with a hammer so it's all good.

Also filled the hole in the side rail and made a filler piece to finish off this section (although that piece needs welding all round but it's fixed for now).

73B5757D-1AB0-42BD-BD0E-8AFDFD748E82-2052-00000377A85BCBD1.jpg


A439B011-26ED-4449-8CCA-1C72E17275B2-2052-0000037766F0A833.jpg


BE638952-76B1-4869-8293-10CB83A7EA7D-2052-000003775914B75E.jpg
 
jesus christ mate, looking through your photos has made me cringe and wince!!! i'm no stranger to restoring vans, but what you're up against is horrific! i've welded up (what i considered) some terrible rotboxes in my time but nothing on the all over/ everywhere scale you're going through. your grit and the fact that you seem completely undeterred are awe inspiring! :D
i've scrapped 7 vans that were 10 times better than what you started with! if something had no previous sentimental value and was that bad i just couldn't find motivation to even begin! :eek:
i'll be watching this thread with interest. keep up the good work! :D :D :D
 
Right, time has come to finally admit I'm never gonna finish this and stick her on the bay. Been dry stored since I first purchased it but there's no denying it's still a big project although a few big (daunting) bits are done. Does anyone have an idea where I should be expecting this to end up if put in an auction. No wise cracks like the scrapyard please. :) I'm looking for a rough guide to where to pitch it. It'll probably go in an auction anyway as opposed to a fixed price sale.

Spares include 1 x genuine rear inner arch, 1 x lower panel and a scuttle, original engine, brand new 1641 pots and twin port heads and most of the engine bits for a rebuild.
 
Sorry to hear the bugger has beaten you :(
I would expect over £5k, but you never know!

Good luck with what ever you decide to do.
 
Cheers dude. TBH I was expecting nearer £3-4K but haven't kept pace with prices as it wasn't gonna be going anywhere, it just makes a bit of sense for us at the moment. Just going up the garage to get her wheels back on and get her back on the floor and get some pics for the bay.
 

Latest posts

Top