71 Early Bay, formerly know as 'SuperDry'

Early Bay Forum

Help Support Early Bay Forum:

This site may earn a commission from merchant affiliate links, including eBay, Amazon, and others.
Just ordered new valves and guides, some replacement tinware pieces, heat exchangers, new tinware screws, heater piping, new pulley, crankshaft oil seal and installation tool, sump plate with drain hole, tank filter, breather joints, battery tray and some full flow kit.
That should get me back on the go!
 
Mrs Scoops has informed me that my parcels have arrived so I'm now itching to get home this evening and unwrap my containers of shininess!
 
Orders from M7 and JK arrived today.


Just got to buy an M10 tap now and I can get on with getting the guides out. Need to crack on.
 
Decided I was going to have a pop at doing the valve guides myself rather than farm it out;-

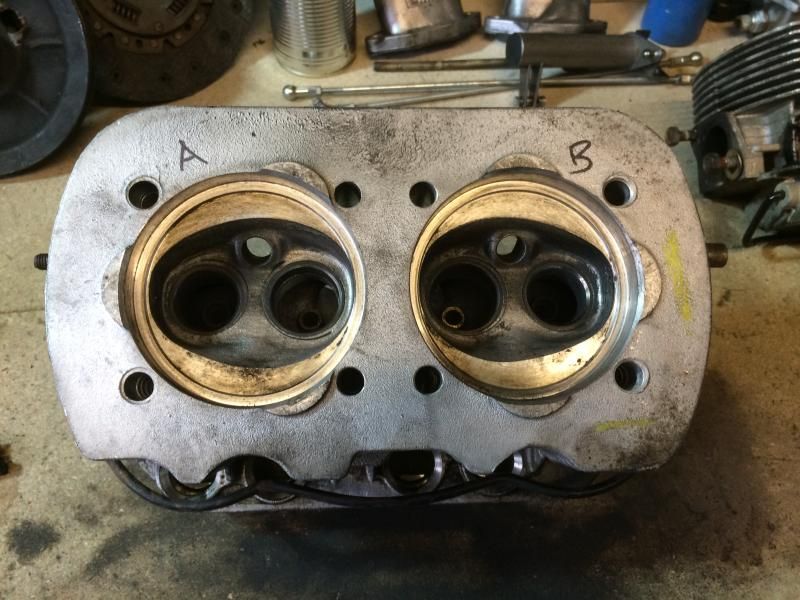
Both heads were coked up so the first job was to clean them up.


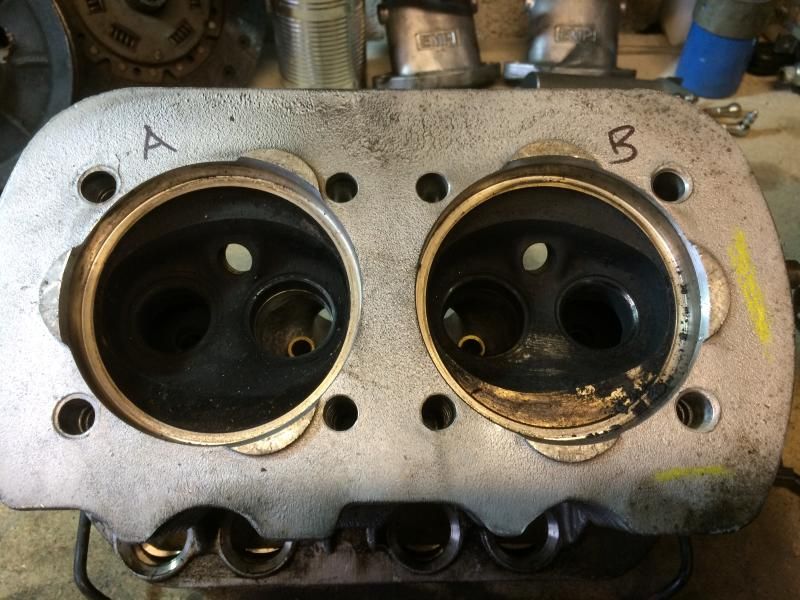
Bit of wire brushing and some elbow grease.


Now to get those guides out.


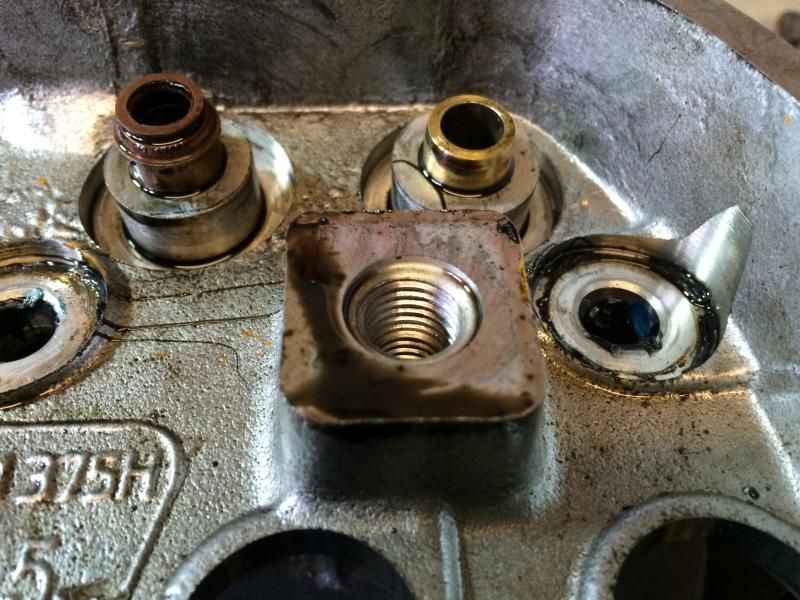
Still had the guide seals in situ, quite unusually!


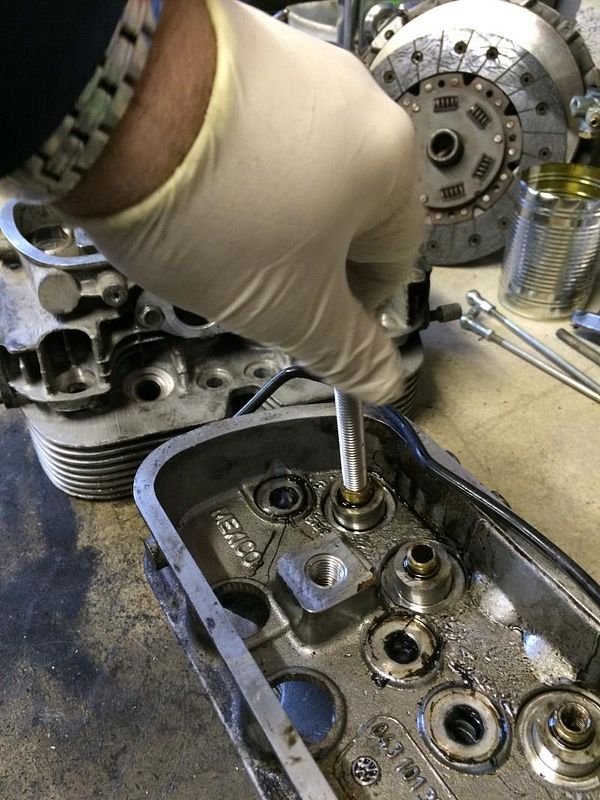
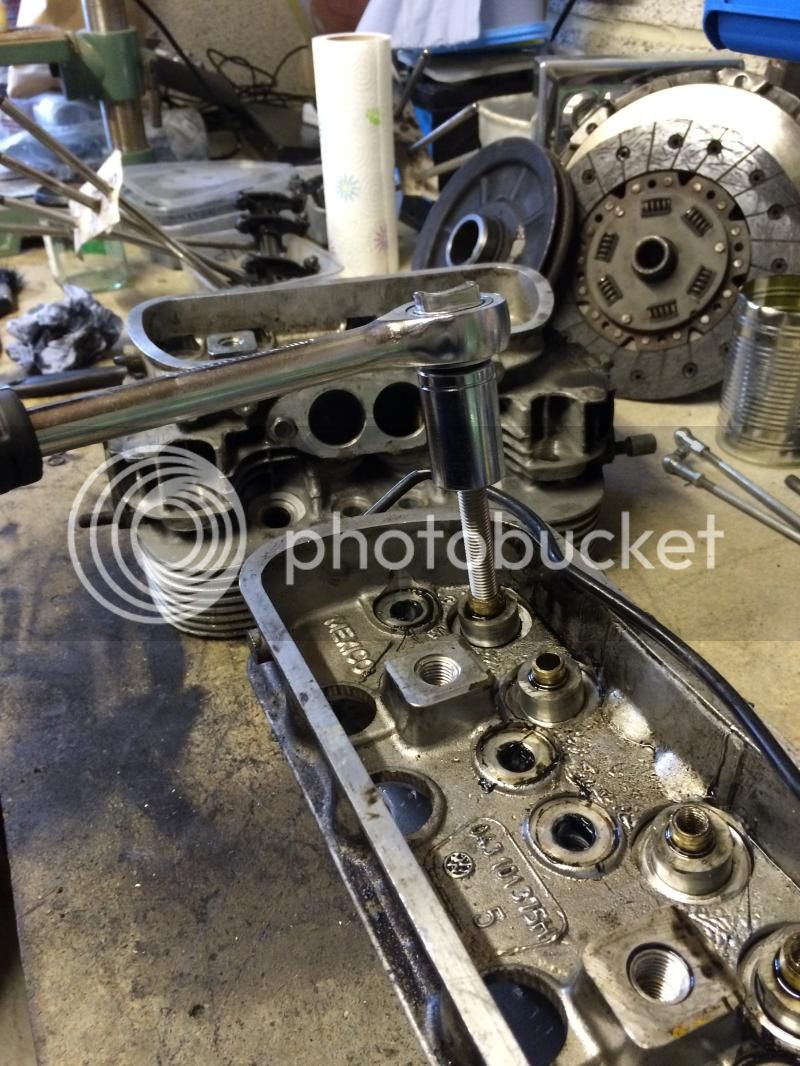
Double nutted to get the rocker assembly studs out.


Gave me a bit more space


Threaded the guides (although my tap was crap so I popped up to a Buddies and he sorted me out, so to speak).


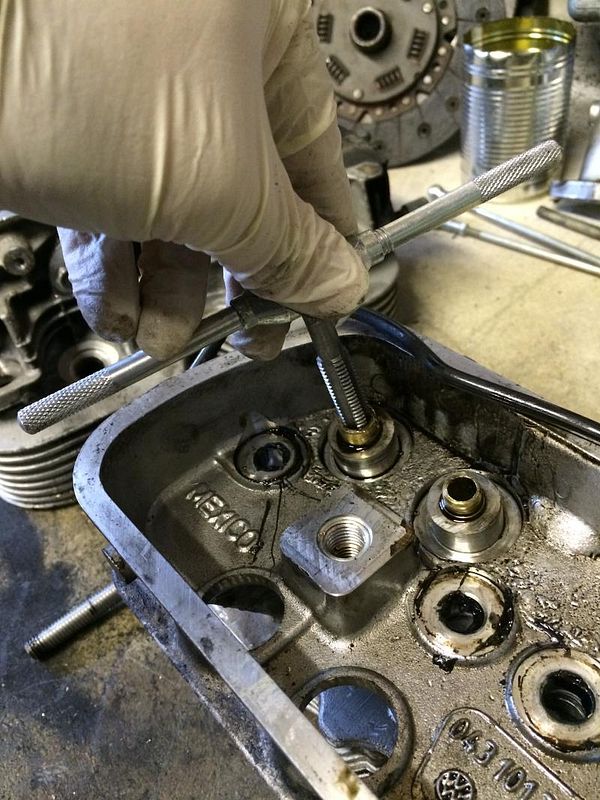
Put a bolt in to the newly cut thread.


Flip the heads over and you can see the bottom of the bolt that's been wound in.


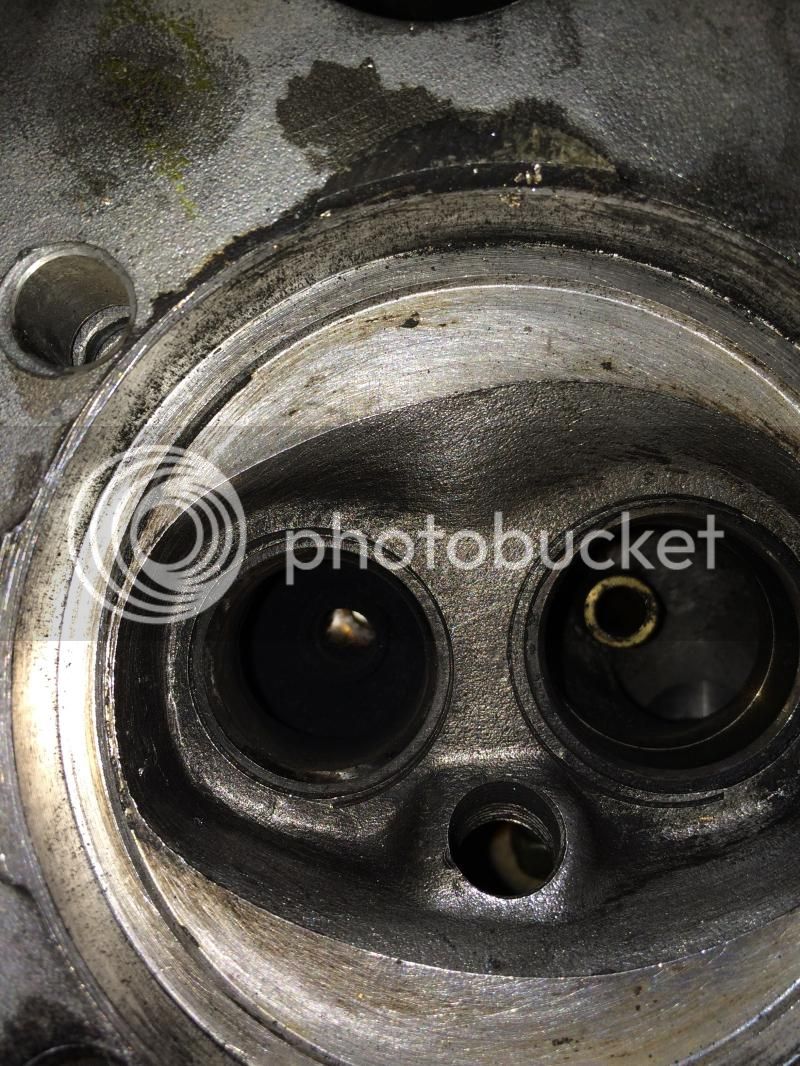
Then using an old valve in the guide, tap the valve against the bolt to knock the guide out.


Needed a drift for the inlet valve guides as they seem to a smaller dia.
Thanks again to Nomates and his lathe.


Replace the old valve with the drift and twat it!


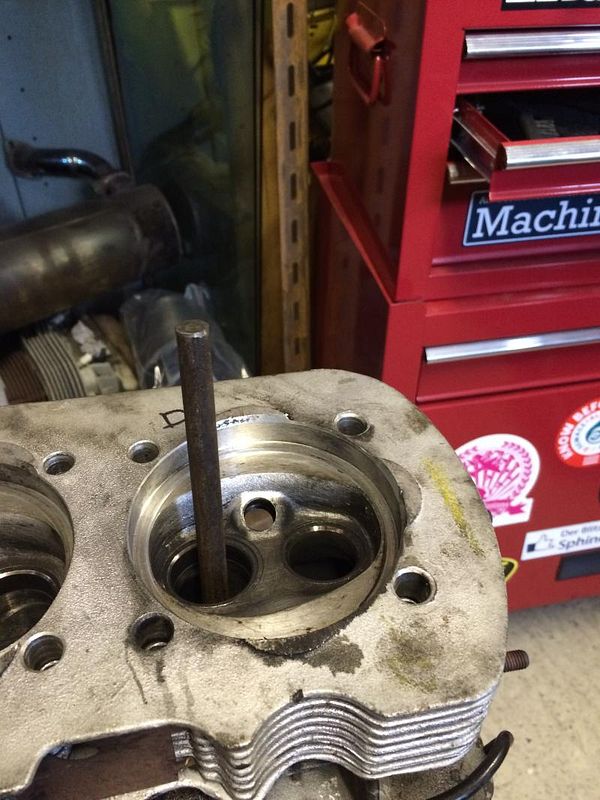
Managed to get them all out. And as you can see, the inlet and exhaust guides are definitely different sizes. I'll have to call Machine7 tomorrow to return 4 of the guides and see if they have the correct size in stock.


Had a couple of issues though. Had to use a socket as well on the end of the drift to push out a guide, however, I didn't realise it had made contact with the valve face. :(


And also managed to peen a bit of the guide over too.


So. I may have written off one of the heads with the damage to the valve face and the guide hole. Going to take it somewhere to see if it is salvageable.

Arse, still, a lesson learned for next time. Get some longer drifts made up.
 
An update from the weekend.

Had an hour or two this afternoon so thought I'd make a start on cleaning up the engine bay.
Started off with this....


Bit of Gunk, then a rinse with a sponge and finally a wipe down and it was starting to look better.


It needs redoing, then a bit of T-Cut and a polish next. Glad that the OG paint comes up that well.
 
Back out for a couple of hours to get the initial clean of the engine bay done.


On to the 'offside' of the bay, getting it cleaned up, first with Gunk, then a wash down with some bodywork shampoo and a wipe over with paper towel.


Starting to look better.


My other little task was to drag out the 1641 from under the bench and pop one of the covers off to see what heads are fitted.


As you can see, these are 040's. That leaves me with a decision.
I can either leave them in situ, fit the ratio rockers and IDF's, or to pull them off the 1641, replace them with 041's (with slightly larger inlet valves) and then put these 040's on to the 1584 (to replace the 043's for which I simply cannot find any replacement valve guides).

What advantage will the slight increase in inlet valve dia give me?

Spec will be

1641cc engine, Engle 100 cam, 1.25/1 ratio rockers, twin 36 IDF's, Pertronix igntion and VS exhaust.

My choice is;- fit a pair of 041's to this engine, or to leave as is, and buy a second hand pair of heads to fit the other engine so I can sell it as a complete long block. Any comments etc welcomed.
 
Hi Mr Scoops, I have a 1641 with 110cam in my bug and it pulls very well. It needs rebuilding though, but once done it will reside in my bus so looking forward to finding out how well it performs in yours!

Matt
 
mr scoops said:
My other little task was to drag out the 1641 from under the bench and pop one of the covers off to see what heads are fitted.


As you can see, these are 040's
How do you identify the head? I assume it's just the part number...
I'm a bit paranoid now I've fitted a brand new one to check it matches the other side. :msn4:
 
Got the 1641 on to the engine stand with a bunk up from a buddy from my local club


Cleaned up and then bolted up the engine support bar so I could mock it up with the exhaust to mark up where I want to put the notches in the bar.


I'm thinking I'll have clearance for an In/Out oil pump cover to run the external filter under the n/s battery tray


Got the VS on there.


The flanges had previously been ground down but I"m going to get the support bar notched to give more room when fitting the exhaust when it comes to it.


Notch positions and size marked on with a Sharpie.


Had a quick dabble this evening. Only had an hour out there as had some other stuff to do.

Decided to mock up the oil pump cover to see if the moustache bar required any modification.
I have two different types and tried this one first.


It's pretty blooming close to the moustache bar!


But there's a bit of meat here that can be clearanced. This is simply a spacer.


I then popped the two way cover off and replaced it with this outlet type and popped on a braided hose that I have ready for the job.


The next problem was that the oil pipe sits below the level of the engine bar.


Sitting vertical


No way I can run this, it'd get torn off the first time I drop around Weston!


Sits better at this height, but I think I'd have to mount a skid plate underneath it.


Just looking at ideas at the moment so I can mock things up. Once I know what set up I'm going to go with I can get the moustache bar modded, then powder coated.

The engine can then be properly cleaned up and I can also dry fit the tinware before that gets powder coated too.
 
Weld a bit of box or angle to the back of the bar before you start cutting, this will keep it aligned during the mod and add strength to it.
Also, if you "bond" in the battery tray with Sikaflex you will not burn the paint. Just look for a suitable structural adhesive.

Nice thread BTW.


Sent from my GX64 SatCom phone using Tapatalk
 
Had a little bit of time this afternoon so I decided I needed to get a bit done on the engine.
I whipped out the 5 exhaust studs that were in the heads and fitted all new 8 new ones, with a smear of good old copper slip on each stud.
This reminds me, I need to source the slim line exhaust nuts that have the allen key pattern in the end.
Next was to start dry fitting up the tinware to make sure it all goes together ok prior to getting it coated.


I know it all looks a bit manky but I'm going to clean the case etc when the tinware is being done.

Popped the oil cooler in place and nipped up one nut to hold it in place.


Then put the fan housing in place. Doing this made me realise one side requires the bottom front edge to be straightened out.


I started looking at the areas that require a mild 'fettling' to get it to all fit together properly.


This is where we are at the moment


I've been offered a full set of tinware that's already been powder coated but I'm waiting to find out if it's a brand new set up that's been done, if it's og or if it's had it's fettling and fits straight on.
 
Had a bit more a furkle with the tinware this afternoon.
The tinware on the side of 3 & 4 is all sorted now.
Just need to sort out blanking the holes in the rear tinware where the heat risers would have been and then get the other side done.
Didn't take any pics today, but will do if I get on it on Sunday afternoon.
 
Finally I've managed to get some work done.
Got the fuel tank back in place.


With the breather pipes all reconnected I then managed to get the firewall back in place.


I had a quick look to where I could fit the new electric fuel pump but have realised this has a 2.2psi output, which would have been ideal for the ICT's, but now I'm planning to fit a pair of IDF's I need to replace it with a pump that put's out 3.5psi.


And although I know other people have fitted them, I couldn't fit this filler pipe and get a fuel clamp at either end, so will be flogging this too.


I've now got to order some new bits and bobs. With a nicely finished firewall I can't reuse the scabby screws so need a set of them as well as the slide in engine bay seals.
I need a pair of IDF rebuild kits and possibly a replacement lot of jets.
Also need a clutch, some cheap oil to do a compression test and some engine flush and a set of over engine fire boards.

Got my heat exchangers and tinware back too.


Firewall sorted properly now. Bought stainless screws today and fitted them, then found the 12v feed for the sender, so had to drop it off again, fit the lead, then refit. All sorted now. next job is to t-cut the paint in the engine bay.
 

Latest posts

Top