Moose the '72

Early Bay Forum

Help Support Early Bay Forum:

This site may earn a commission from merchant affiliate links, including eBay, Amazon, and others.
I've been experimenting with Rustoleum over the last week or so. One of the sites I used to get a couple of tins suggested using flour paper in between coats. This gets a proper mirror finish apparently. I haven't actually tried this method yet as I wasn't happy with the colour. I've since got a couple more colours so might play around today/tomorrow.
 
Here's a bit of a review of my paint job I did as I didn't always take photos or update as I went along :roll:

I used Rustoleum Combi colour Cream (5ltr) & Black (1ltr) and 8ltr of white spirit, I had this from Rawlins Paints all for approx. £80 delivered.


I used this Sealey HVLP set up (approx.£40 on ebay) and It was quite a steep learning curve as I've only ever sprayed with rattle cans before.
I was able to get quite a good finish straight from the gun although this wasn't always consistent but that was down to my inexperience I think :lol: I mixed the paint 3:1 with white spirit and this seemed to work ok.

Originally it was going to be all cream but every day I drive past my neighbours new mini in cream & black and this got me thinking ;)
Overall I'm quite pleased with the results, but like most things done for the first time I'm sure I could do a better job next time so will probably paint a couple of the panels again.
It's never going to win any awards but we like it and it has received some favourable comments even from strangers :D and I've probably saved about £800 even compared to a quick blowover and the finish does seem to be quite tough.
 
I used rustoleum on my gutters around 5 years ago and rust is coming through........
 
aogrady said:
Hi,

Nice, cheap was that lot, tempted to buy a hvlp gun now....I fancy repainting the motorbike after the pop top!

Cheers,

Alistair

Go for it Alistair, :D
 
gninnam said:
I used rustoleum on my gutters around 5 years ago and rust is coming through........

I can't really comment on the longevity of it so far, but if it lasts 5 years I'll be quite happy I think :lol:
 
I bought some LED strip lights off ebay for around £2.50, a friend had fitted some similar to his motor home and I thought they looked very good fitted under some of his units.

I was then wondering how I could fit them as they are quite flexible, I put one against the curtain rail and realised that they are an almost identical diameter and a tight fit inside the rail. Checked my spares box (shed :lol: ) and found a suitable spare length of curtain rail.


Since I've had the bus I've not had an interior light that comes on when the door is opened but I was able to wire these to the door buttons used by the interior light when it was there.

I fitted these just above the front seat backs so that it would like the back as well as the front of the van.

I just need to fit a switch so that I can turn them on independently from the door, this should be straight forward once I get a suitable switch. :D

Looking at this has made me realise that the headlining needs attention urgently :lol:
 
Liking what you have done with the strip lights. Simple but effective. Very nice 8)
Do they give out much light?

Like your headlining too :mrgreen:
 
Weird we have same table and roof combo lol

I did a similar thing with the LEDs but ran them across the bottom of the pop top. Lucky for me the light feed was pre run from beside the rock n roll bed to above so I put a rocker switch in the sink unit to run it.

Sent from my C2105 using Tapatalk 2
 
gninnam said:
Liking what you have done with the strip lights. Simple but effective. Very nice 8)
Do they give out much light?

Like your headlining too :mrgreen:

:lol: headlining has sagged so much it just about rests on my head now :lol:

It's surprising how much light they give out, they are enough on their own to light up the whole van, I'll try and get a pic at night.
 
Aazbo said:
Weird we have same table and roof combo lol

I did a similar thing with the LEDs but ran them across the bottom of the pop top. Lucky for me the light feed was pre run from beside the rock n roll bed to above so I put a rocker switch in the sink unit to run it.

Sent from my C2105 using Tapatalk 2

Great minds thinking alike :lol: I'm not sure where I'm going to put the switch yet but probably near the lights as it just basically adding another earth route to the circuit and will need less cable to be hidden.
 
Since I got the van back on the road a month or so ago I've been using it as my daily, here it is outside where I work.

A lovely place to come to work every day :D
 
Just mooching about the van today and thought that the kick panels are looking pretty scruffy


I'd got some sticky backed plastic (cue Blue Peter :lol: ) that I had from Poundland :mrgreen: in my shed and thought I could tidy them up a bit.


Sorry photos aren't too good as they were taken on my phone which can be a bit hit & miss, the kick panels themselves are some I made from mdf a few years ago and had just painted them black, time and leaks had taken their toll :lol:
 
I'm still undecided what to do with my interior, whether to stay with a 3/4 wooden folding bed and a couple of Devon units

a single buddy seat, swing out cooker not shown in the pic.
I'm thinking about a full width RnR bed and poss keeping the swing out cooker, I would like one of Faux's beds but finances wont allow it :roll:
I have this in my shed


So I'd need to cut it down and weld it back together to fit, this may well be a winter project for me but I'm not too sure yet about how I'd mount it so would appreciate any pics if anyone has done it before otherwise I might have to just give it some proper thought and planning rather than my normal scatter gun approach :lol:
 
I made a start on this yesterday and to keep it balanced and the cross bars for strength I decided to cut 2 sections out of the base

I cut this 215mm section out of either end in total 430mm

After cutting I spent a bit of time tidying the ends and getting the mesh to line up ok, had to leave it then so next time weather permitting I'll be trying to weld it back together, then on to the back rest.
 
I managed to get the base welded back together today

Not the neatest of welds :oops: but nothing that a flap disc can't tidy up :D the steel looked to be fairly thick but was very soft and I ended up using the lowest setting on my mig but not before I blew a couple of holes with it too high :roll: A coat of zinc primer to finish off, which matches the rest of the paint pretty well.
But I'm hoping this experience will help me when I do the back rest, tomorrow weather permitting.
 
I've still not decided what to do with the rear seat, the back rest has been welded up now as well but no other progress made :roll:

Took a trip over to Aberystwyth on Friday afternoon and enjoyed the evening sunshine :D


On the way home the van started chugging a bit but as I was working Sat & Sun today's been the first chance for me to investigate further, the fuel filter was quite clogged up so with that changed I thought I'd whip the carb off as well to check

This was in the bottom of the float chamber but a good flush through with carb cleaner seems to have shifted it.

I think I really need to get the fuel tank out to flush and seal it properly but don't fancy having to take the engine out first :roll:
 
I've still been experiencing some lumpy running even after replacing the fuel filter and cleaning the carb
IMG_20140523_120304_zps6ojghh4h.jpg
[/url]

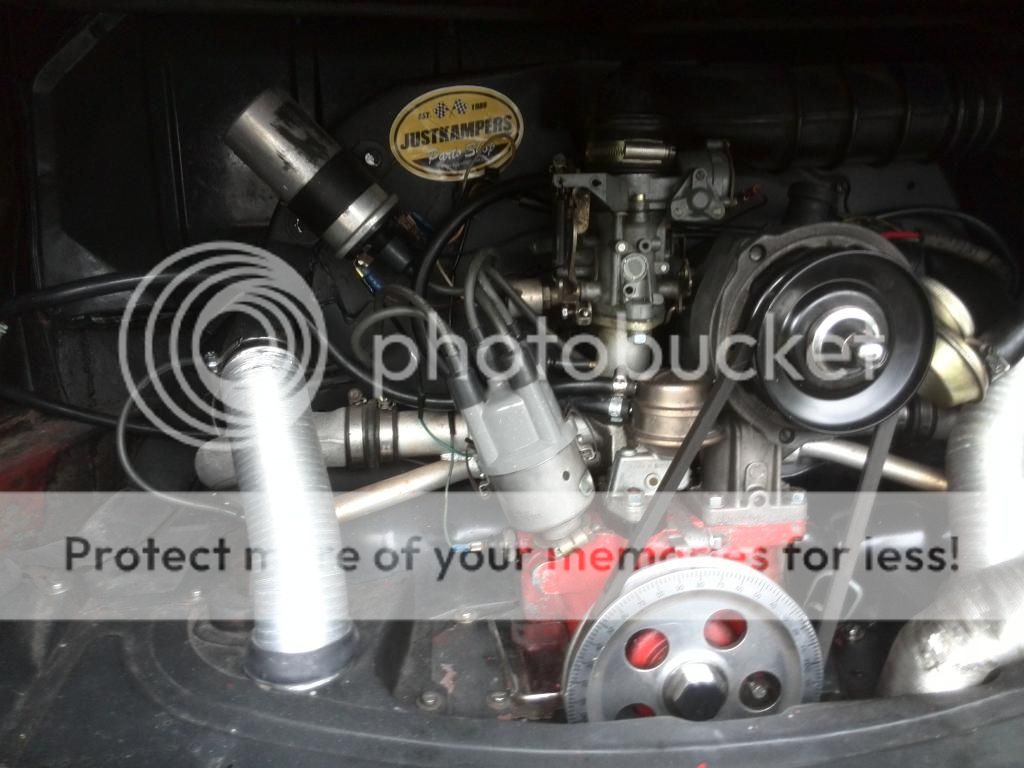
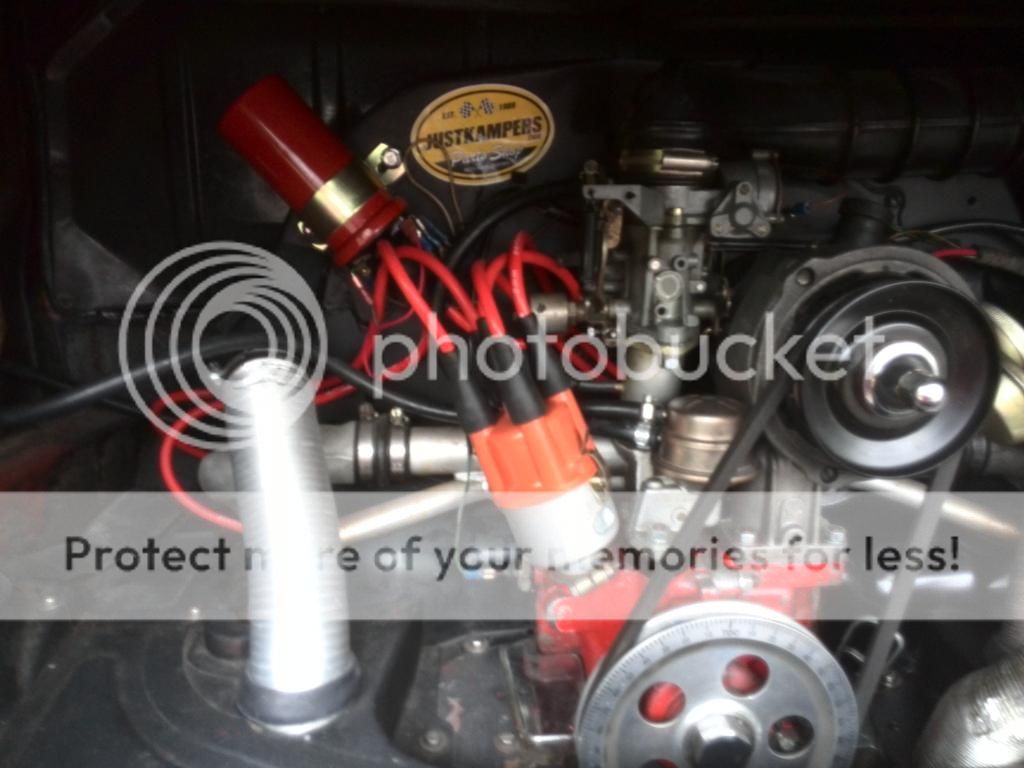
This was my engine bay at the time running a stock carb & air filter with a genuine 009 distributor.
I decided to go for an accuspark electronic ignition module after reading various reviews that generally give it a thumbs up.

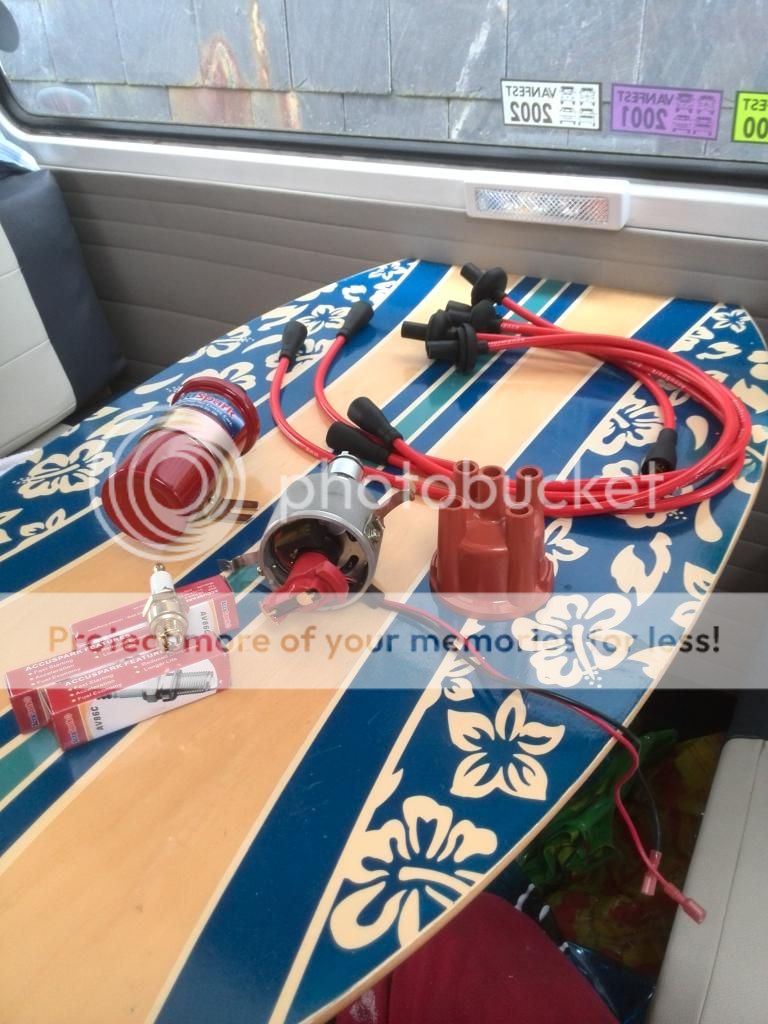
This is what I bought from accuspark via their ebay shop, coil, leads,plugs, 009 dizzy with the electronic ignition module ready fitted.
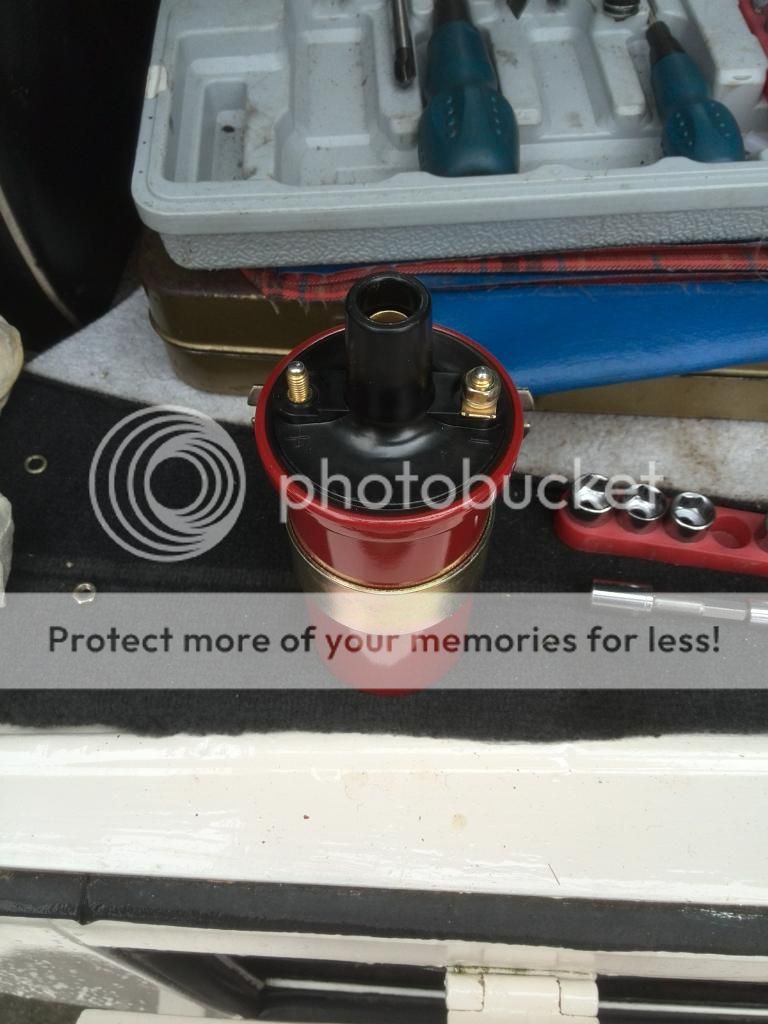
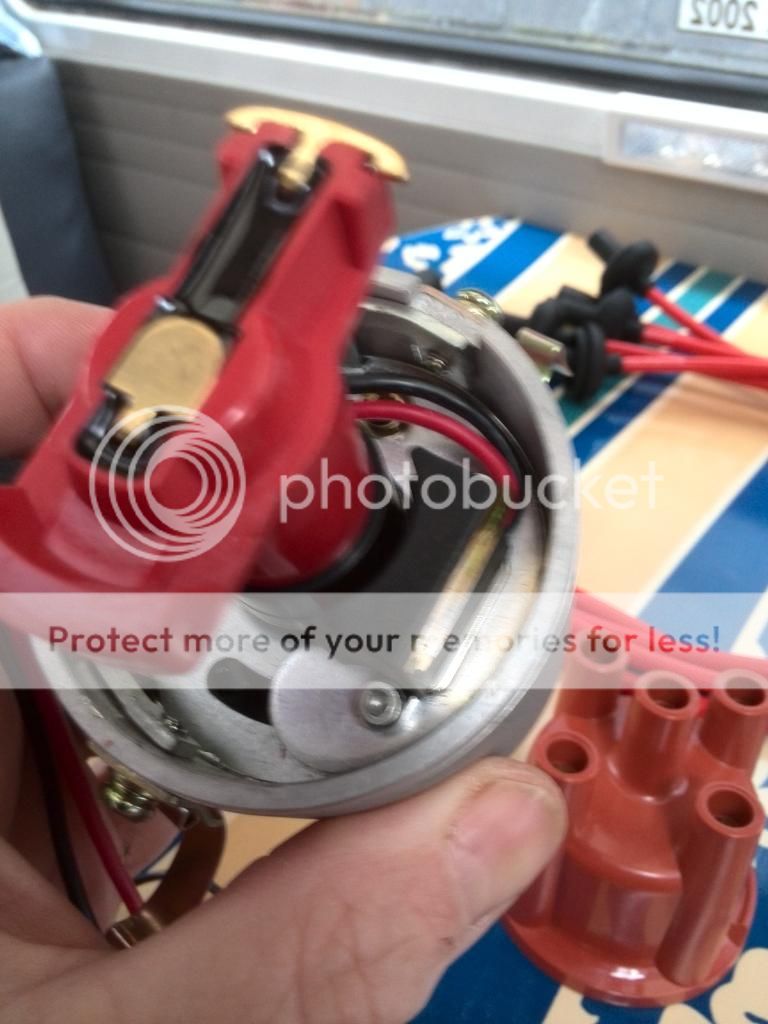
Here you can see the module fitted to the base plate, doing away with the points and condenser. And I had to swap over the tags from my old coil to the new so I could make all the connections. There are just 2 wires that go to the + & - terminals on the coil to connect the module but it is vital these are connected correctly otherwise the module will blow.
Here it is all fitted, I made sure the engine was at tdc on number 1 cylinder before starting as you can't really time this unit statically just approx and then timed with a strobe at 3000 rpm.
It may be in my head but it does feel smoother and hot starting is easier so another thumbs up from me :D
 
On first inspection I was a little worried about the dizzy as you hear all sorts of horror stories about flat spots with the copy 009's , I've not had a problem previously with my genuine one and as it's turned out I needn't have worried so far, as after about 40 miles it is nice and smooth straight from idle.
 

Latest posts

Top