

Looking really good in the engine bay, very neat. I'll probably remove mine as well. Are you going to put any sound insulation in?
You are using an out of date browser. It may not display this or other websites correctly.
You should upgrade or use an alternative browser.
You should upgrade or use an alternative browser.
Monty the Red Campervan
- Thread starter mike202
- Start date
Help Support Early Bay Forum:
This site may earn a commission from merchant affiliate
links, including eBay, Amazon, and others.
gas1man said:I bought a length of board from B & Q that you use to go in front of a radiator in your house.
It's nearly the same just the holes are a little tighter together. Sprayed it black.
https://www.diy.com/departments/cambridge-large-white-traditional-radiator-cover/153462_BQ.prd
This is the sort of thing I used and some new fibreglass insulation between.
Hope the idea helps. Bus is looking good.
J & P

thanks for the suggestion. I have a look around.
fallingoffalot said:Looking really good in the engine bay, very neat. I'll probably remove mine as well. Are you going to put any sound insulation in?
Thanks, its taken quite a bit of work to get it like that!
I am not in a hurry to replace the tar boards. I have sound deadening (silentcoat) on top of the engine deck, so that should minimise that panel for noise. I would have painted the roof under the tar boards last year, if had realised I was going to remove them later. I am interested if others have found a good alternative.
- Joined
- Feb 2, 2015
- Messages
- 672
- Reaction score
- 474
- Location
- Llanasa
- Year of Your Van(s)
- 1970
- Van Type
- Early Bay
Looks fantastic Mike ... the queue at Aldi doesn’t though [emoji85]
Sent from my iPhone using Tapatalk
Sent from my iPhone using Tapatalk
I was looking at the thick (10mm+) under bonnet insulation.
This type of thing: https://www.deadening.co.uk/products/silent-coat-noise-buffler-30
This type of thing: https://www.deadening.co.uk/products/silent-coat-noise-buffler-30
fallingoffalot said:I was looking at the thick (10mm+) under bonnet insulation.
This type of thing: https://www.deadening.co.uk/products/silent-coat-noise-buffler-30
thanks for the suggestion.
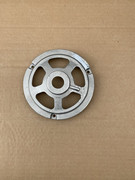
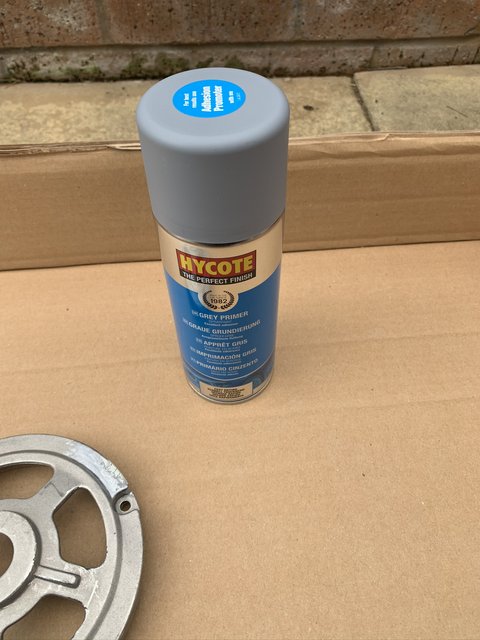
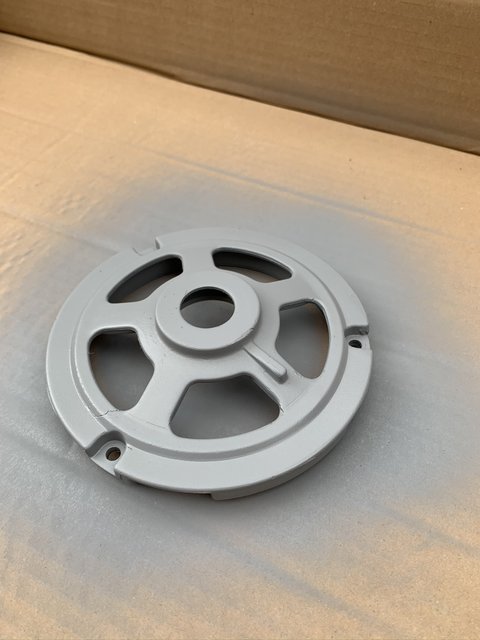
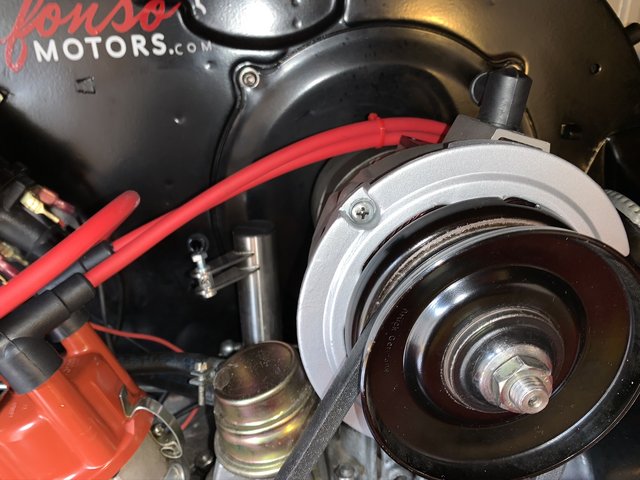
I have made a small repair to the cover plate of the alternator which has been bugging me for a while. I used Milliput to fill the hole then grey primer and then paint to finish it. The hole or cut into the plate was made when I had the alt conversion done to get it to fit with the Weber 32/36 progressive carb. I now have twin carbs.

I wanted to check the spark plugs after about 3000 miles on the new engine. Getting to the front plugs number 1 and 3 is a bit awkward to say the least. I bought a set of extension bars and universal joint to get a better fit on the plugs. I was able to get the number 1 plug out (the front right side) this is the most restricted with my Weber ICT carbs.
When I tried to put it back in after tightening it, I couldn't remove the plug socket! It was stuck fast and wouldn't come out until I unwound the spark plug a bit then it would release. It seemed to be caught by the tinware above it. I had another spark plug socket with 1/2 drive and tried that, same problem!
I had a cup of tea and a think, and remembered I had a really old spark plug T handle socket that I must have had for over 30 years. I found this in the bottom of my tool box, and guess what? It fitted perfectly and withdrew easily because it is a much smaller socket head and the T handle makes it all one piece. I was really surprised that it worked at all and wish I had at least tried it before buying the extra plug sockets, :lol: at least the extension bars will come in handy for other jobs.
old rusty T handle on left with another old spark plug socket.

I made up some Pertronix 8mm leads to go with the Pertronix dissy and coil. Also fitted a new dissy cap and rotor.
When I tried to put it back in after tightening it, I couldn't remove the plug socket! It was stuck fast and wouldn't come out until I unwound the spark plug a bit then it would release. It seemed to be caught by the tinware above it. I had another spark plug socket with 1/2 drive and tried that, same problem!
I had a cup of tea and a think, and remembered I had a really old spark plug T handle socket that I must have had for over 30 years. I found this in the bottom of my tool box, and guess what? It fitted perfectly and withdrew easily because it is a much smaller socket head and the T handle makes it all one piece. I was really surprised that it worked at all and wish I had at least tried it before buying the extra plug sockets, :lol: at least the extension bars will come in handy for other jobs.
old rusty T handle on left with another old spark plug socket.
I made up some Pertronix 8mm leads to go with the Pertronix dissy and coil. Also fitted a new dissy cap and rotor.
Very neat and tidy. I recently bought a T handle, I only bought it because none of my other spark plug sockets would fit. Looks like I've just saved myself a load of hassle.
Thanks. Couldn’t believe it worked better than the new shiny chrome ones. Now where have I heard that before [emoji23]
Sent from my iPhone using Tapatalk Pro
Sent from my iPhone using Tapatalk Pro
67panel said:Most plug sockets are too thick in wall and jamb on cylinder head , I have a thin wall UJ one
I searched for thin wall but these were the best I could come up with. Do you have a link?
Sent from my iPhone using Tapatalk Pro
creationblue
Well-known member
Bus looks great mike and that engine and bay! Gleaming!
Bus looks great mike and that engine and bay! Gleaming!
Like the work on the Alternator - looks factory fresh
Good tip on the spark plug thingy...
Thanks for the comments guys!
Like the work on the Alternator - looks factory fresh
Good tip on the spark plug thingy...
Thanks for the comments guys!
67panel said:Yes it is a Snap on but 20years old!!
Thanks !
I might just clean up my old T handle for now though.
Dirty Harry
Well-known member
Top notch work 8)
Dirty Harry said:Top notch work 8)
Thanks Harry! Can’t wait to go camping [emoji904]
Similar threads
Vehicle For Sale
1971 T2a Double Cab Pick Up
- Replies
- 0
- Views
- 605