Another Dormobile restoration :)

Early Bay Forum

Help Support Early Bay Forum:

This site may earn a commission from merchant affiliate links, including eBay, Amazon, and others.
Mickey Sam said:
Two weeks nearly up Kevin, can't wait for you and Spike to start again !
No pressure , :lol:
Would be great to see this in paint, hopefully see you at Sandown ;)

Good call :mrgreen:
Have you done any work Kevin since the last update ;)
 
hi all , back on kevs van this week so far been cutting off pass inner sills with inner sills on top of them , outriggers jacking points and lots of botched previous crap done by muppets in past when cleaned back we'll start welding good steel back in and then the pass side will be done then just the front to do. after that i'll work up and do window frame repairs and then finish the roof edges / box section .
so far on kevs baby we have done
drivers frt arch, b post, inner ,middle and outer sills, rear arch and tub work, engine bay surrounds, both batt trays, rear 12" chassis rails , 3 ' of chassis rail in middle of van , top hat sections, outriggers, jacking points , 2 x complete rear corners and box section behind them ,
i lose track of hours spent on her its all written down in work logs but some days there has been 2 welders and grinders going for 10 hours+ non stop so it all gets done . 8)
more pics to follow soon

also got a 78 crew to do , a 64 panel , a 78 devon and 2 x 69s and my 71 air ride kemperink ;) ;) to do all before next summer !!!!!!!!
 
^^ dude, 2.46am!! Burning the candle again!

As Spike said, he's back on it but I've been rubbish with pictures. I'll get some next week.

When is Sandown??
 
^^ dude, 2.46am!! Burning the candle again!

As Spike said, he's back on it but I've been rubbish with pictures. I'll get some next week.

When is Sandown??

Surely DubFreeze Kevin... :D
 
DUBFREEZE !!! thats feb is it not?
still got prep and paint her after xmas and then down to kev for suspension, engine ,interior and finish putting back together . i'm shore we will be helping with some of these jobs as well .....
check out " house of dub workshop " on facebook to see what we get up to
 
Getting there mate, at this rate it will be on the road before mine but then i haven't touched mine since the paint job ;)
 
Blimey 9 months since my last update, can't believe where the time has gone.

The bus went on the back burner at the start of the year as following a badly leaking workshop and a numpty of a landlord that refused to repair the roof Spike had to move premises. Then with spring/summer upon us people started breaking their VWs and relying on Spike to fix them, leaving little time for the restos. He has been cracking on where possible and the bus is now 99% done. Really pushing now to get it finished. Brighton Breeze is the target but may be pushing it. Want it to be right so no point rushing the finishing touches and ruining all the hard work that has gone into the bus to date.

Had a few weeks off work so been spending a fair amount of time up at the workshop myself. Pop top is now prepped ready for a fiirst coat of high build and a further flat back. Also cut the extra windows needed to remove the damage inflicted when the PO butchered the roof and removed the vents.

Spike's finished the welding to the bottom six inches and the front screen surround. Just the rear window surround and roof corners to go.

He also now has the help of an awesome prep lad who has filled and flatted the panels back where possible so all looking lovely and straight :)

In the meantime I have stripped the engine ready for a full rebuild. All looks in good order so just cleaning up, new gaskets and reassemble. Whilst its off I've sanded, prepped and started spraying the tinwear and also cleaned up the block for a bit of paint as well as the rocker covers and engine support bar.

So, a hectic few weeks ahead! Wish me luck :) I'll get some pictures up asap of the work to date.
 
Gutted about your workshop and the crap landlord :(

Glad the van has moved forward though and looking forward to the pics :mrgreen:
 
Well its been a while but..... ITS PAINTED :D

550369_461954157163975_125253954167332_1732542_1326778143_n.jpg


The guy that restored it outsourced the painting to The Paintshop Pros. Waiting to see it in the flesh but looks like they have done a fantastic job. Youtube vid of them painting it too:

http://www.youtube.com/watch?v=fONvV2XXUn4" onclick="window.open(this.href);return false;
 
Finally got to go up and see the van in the flesh, time for pics overload!!

543632_10151004140640535_532017348_n.jpg


182528_10151004138245535_1216338778_n.jpg


270869_10151004139675535_2026264051_n.jpg


526782_10151004138650535_1786192561_n.jpg


270864_10151004139345535_366689482_n.jpg


552907_10151004138985535_295136821_n.jpg


253291_10151004140000535_714734973_n.jpg


Now just the chassis to be notched and painted and he'll be back with us :)
 
Looks like a great job. A solid bus again under that paint.

How's the re-fitting coming along?
 
Got him back a few weeks ago and progress has been slow (meaning non-existent!). Have a mate coming round next weekend and hoping to get him better across the garage and get the red 9 kit fitted. Waiting for my transporterhaus springplates but hopefully get them fitted at the same time. Loom ordered from volksgoods, should be here mid Nov. Winter rebuild and get him on the road next year I hope.
 
Wow, 2 years since I updated this. Time flies!

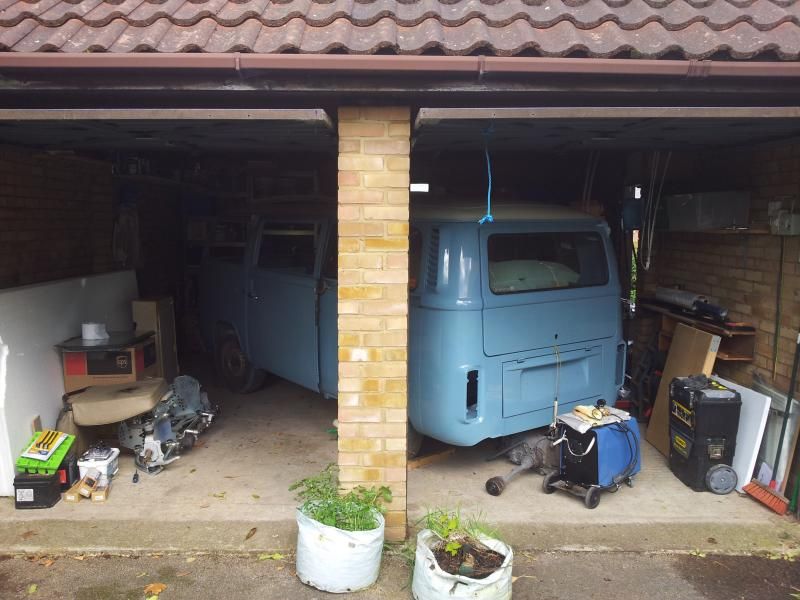
We moved house and then shortly after I got the van back. Got it tucked up nice and safely in it's new home and then....did nothing to it!


Needed to do a few jobs to get the new house comfortable for us - decorated the bedroom and lounge kitchen, sorted out the garden, built my shed! Then we had a baby and life went on hold for the next few months.

BUT! Now I'm back on it. Will follow with pictures but so far:

Found all the boxes of stuff I'd put away when we moved. I'd made the mistake of putting everything away dirty so started cleaning all the parts up, prepping and spraying any metal bits and generally getting stuff sorted.

Decided to work from the front backwards. Stripped off the old beam that had been left on for moving then van around and fitted the red9 wishbone kit i bought 3 years ago. Bit fiddly to get it lined up with the spacers between the beam and the chassis but didn't take too long to get it on nice and securely. Stripped and cleaned the hubs, repacked with grease and refitted.

Bought and fitted a new master cylinder, and upper and lower reservoirs. Used a length of 12.5mm internal diameter EPDM hose from hoseworld.com after finding a topic on here recommending it. Chemical resistant and the perfect size for the reservoir fittings with a couple of clamps to keep secure. Also started on the brake lines - possibly didn't need doing as have found the old ones are copper lines, but they's been left on during blasting/painting and easier to replace than clean.

Stripped, primed and painted dash front and top, ashtray, steering column bits, handbrake assembly, pedals, gear stick bits, front fresh airflaps.

Started rewiring the van. Ended up going with a RapidFit loom - name is a bit of a misnomer but seems decent quality.

Stripped and rebuilt all of the light units with new rubbers, screws and plastic bits where needed. Got the headlights and indicators fitted and wired in. Indicators were a complete b@$tard of a job trying to get the bubber to stretch round the 'good' quality repro lenses. Cavity waxed all of the bottom of the front panel with Bilthamber Dynax S50 and treated the headlight bowls with Dynax UC clear wax.

Re-fitted the clutch and brake pedals with new rubbers. Drilled the floor for the accelerator fixings as the mounting points had been lost when the floor was replaced. Fitted a buttys bits accelerator linkage - lovely bit of kit...well thought out to give plenty of adjustment and effortless fitting.

Cavity waxed all of the front box sections, arches, a-posts windscreen surround, b posts, jacking points etc with Dynax S50. Will treat all of the underside with Dynax UB once I have finished fitting all of the components.

Sure it will be more interesting with pictures so I'll head out and take some and update the thread as soon as possible.
 
Welcome back and great to see you have been productive (in more than one sense....)

And get those pics loaded up :mrgreen:
 
Cheers Andy :D

Right some pics. Very poor on the before and in progress but here's the after.

Red9 kit fitted:


Lights stripped, new rubbers, new screws, polished with tinfoil, reassembled and installed. Not perfect but good enough:


Folded and sprayed a piece of aluminium to mount the new fusebox to the original fusebox mounting bracket:


Pedals sprayed up and fitted:


And Buttys Bits throttle linkage in:


And dashboard starting to go back in:


Was very tempted to get an MCJ sterring wheel, but at £300 and now on a bit of a budget, the £300 went on a car seat and I decided to try and repair the original wheel following what Doris had done.

The wheel to start with...not in great shape:


Gently cut out all of the hairline cracks to give a bigger gap for the putty to fill, and sanded the bulk of the rough edges down. First build up of Milliput Epoxy putty on:


Now need to sand down and shape and either apply a bit more putty, or some filler depending on how it looks.

Oh, and a growing collection of old rusty bits outside the back door :msn4:


Latest posts

Top