Another Dormobile restoration :)

Early Bay Forum

Help Support Early Bay Forum:

This site may earn a commission from merchant affiliate links, including eBay, Amazon, and others.
Well, a four day weekend but away for two of them and wind and rain on another meant I only really got one day on the van.

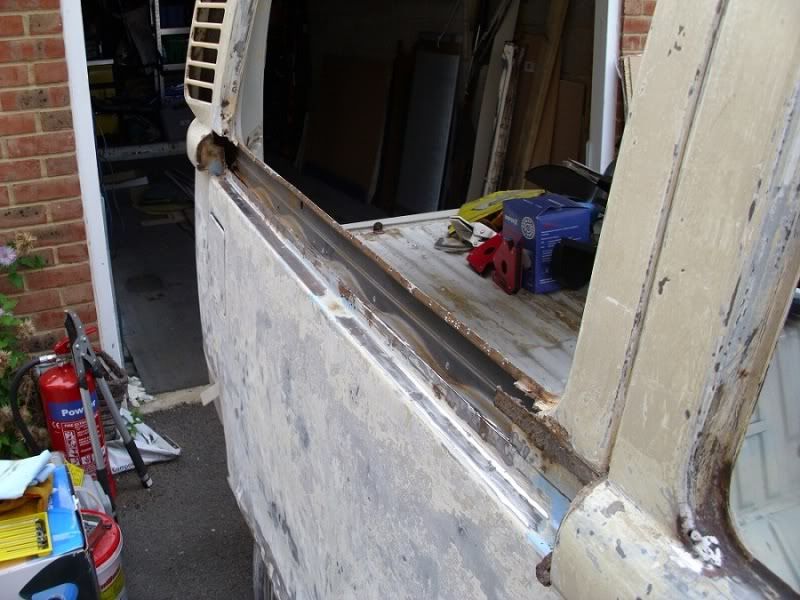
On the wet day i managed to get a couple of hours in before the tent threatened to blow away completely! Stripped down the drivers side door and removed most of the waxoil from the inside ready to repaint it.

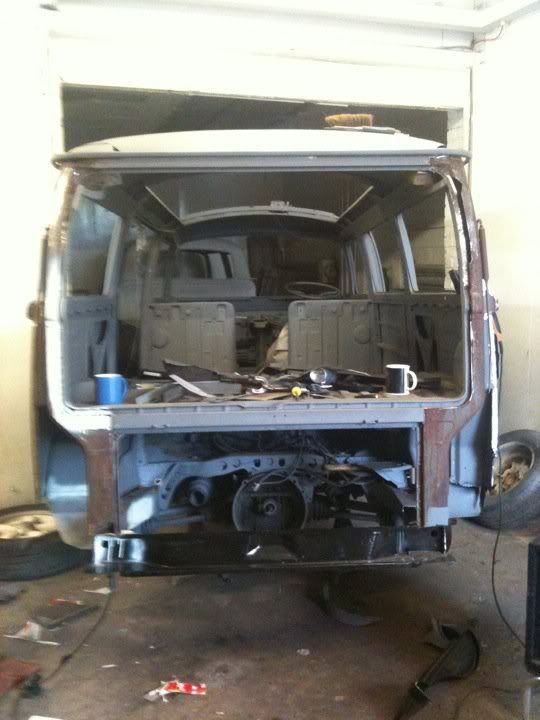
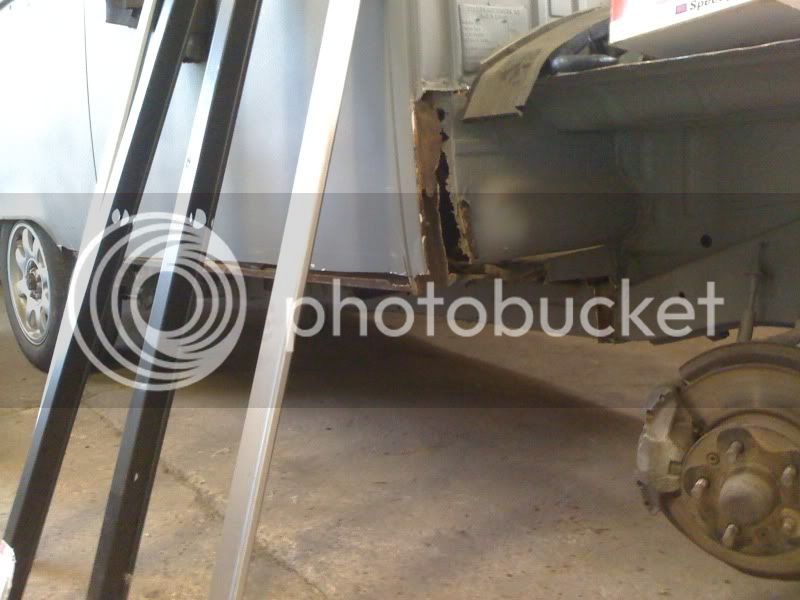
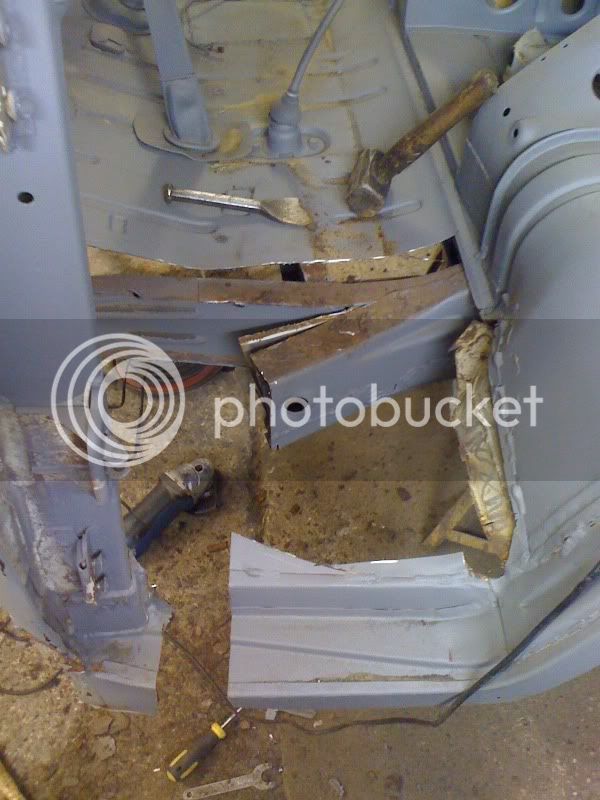
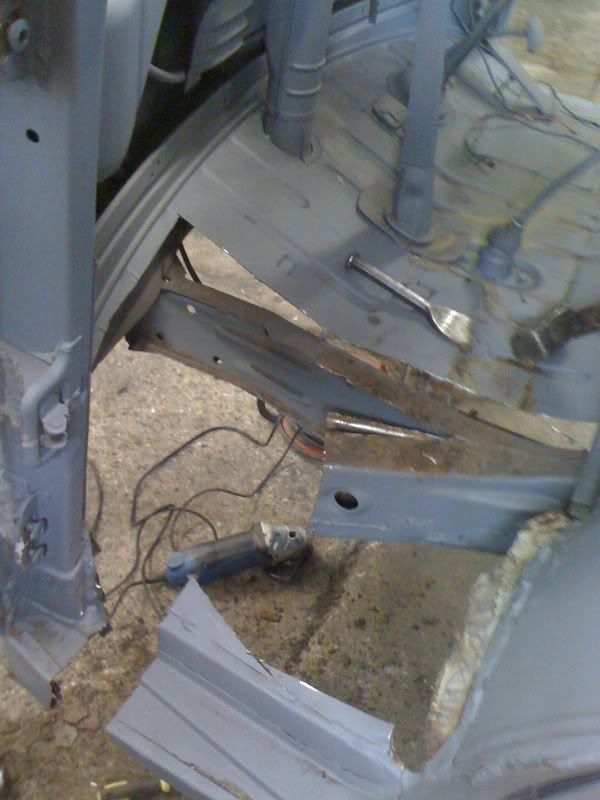
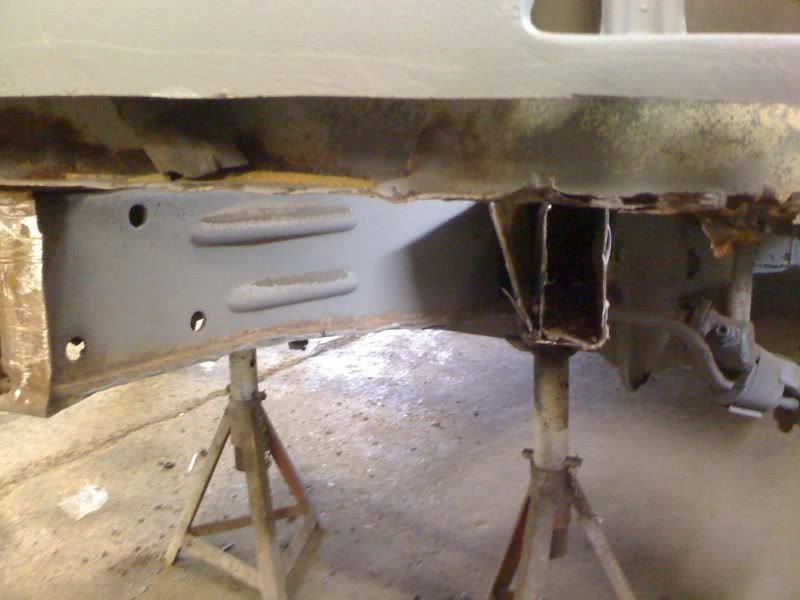
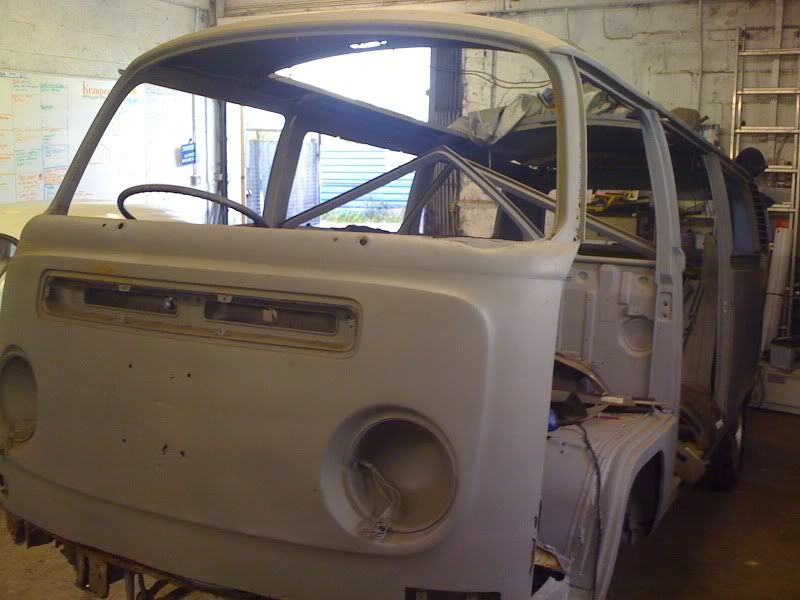
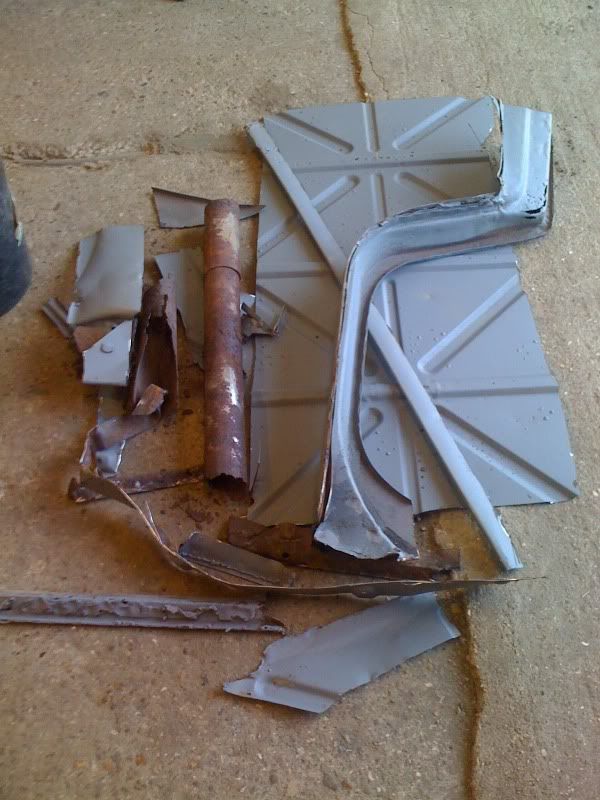
Then next day, started on removing metal at last. Cut off the rear corner, fudged in battery tray, and uncovered all the other rust in the engine bay.

DSC_0021.jpg


DSC_0019.jpg


DSC_0024.jpg


DSC_0023.jpg


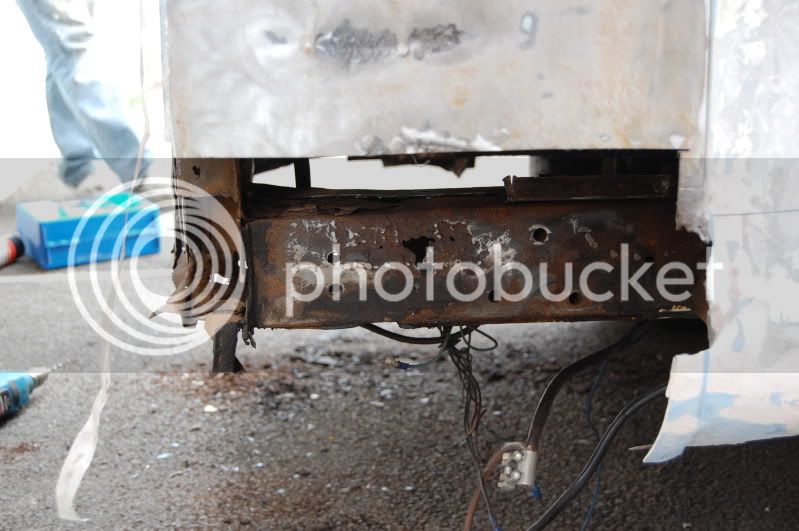
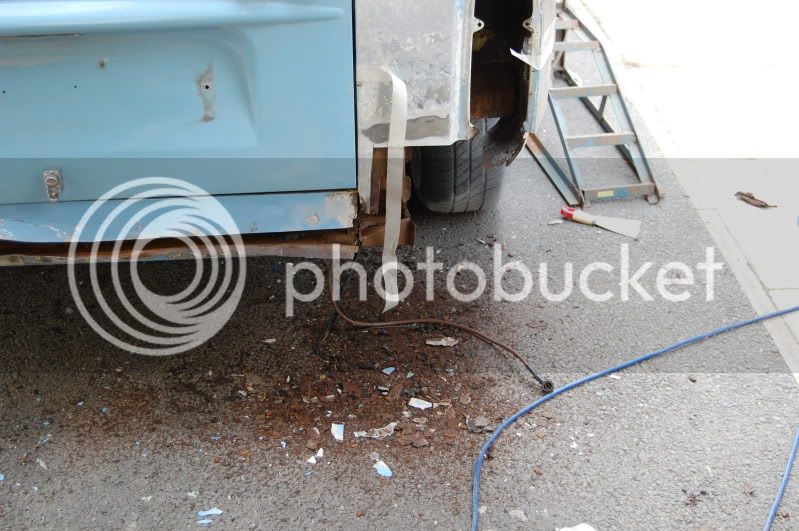
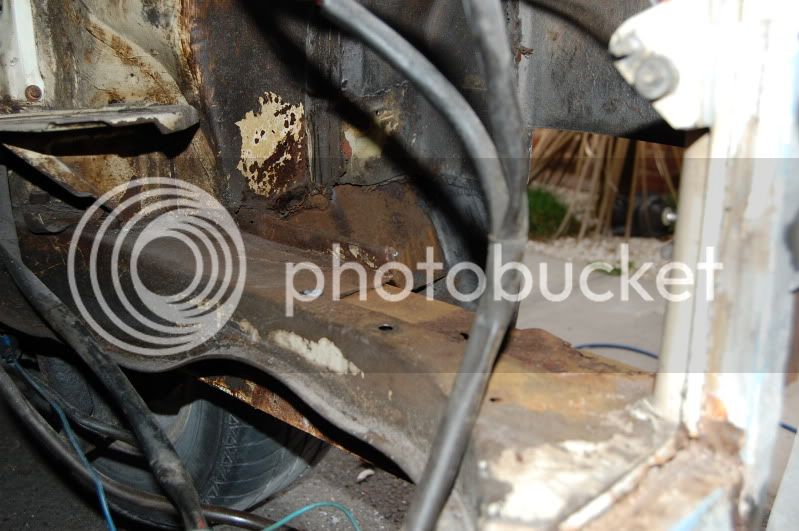
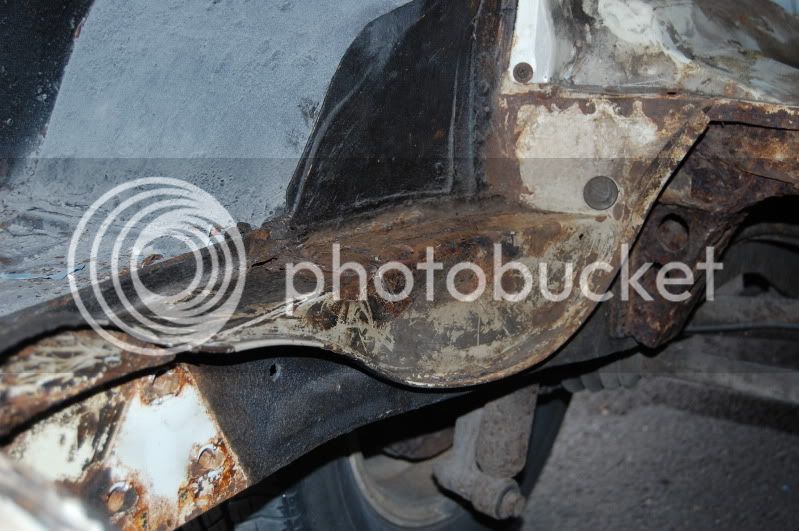
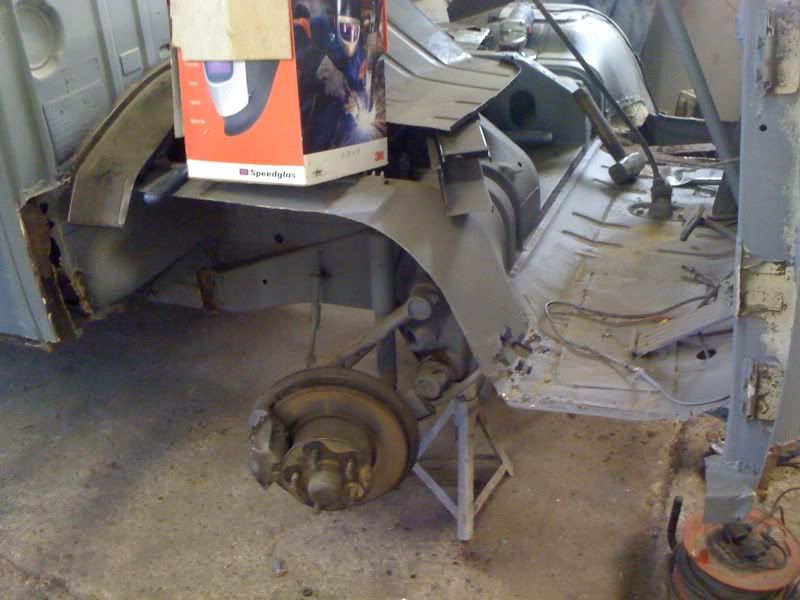
Going to need an inner valance, outer valance, left hand battery tray and left hand engine bay repair section. Also have to make a few sections and repair a couple of bits of the chassis. Get the bits on order tomorrow and then try and get some stuff fitted next weekend.
 
wow :shock: - cracking progress!

I love build threads me :) - amazing seeing, what looked like a pretty solid van, turned back to a starting point before being restored properly - mines waiting until next winter before I start stripped out and I'm a bit nervous, I think though that it's better to know the true condition rather than think that it's all solid!

inspiring stuff - shows that you don't need a big shiny garage to make real progress

Looking forward to the next update! great work
 
Good to see another Dormy being saved, taking it back with the nitro will certianly show all the finest bits, goodluck with the resto.
Whats your plans on the gutter and rear corners?
 
Cheers guys. Its definitely at that scary stage now but hopefully I can start putting bits back together and that will boost the motivation.

71Dormobile said:
Whats your plans on the gutter and rear corners?

With the rear corners I might get a couple cut off rust free buses if I can them. Otherwise the curve doesn't look too complex so I might have a crack at making up my own repair panel. On the guttering it mostly seems to be surface rust so I'll whizz over it with the rust remover on the grinder, give it a coat of kurust see how it fairs and hopefully just replace any bits that are properly gone through.
 
Can't believe the bodges previous owners do :x . Keep up the good work, it;ll be worth all the effort in the end.
 
Not meesing about are ya! drive way resto's rock, i'm doing a car park resto on my 72' and trying not to upset the neighbours in the other flats its pain having to drag the welder out to van all the time but i'm hopeing it'll all be worth it.

Great work there mate, Crack on! :D
 
jeesus wept!!! all this from an interior change!!!! best of luck with.... nice clean looking dormy interior you have there....wish mine looked like that!!!!!!
 
Right been a while since I have updated this, but not a lot has changed! Started practicing some welding on smaller repairs like the window sills and was getting adequate welds but not great. No pics as welding is a bit embarrassing!

Decided to cut off the rear window sill in prep for a JK repair panel going in.

DSCI0021.jpg


Took me basically a full day to drill out the spot welds and get the area prepped and started to dawn on me how long this was realistically going to take. Also in the process of buying a house to renovate so my time is going to be needed on that.

So, been on the hunt for someone to take on the job for me. Thanks to everyone who has given up time to chat through options and give me advice. Have eventually settled on a chap who is very local to me. So the van is in to be media blasted and to get a formal quote once this is done. If all is ok, I'll get him to the welding and painting to get me going.

In the meantime we have hired this for our hols next week:

8e9eaf52-9610-40cf-b7ab-19ab03c0b740.jpg


Pics of the balasted shell to follow shortly and hopefully then back to regular updates of somebody elses handy work!
 
Had a couple of progress pics now work has started on my van. Corners cut off:

photo-back1.jpg


And new ones clamped on to see how they fit.

photo-back.jpg


Fair amoount of work required on the box section before the corners go on properly but great to see how he could look very soon. Popping in after work tomorrow so hopefully get a few more pics :)
 
Well back end is fully welded now, all box section repaired and new corners on so Spike has moved onto the front. Being worked on most of this week so hopefully progress should be good. How the bus looked on Friday evening:

IMG_0456.jpg


IMG_0457.jpg


IMG_0458.jpg


IMG_0459.jpg


IMG_0460.jpg


IMG_0461.jpg


IMG_0463.jpg


Coming on a treat. More and more glad every time I see it that I admitted defeat and got someone who knows what they are doing to do the job properly. Not sure I'd have finished it this century!!
 
^^ Cheers :) Spike is doing a great job. When I went last night a bit more was missing...

IMG_0465.jpg
 
I bought some imported '72 only arches a while ago which came with a good chunk of b pillar as one side was completely caved in. Shot blasted with then van and one now in place:

IMG_0474.jpg


Starting to look more like a solid van down this side:

IMG_0475.jpg
 
Does look good once some tin is replaced - especially with proper VW cuts ;)
 
Cheers Nick. Spikes got a couple of weeks on other stuff including putting a late front back on an early-ised double cab. Then back onto mine. He says mine should be fully welded by Chrimbo then paint in the new year. Really want to make volksworld in march.
 
Two weeks nearly up Kevin, can't wait for you and Spike to start again !
No pressure , :lol:
Would be great to see this in paint, hopefully see you at Sandown ;)
 

Latest posts

Top