My 71 bay

Early Bay Forum

Help Support Early Bay Forum:

This site may earn a commission from merchant affiliate links, including eBay, Amazon, and others.

Caboose

Well-known member
Joined
Aug 8, 2011
Messages
194
Reaction score
1
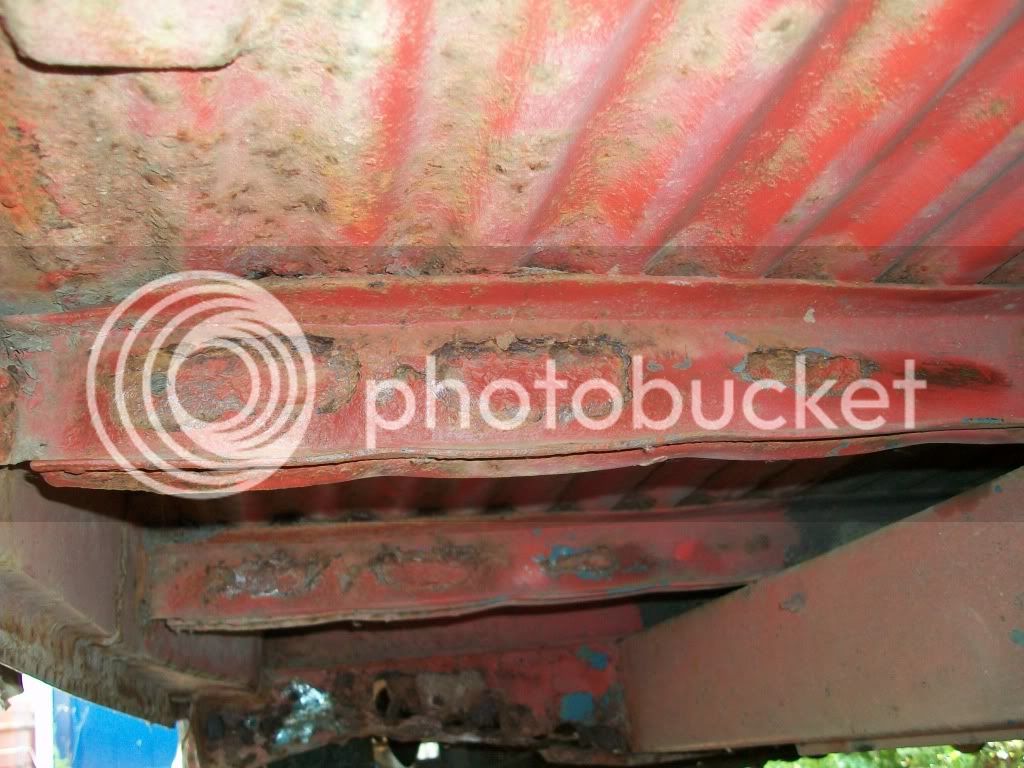
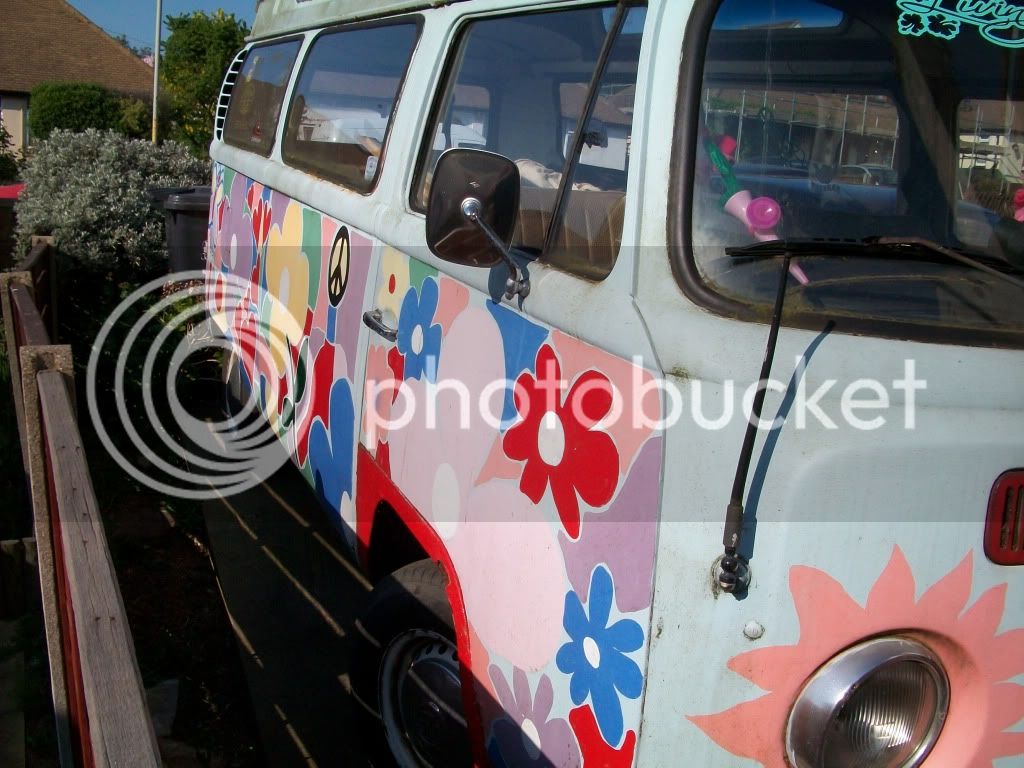
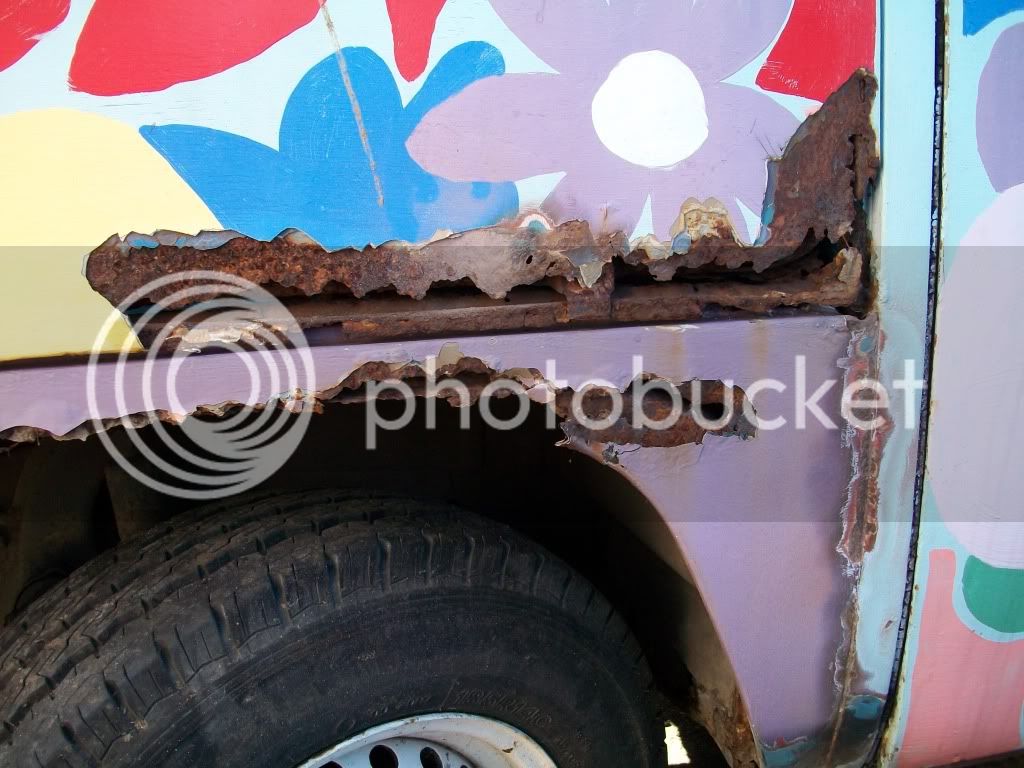
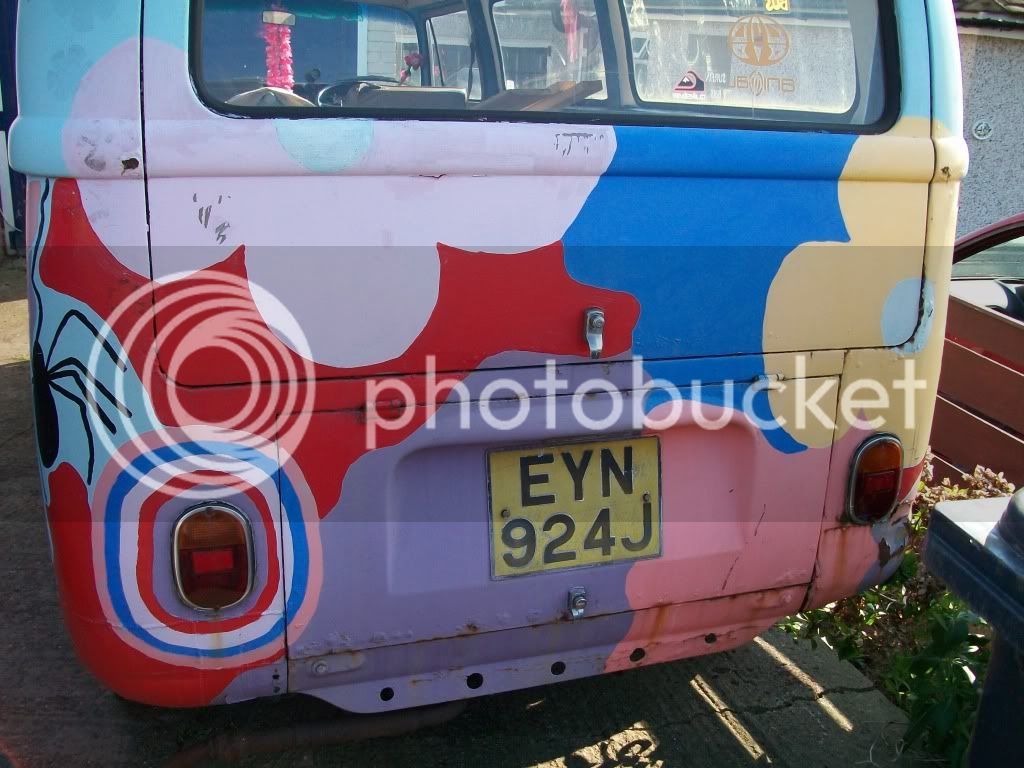
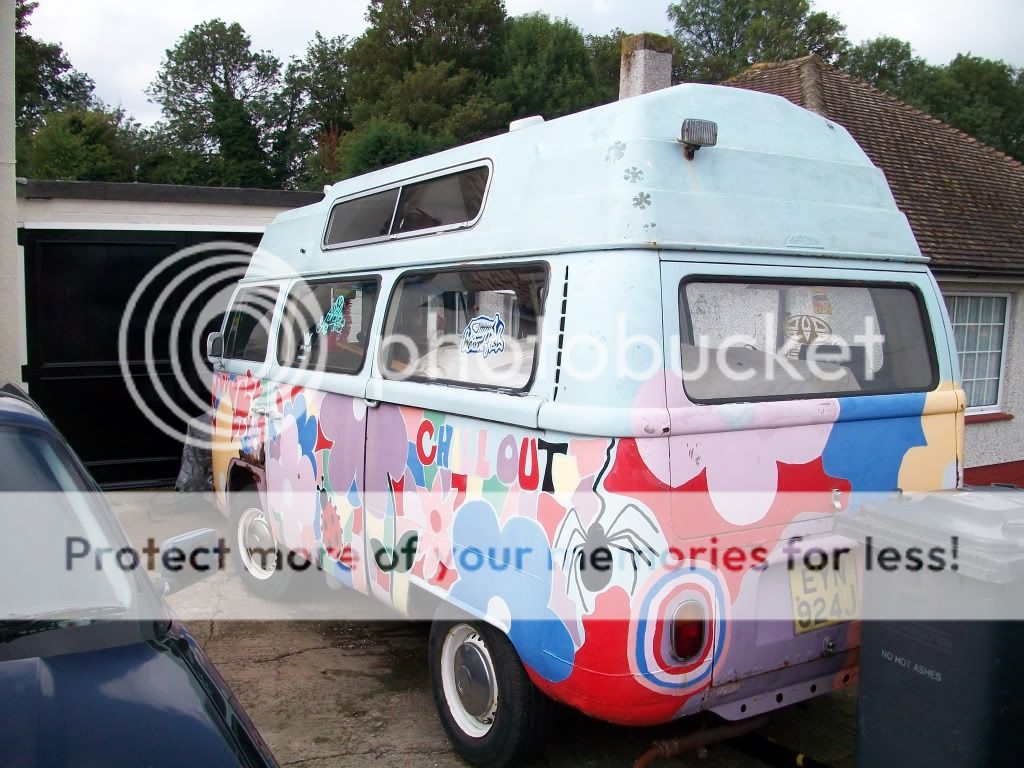
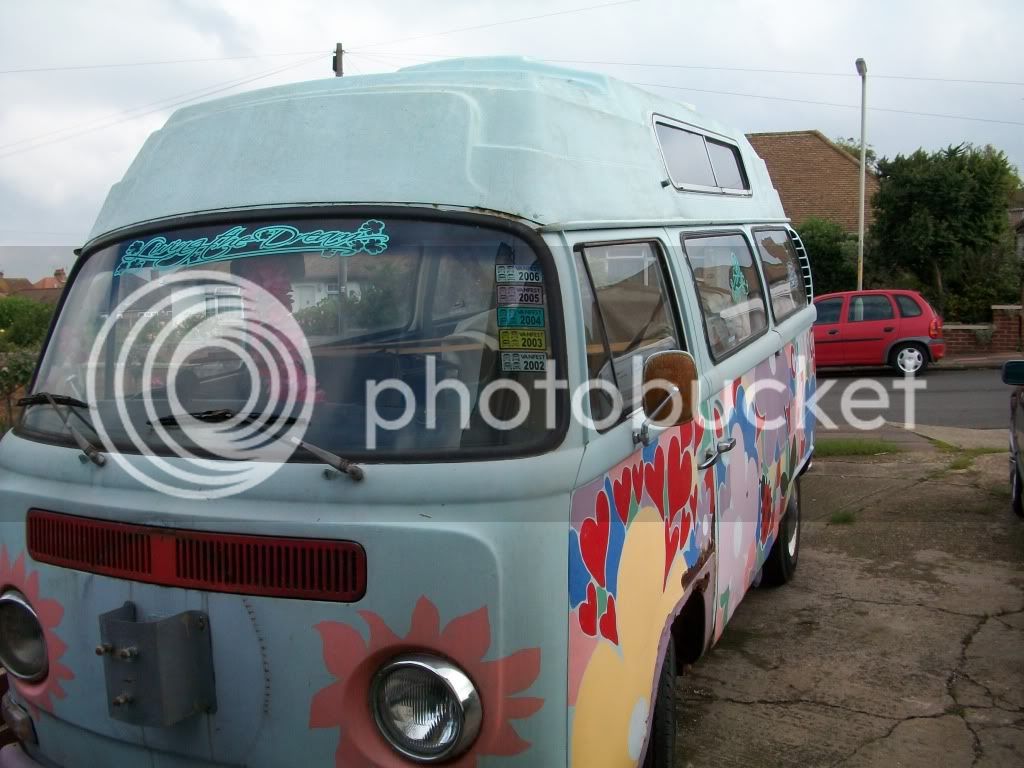
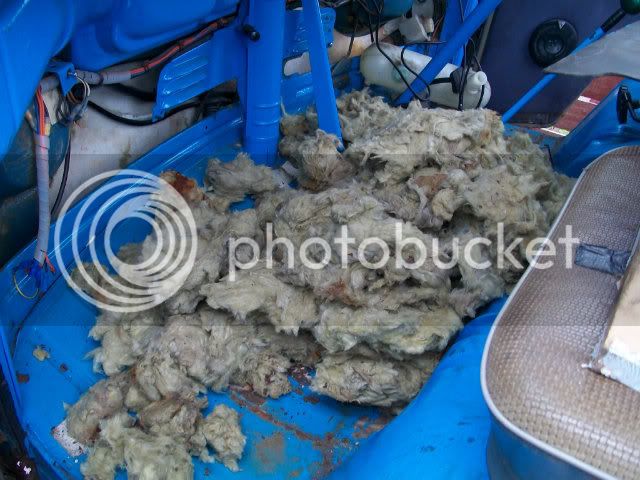
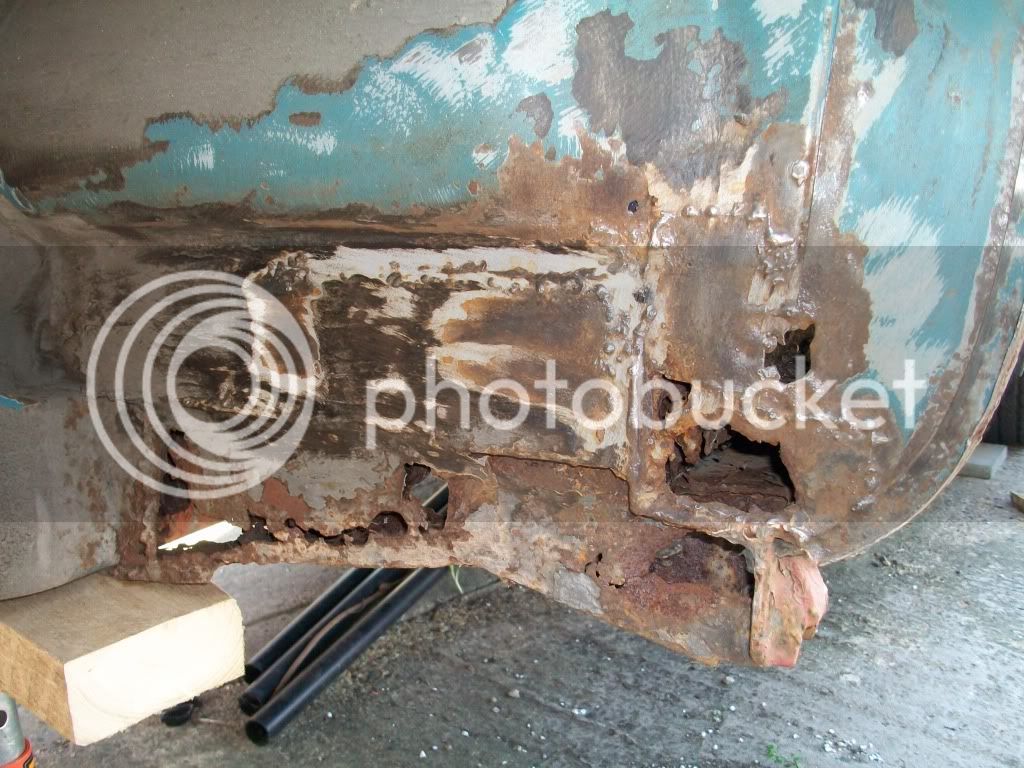
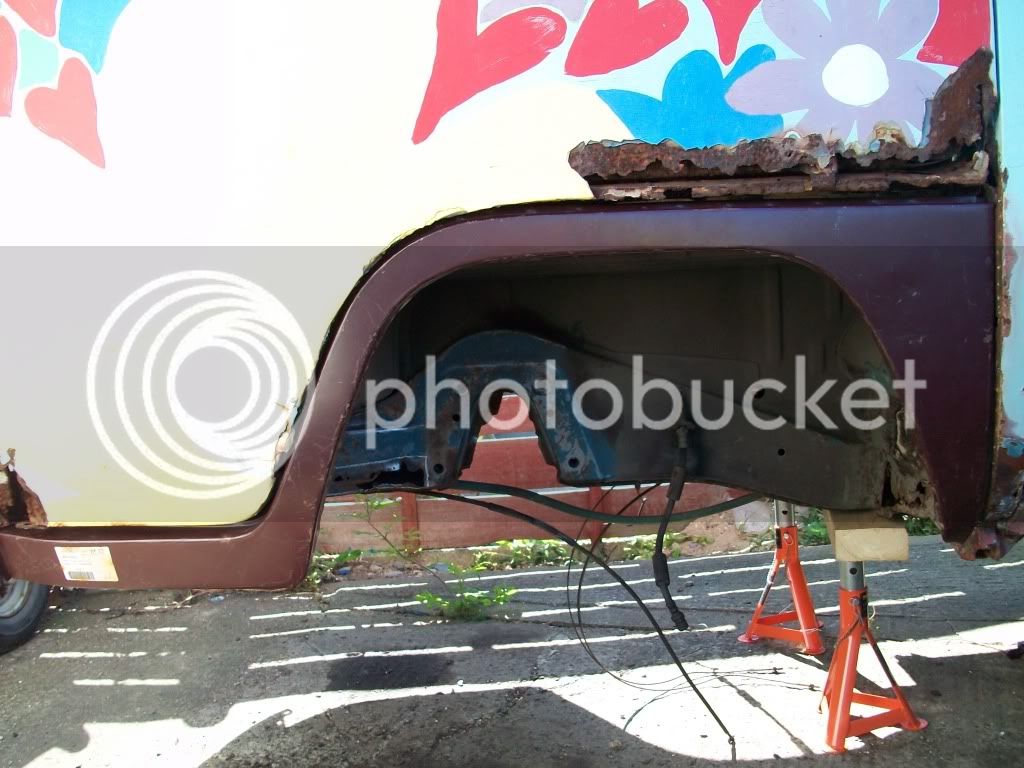
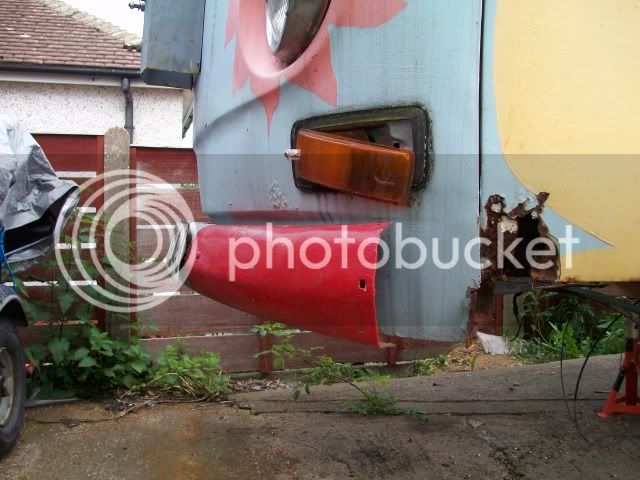
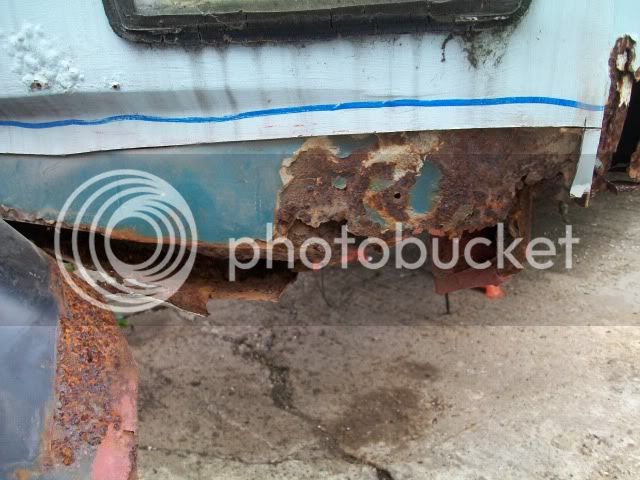
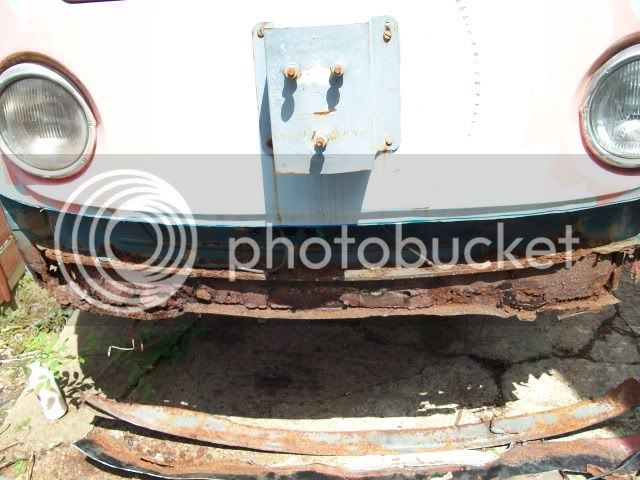
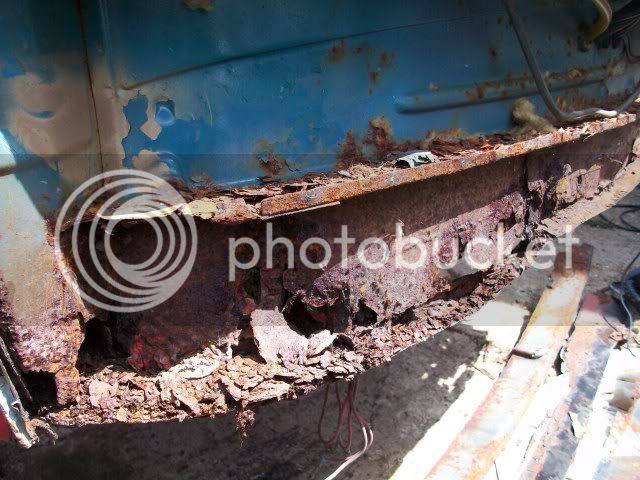
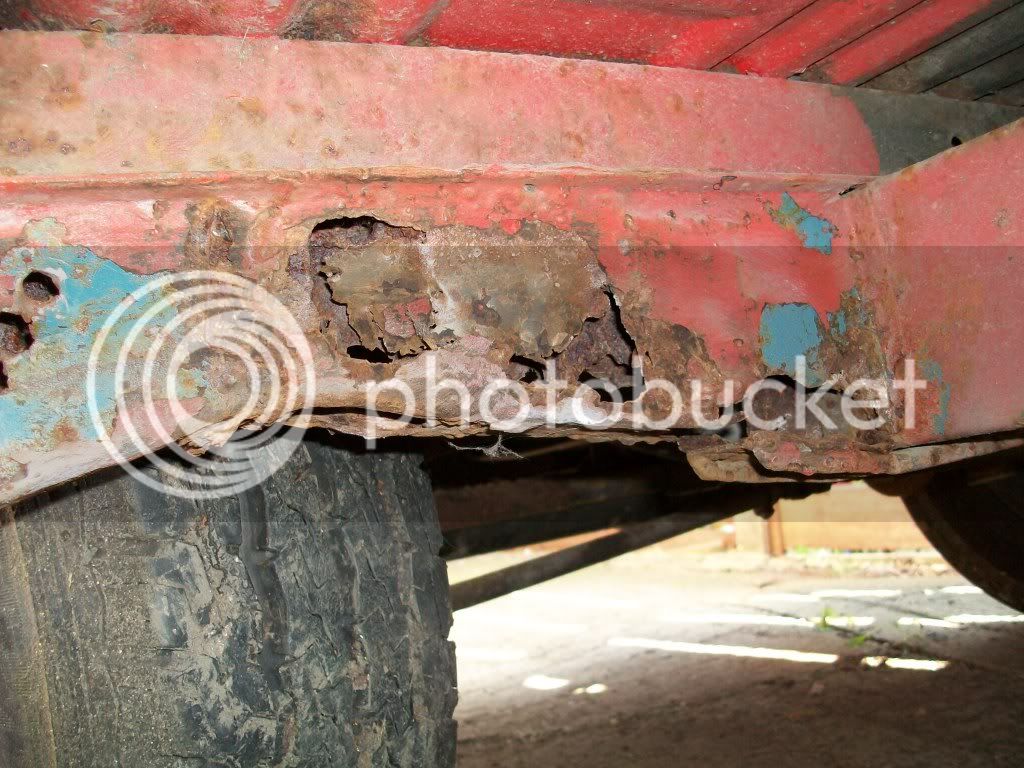
Hi all, big thanks for all who have put there restore work on earlybay, it has helped me a lot, well this is my first attempt to restore a bay, so in the deep end it is. Been wanting one for years and now's the time. So I try and get some pic's up, would appreciate some ideas how best to tackle some of the work needed thanks.
Rodneythecamper008.jpg

Rodneythecamper005.jpg
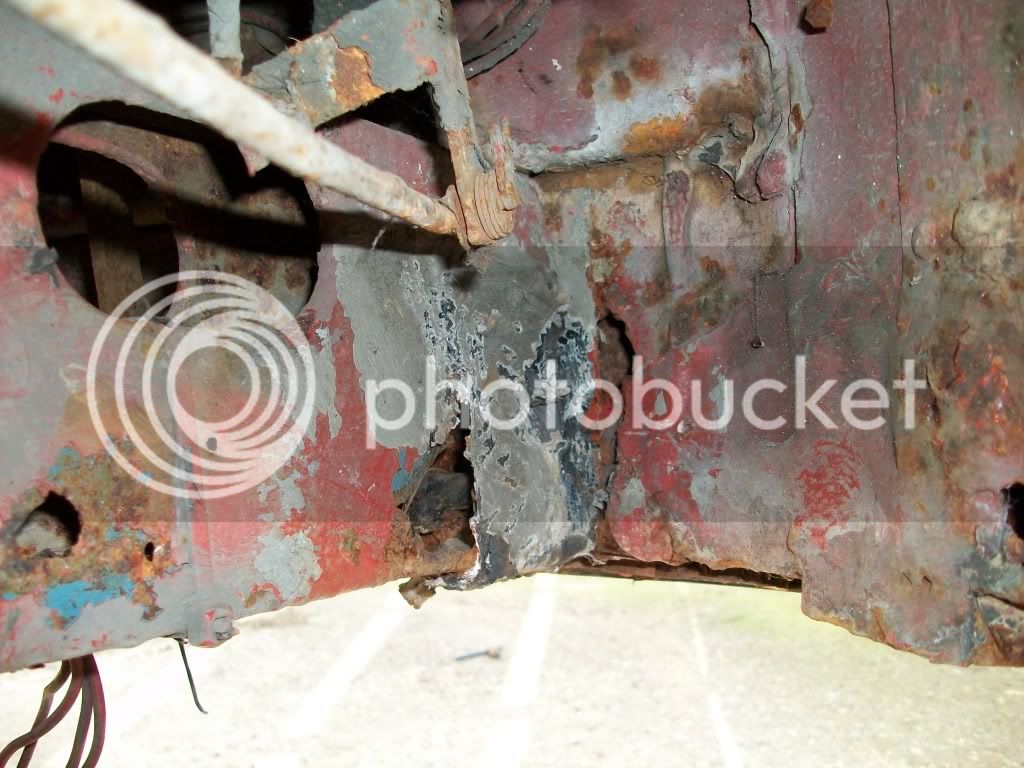
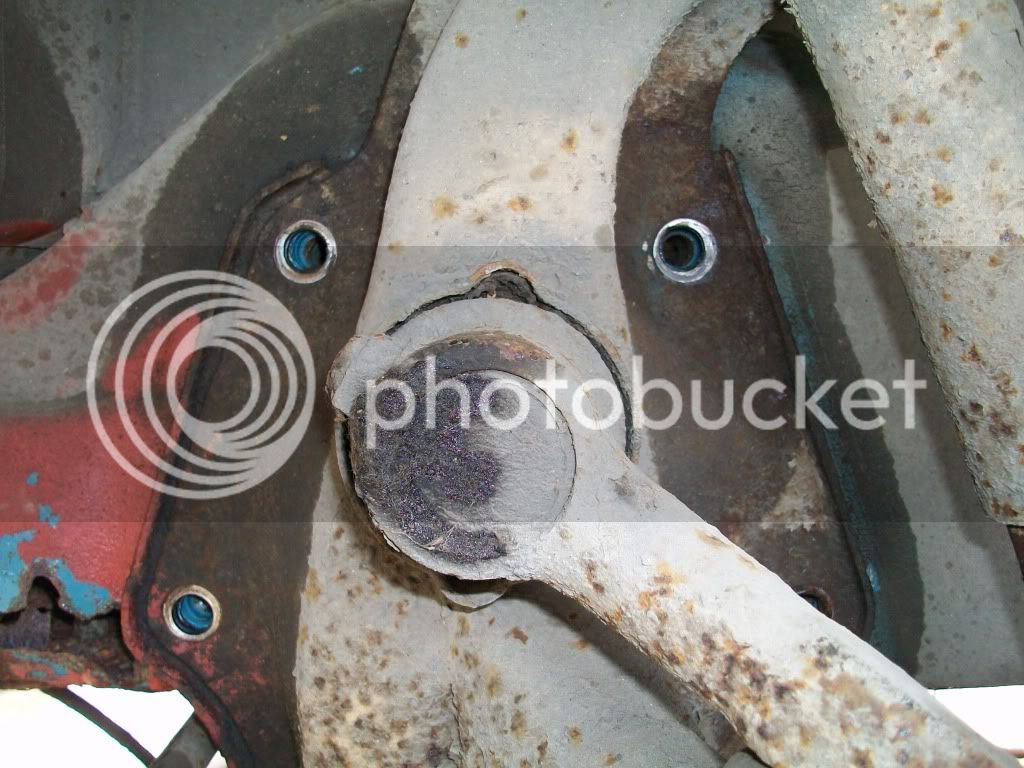
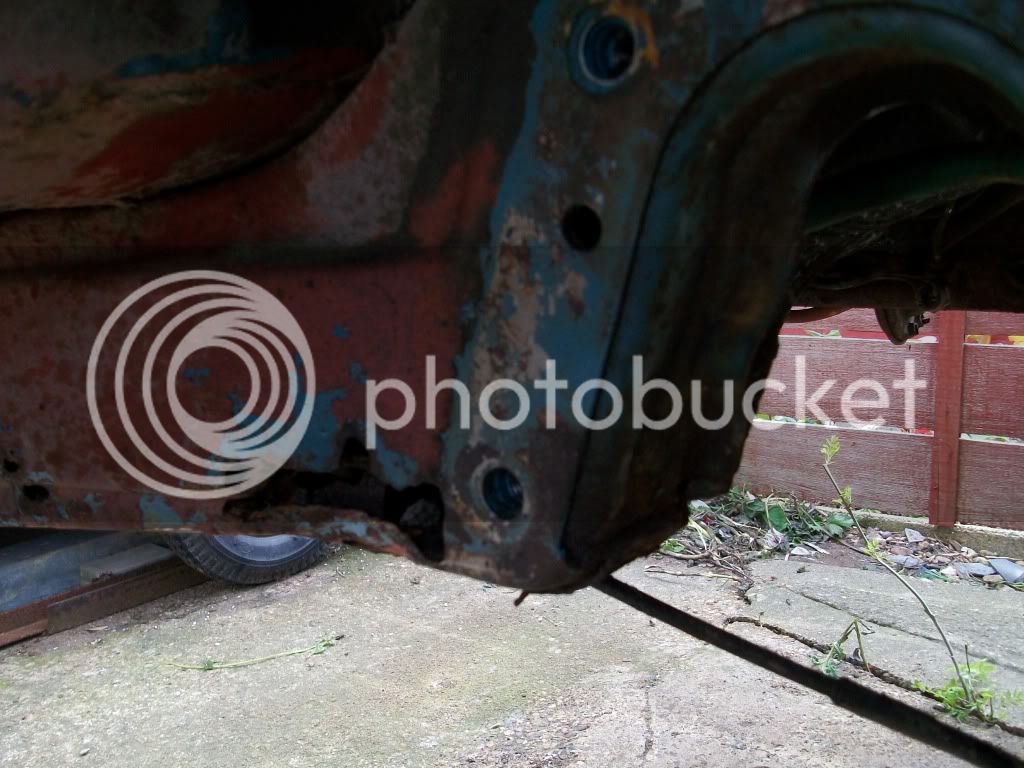
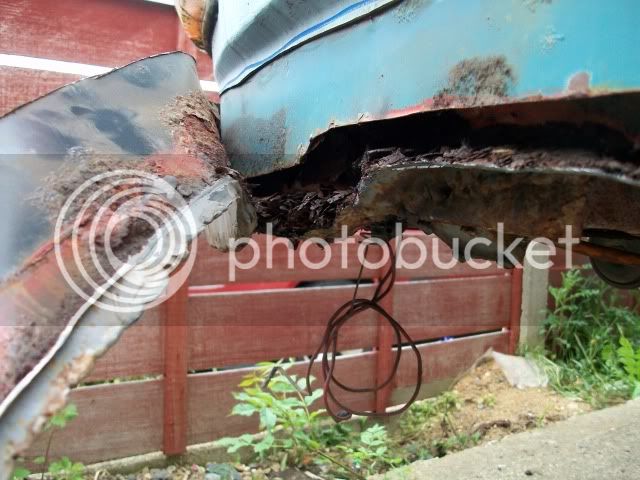
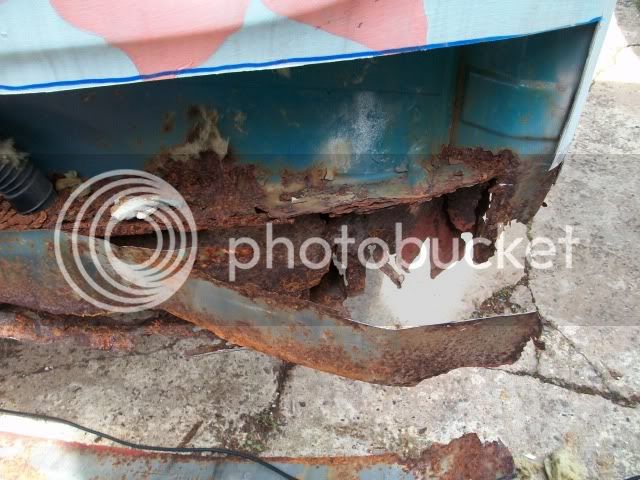
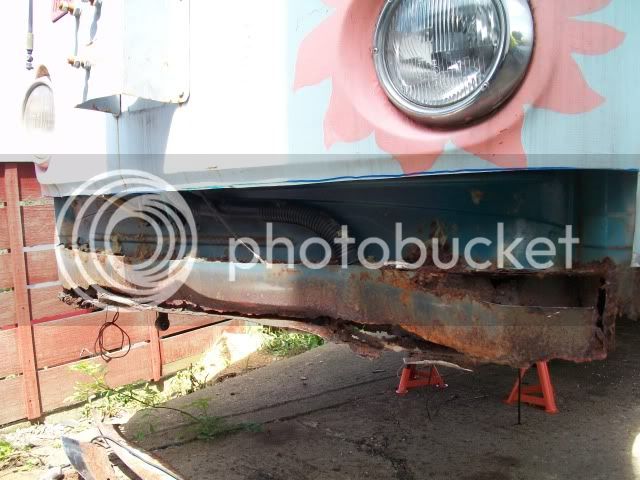
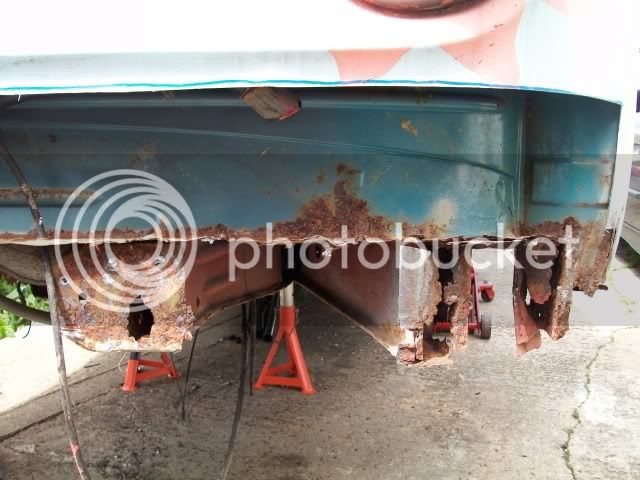
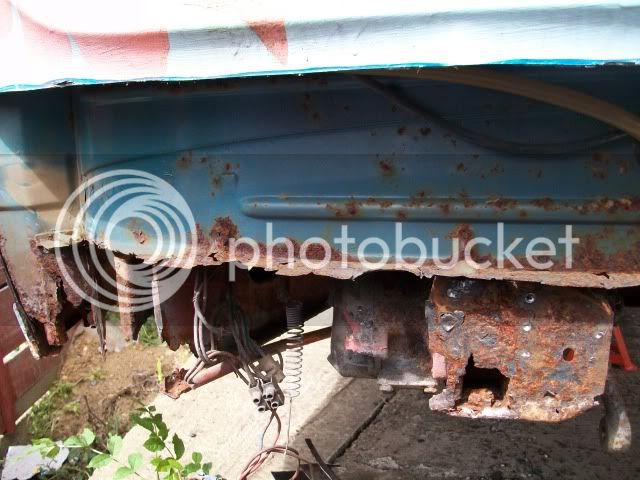
chassis front beam area's first to be tackled.
Rodneythecamper004.jpg
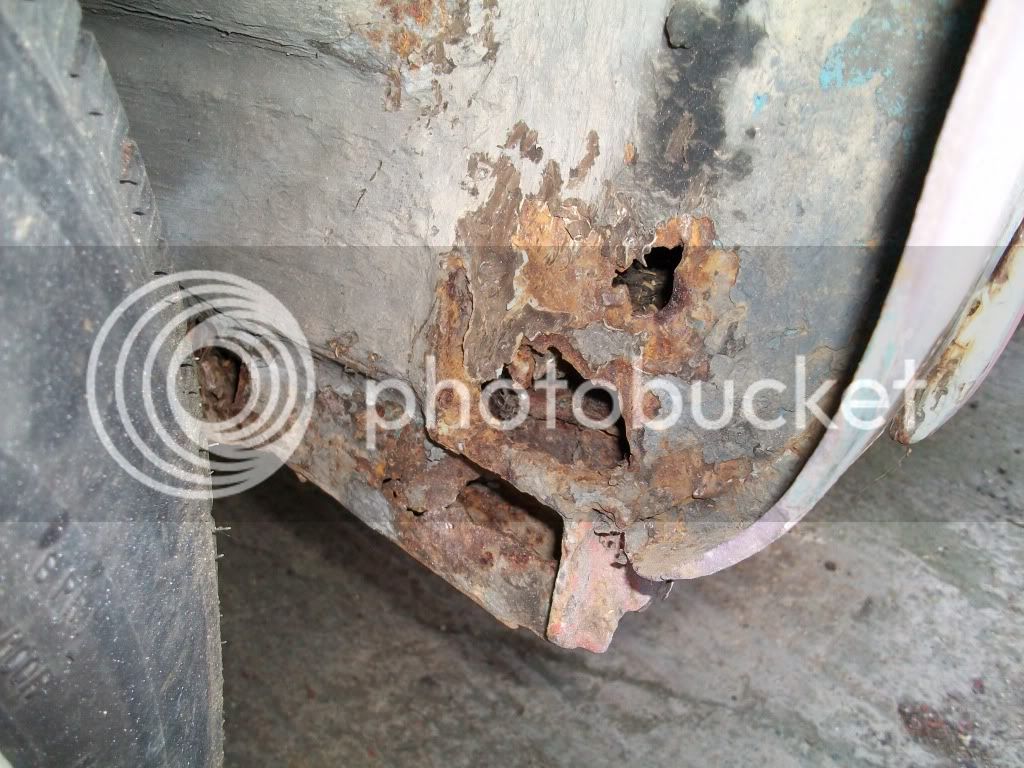
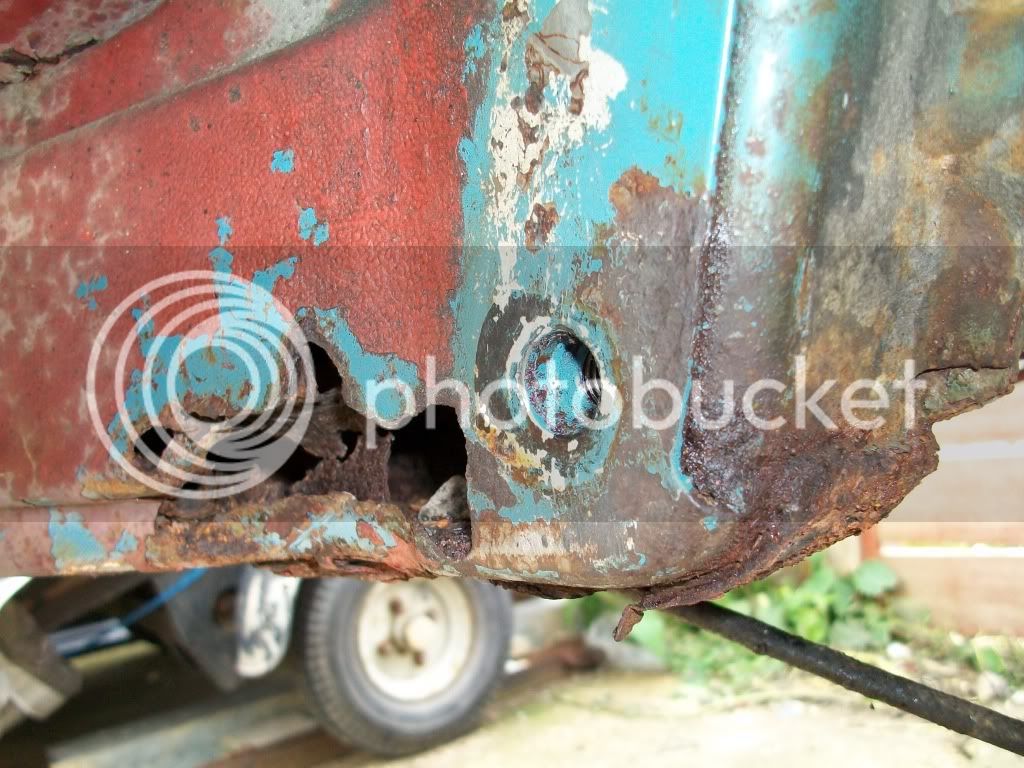
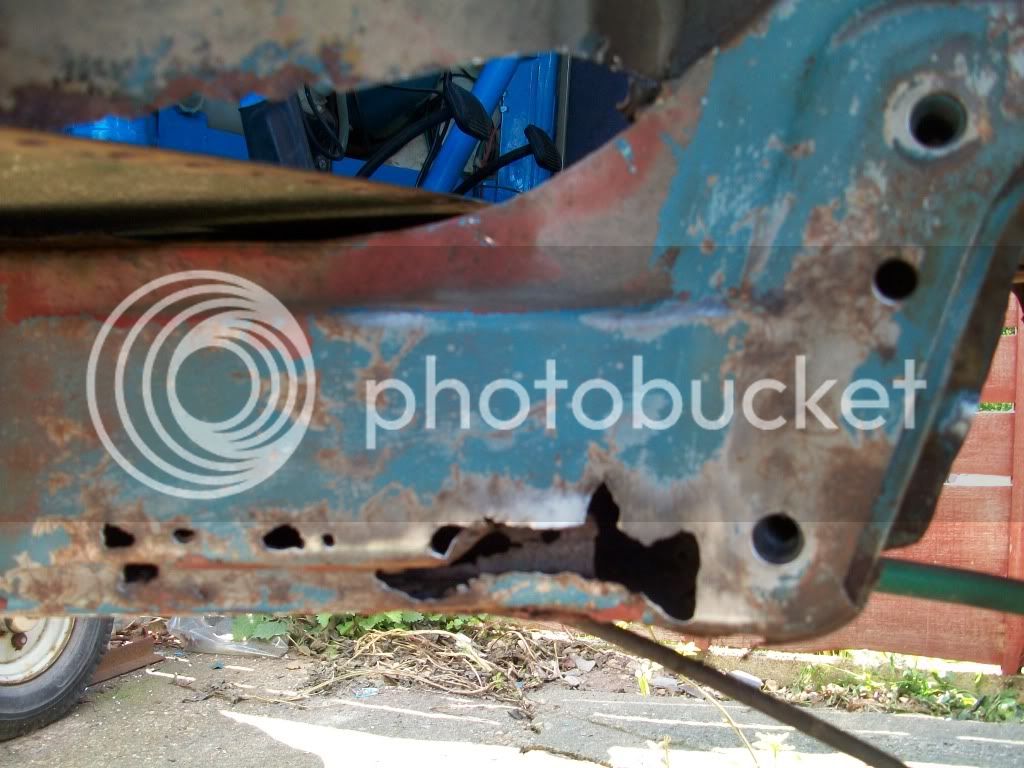
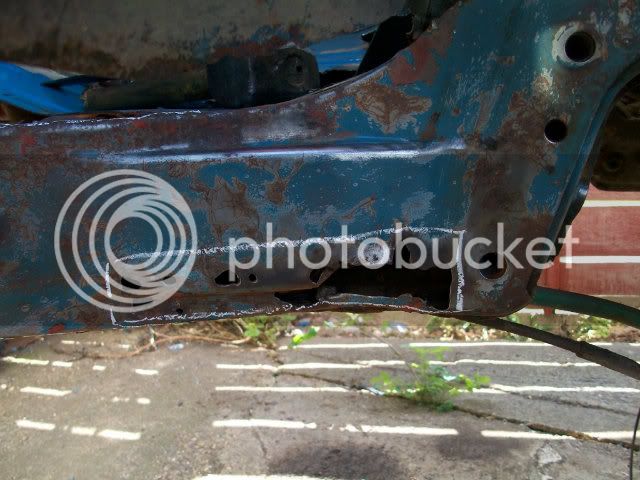
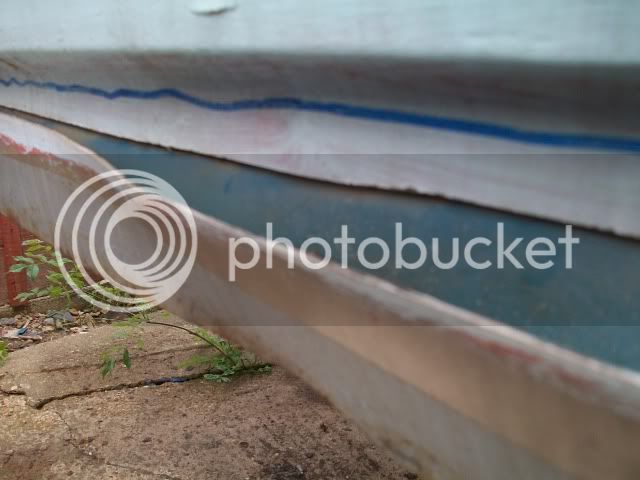
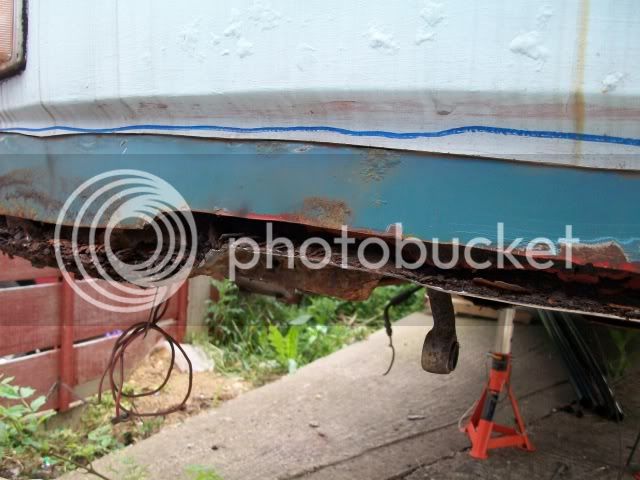
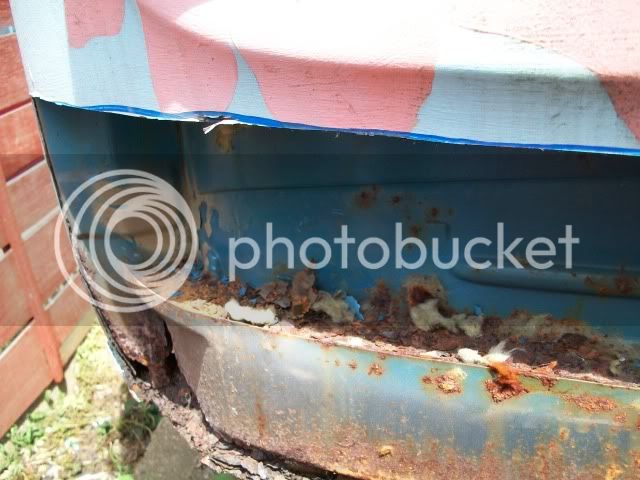
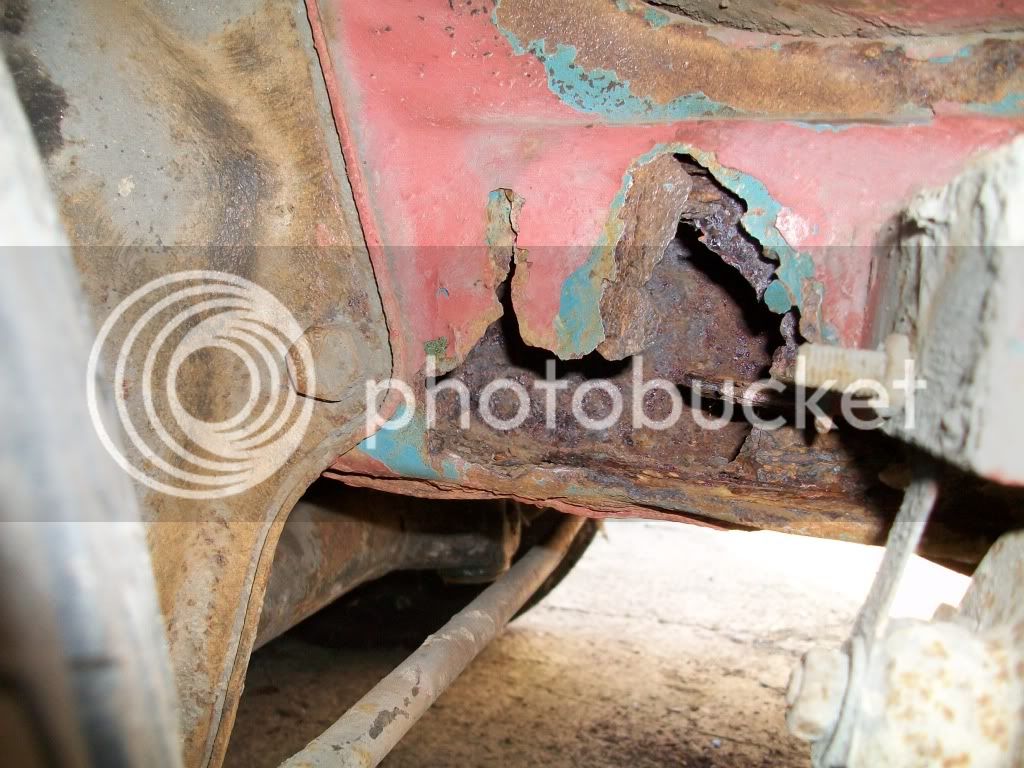
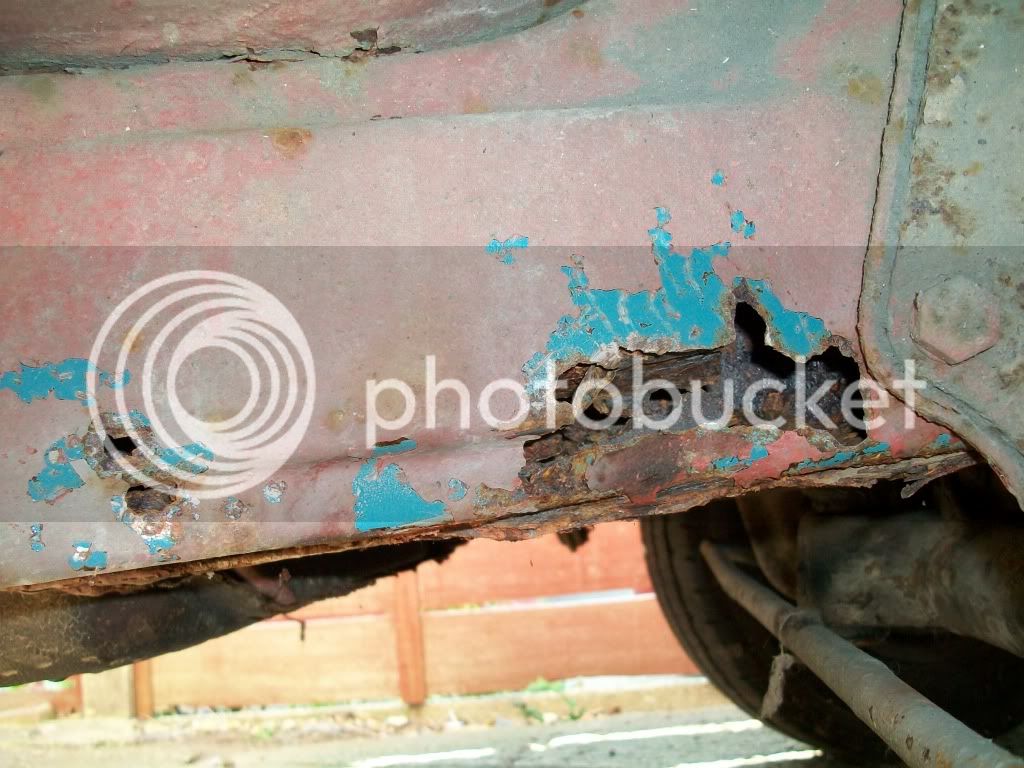
n/s jacking point will try and add more pic's. :roll:
 
The front chassis repairs all depend on budget. You can get salavaged chassis legs but they're not cheap, although you might not need them, get the beam off and start removing the paint and rust (wire cup on a grinder) to see what your dealing with, you might be lucky and need to let in some repairs. If it looks like both legs have had it and need to come off, then you will need to brace the front.

The outrigger/jacking point is toast, but the chassis there looks good, sometime once the outrigger is removed there's a small hole in the chassis to be repaired. Usually the tophat section by the sill requires a repair to (if there's any sill left)

:)
 
thanks moler, think it would be best to drop out the front beam first then clean up chassis legs.
here some more pics:
Rodneythecamper009.jpg


Rodneythecamper012.jpg


Rodneythecamper003.jpg


Rodneythecamper020.jpg


now for the top no laughing but it can't not make you smile

Rodneythecamper007.jpg


Rodneythecamper002.jpg


Rodneythecamper017.jpg
 
Will be watching this with interest as I'm a newb when it comes to all things involving grinders and welders, hopefully you will be building up my confidence as you go :mrgreen: - good luck with it!
 
hi lard thanks, i think it's a case of looking what other people have done and learn from their experiences. Is there anyone on earlybay from herne bay area? maybe pick your brains i must clearly lack some, but my bay makes me smile when i get it on the road i'll be the one with the silly grin :D. the engine runs a treat so thats a bonus :lol:
 
Classic bottom 6 inches of a uk bus, I've got same work to do on a '72 Dormie over the winter...thread soon ;)

Yes i'd drop the beam, the rot usually extends behind it :roll:
 
Hi Caboose, have got a project under way myself that was in similar condition as yours if not worse. I am lucky enough to have a friend who knows what hes doing helping me out with the welding but all it takes is a bit of practice on scrap metal and confidence.
One thing I've learnt is if you've got lots of welding to do its certainly worth considering getting an account with your local gas supplier as those little bottles you can get from machine mart etc at about £10 don't last 5 mins. I get a Y size bottle of argon mix filled for about £60 which i'm told holds the equivalent of 60 of the little bottles. Also U-pol weld through zinc primer seems to be the best and halfords do the best deal on it.
I also invested in one of those contraptions for rolling the bus on its side which has been a massive help doing the chassis because being a novice welder i can only imagine the pain i could inflict on myself laying upside down......
I've put some pictures of progress in the gallery under 1970 uk devon rolling resto, though the only rolling its seen is on its side :lol: , which may help and i do have others if you want.
I to am looking forward to the smiles to the gallon one day :D
Good luck with the project
Andy
 
Hi and thanks redbug I've picked up a couple of mig welders a 130amp gas/gasless 190 amp
It was a bargain I couldn't refuse. I would love to get one of those rollers, would make life a lot easier, I've picked up a 10 litre gas bottle of argon mix from a place called Adams gas they are advertised in most car mags. Years ago I did a classic car restoration course (worked on '63 beetle had the bug ever since), and got a city and guilds in welding (result) I'm a bit rust like said camper :lol: but will practise first on some scrap. Will checkout your pics thanks
 
Hi discott1974, yes i brought it from eBay couple of years ago, missed out on it 8 seconds to go. The buyer went up to collect it then changed their mind I got 2nd chance offer the rest they say is history. I had owned it for about 10 mins after collecting it when we pulled it petrol station when someone pulled up and wanted to buy it. After months of watching eBay etc and losing out each time I had to say NO! :shock:

more pic's topside
Rodneythecamper029.jpg


Rodneythecamper030.jpg
 
it's been a time since i managed to do anything on camper but i've made a start (yippie) all the chores done at home and gradully overcoming abit of illness, the energy levels are returning (yes). time to get down to some restoration work,
camper001.jpg

found this lot behind the kick panels.
camper006.jpg

front beam on it's way out (what a **** job)
camper009.jpg

GET OUT!!!!!!!
 
sorry about picture sizes not sure how to make them smaller.
now the front beams out time to see what's got to be done here's some more pic's for ya any info would be welcomed how best to tackle said job (could i get away with patching chassis legs) they don't look too bad do they?
camper011.jpg

camper010.jpg

camper017.jpg

n/s chassis legs
camper021.jpg

cut out cab floor to see how bad chassis legs were on top, strenghtening plate shot.
camper022.jpg

cut out and repair? not sure yet
camper018.jpg

n/s front arch
camper024.jpg

couldn't resist trail fitting wheel arch to boost morale abit (it will look alright on night) me thinks
 
looking a good start fella. give me shout if you need a hand, i'm only around the corner ;) ;) ;)
 
Thanks I might hold you to that Marcher :lol: at some stage I might need some sort of reference point if that's ok, would be ok to pm you if I need abit of help, just want to get it right 1st time ;)
 
yeah m8, that's what the site is for. I'm only in Greenhill.
drop me a pm when you have 5 mins. :D
 
managed to get abit more done today, front bumper off time to cut bottom of front panel off.
to reveal what needs to be replaced or repaired.
camper025.jpg

camper026.jpg

camper027.jpg

something didn't ring true looks like po had welded over the top of orginal panel instead of cutting it out.
camper028.jpg

now had to cut higher up the front panel, trying to find where po had made the join.

camper029.jpg

camper031.jpg

camper032.jpg


found this little lot behind the panel rot or what? :(
camper033.jpg

camper034.jpg

camper035.jpg

time now to clean the crud out
camper036.jpg

camper037-1.jpg

thats it for today, now have to work out what to do next!! :msn4:
 
Thanks nick been reading other restores, yours as well, when I brought it The po said (a bit of TLC was all that was needed). I knew it needed more, but most of the panels have had repair panels welded over the top instead of cutting the rot out :( .
Yours is one I have read from start to finish it's people like you that will keep me going ( mine was supposed to be Neptune blue as well )
 
Caboose said:
Thanks nick been reading other restores, yours as well, when I brought it The po said (a bit of TLC was all that was needed). I knew it needed more, but most of the panels have had repair panels welded over the top instead of cutting the rot out :( .
Yours is one I have read from start to finish it's people like you that will keep me going ( mine was supposed to be Neptune blue as well )

Yep, I know all about panels tacked, stuck, mastic'd over other panels! everything I've repaired to date is going over a previous repair!

Cheers Fella, I wish I could make more time to get on and do mine but 2 kids and a full time job doesn't leave a lot of time for fun!! I haven't done my front panel yet, but had a look see and it's exactly the same as yours!

Keep going, all good fun :)
 

Latest posts

Top