More steering box questions! bearing surfaces...

Early Bay Forum

Help Support Early Bay Forum:

This site may earn a commission from merchant affiliate links, including eBay, Amazon, and others.
The casing is still sat on my desk ready to be bored out... Hopefully it'll go out to the machine shop early this week, but since it's a favour I'm asking I can't really push it. I'll let ya know ;-)
 
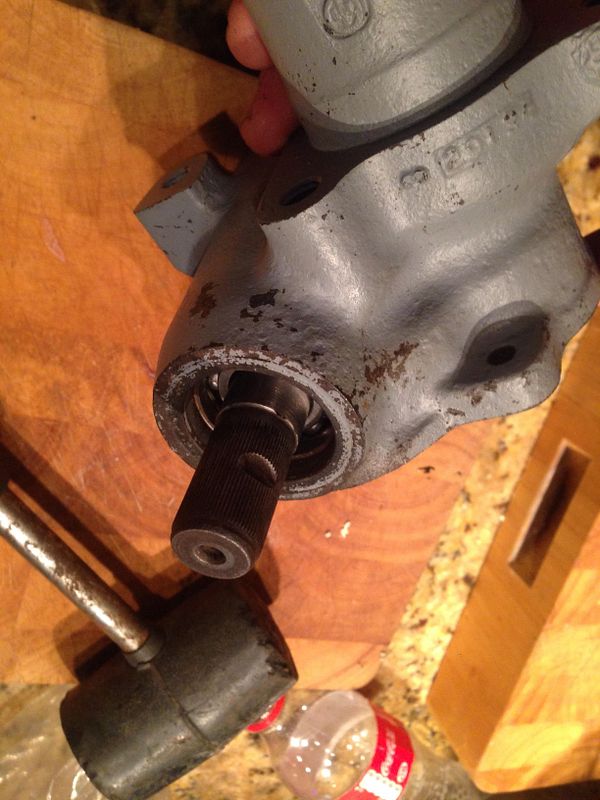
Well, it's been a while (not that t'bus was going anywhere!) but another colleague kindly bored out my steering box over Christmas. I asked how he did it and his response was "carefully". I know he used a 4-jaw chuck in a lathe and stood well back I guess! so I suppose you can either do it that way, or alternatively use an adjustable boring head.

Anyway, the whole effort has cost me £6.18, plus a six pack of beers. Will take some piccies later, I've still got to clean the swarf out of the casting, give it a lick of paint and fit the shaft (rather than tap fit, I'm going to warm up the casing, cool down the shaft and let them expand together... Should work out perfectly).

Happy days (hopefully!)
 
Happystamps said:
Well, it's been a while (not that t'bus was going anywhere!) but another colleague kindly bored out my steering box over Christmas. I asked how he did it and his response was "carefully". I know he used a 4-jaw chuck in a lathe and stood well back I guess! so I suppose you can either do it that way, or alternatively use an adjustable boring head.

Anyway, the whole effort has cost me £6.18, plus a six pack of beers. Will take some piccies later, I've still got to clean the swarf out of the casting, give it a lick of paint and fit the shaft (rather than tap fit, I'm going to warm up the casing, cool down the shaft and let them expand together... Should work out perfectly).

Happy days (hopefully!)


I don't really understand much of that- but it sounds very impressive and great value for money :lol:


Sounds like you've fixed your steering box. I think :)
 
Very nearly.... Did a bit of trial assembly today and I just need to get my end cap machined down a little bit. It won't seal properly as- is, there's only half a mm or so in it though, should be a piece of piss.

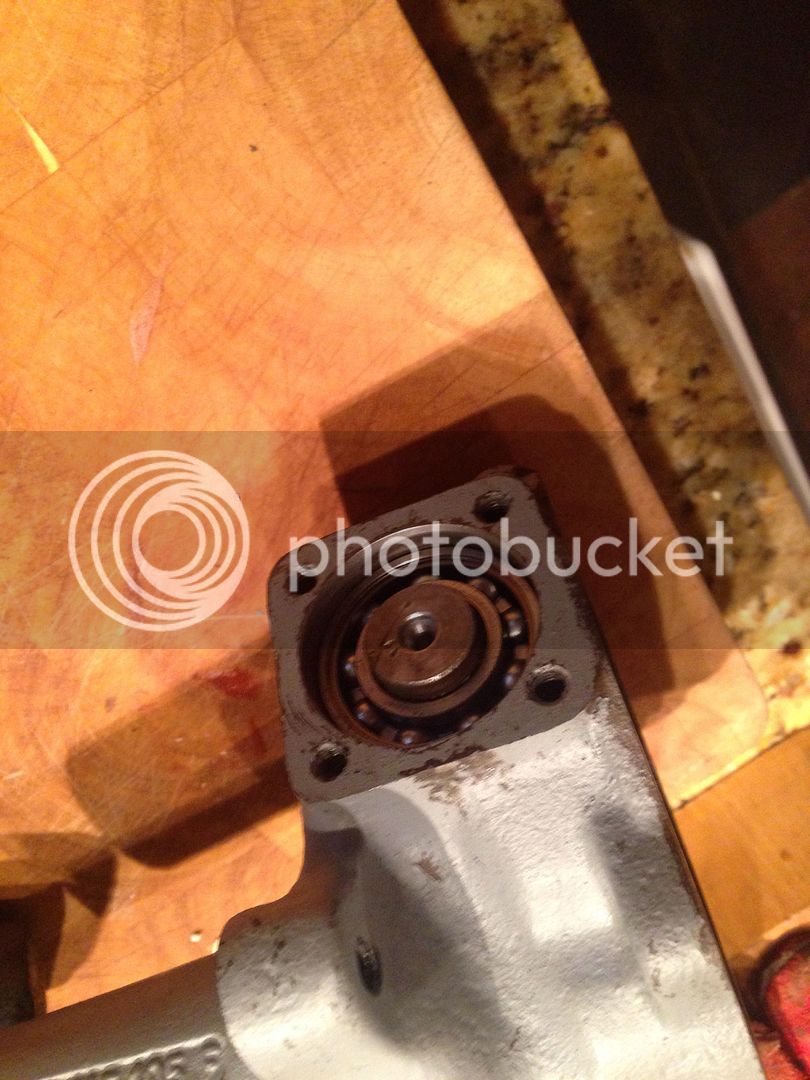
Here are a couple of pictures- I could have knocked the worm in, but opted for warming the casting up in the oven with the worm in the freezer, an hour later I took them in, and the worm dropped into place beautifully.

Awaiting new seal


View of the gubbins


Bottom view


Not far off now :)
 
I'm going to mark this one done now- while I've still got to seal the cover/box join (I left my hylomar out in the rain about 6 months ago with the cap off and now It's like blue wax!) everything else is done.

Copied and pasted from my VZi thread:

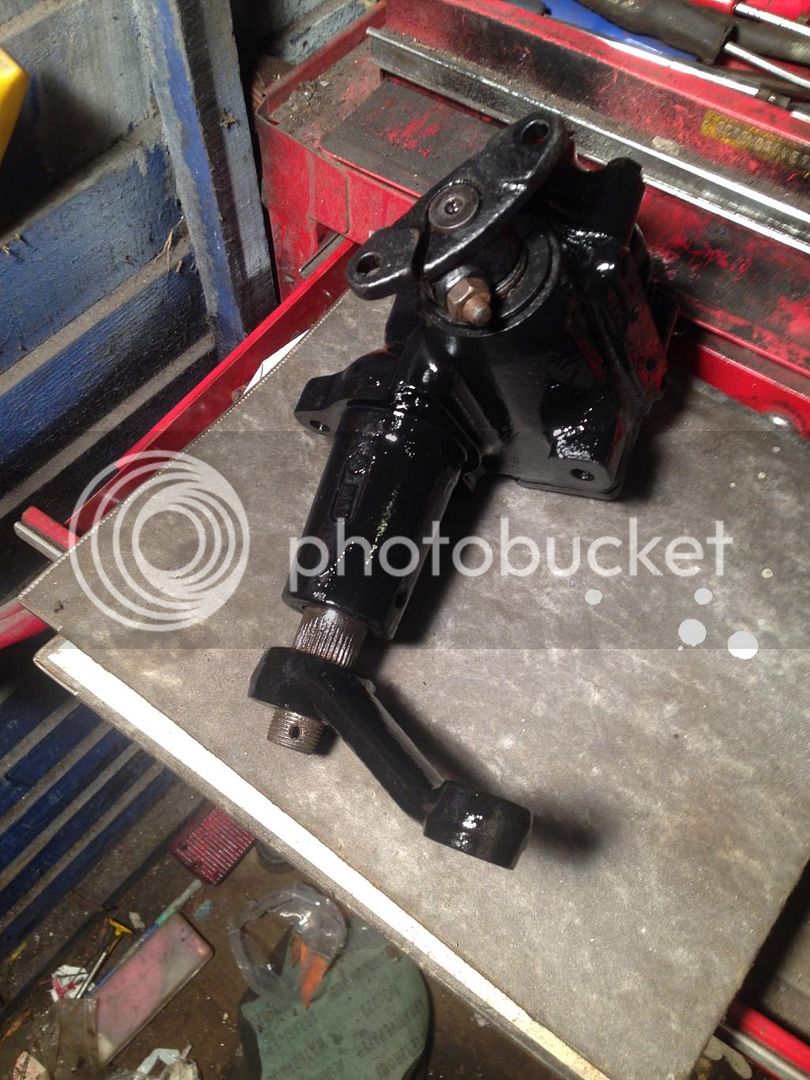
Brief update- I put the steering box back together. Isn't that nice!

The seal on the steering box didn't want to go on (bit too big) and I must admit that I took a pretty primative approach to that. I put the seal on a socket,
held it with an extension bar and span it round on the bench grinder. I'm genuinely surprised that it works perfectly, and doesn't even need sealant on the outside (trying to use as little as possible). I put oil in it and held the box upside down for 20 minutes or so without it leaking, figured that'll be fine.
Anyway, I built it up. Here's a photo of fitting the wee needle bearings into the output shaft/peg combo:


After that it was just setting the torque on that peg (Just shy of 2ft/lb, hold the peg still with a screwdriver or pliers against the washer tabs), re-fitting the seal onto the output and bolting it back together. I ran out of Hylomar for the cover so will need to re-do that as it has a slight weep (to be expected, but I really wanted to see how the modifcation had gone so bolted it all up anyway)

Once we were all bolted up and oiled, I cleaned up the threads on the adjustment screw and gave them a light oil coating. Then I wound it in by hand, while at the same time moving the output shaft in and out. With the screw completely removed, it moves about 1/2". just wind it it until you can barely move the output shaft in and out. Then take the input shaft flange and rotate it back and forth over the central point of the steering box's travel until you can JUST feel it becoming slightly firmer and back it off again about 1/8 turn, maybe less. Run the input shaft again and make sure that it all feels uniform.

Now, to test it.
I put the steering box in a vice, clamped a piece of wood to the input flange 22cm long (same as the steering wheel radius, so essentially a dummy wheel rim) with a reference surface and set up a Dial test indicator on the output shaft (I put the arm back on for this) so I could see when it started moving.

I'm happy to report that there is around 0.5mm of play at the wheel rim before the output shaft rotates. Bear in mind the MOT requirement is 70mm or less. DTI moved smoothly and there was no graunchiness at all. In fact it was like butter.

So there you go, I think I've fixed my steering box. Happy as Larry.
 
As I've said before in this thread, really nice work and good to see an educated approach to modernising this component. I wonder what the reason was for not using caged bearings off this style in the first place??
 
Well, I originally thought it'd be a cost issue- no inner race means cheaper bearings. However of course the assembly of the worm is much more complex with loose bearings, nobody would want that... Hmm, I don't know. Combination of factors perhaps.
 
Not really to be honest. It wouldn't be fair to assume that my friend with a lathe would be up for it (plus I already have a job lined up for him- a dog nut and crank handle for the bus- so don't want to take the piss!)
I'll make sure the plans are available in case anyone needs it done, and may buy the odd unknown box to fix for a bit of beer money sometime, but that's about it- I've got a van to build!

Here's the finished article, anyway.

 
Once I get fully moved into my new place, then I'd be more than happy to offer it as a service... As long as Happystamps is ok with that? :)
 
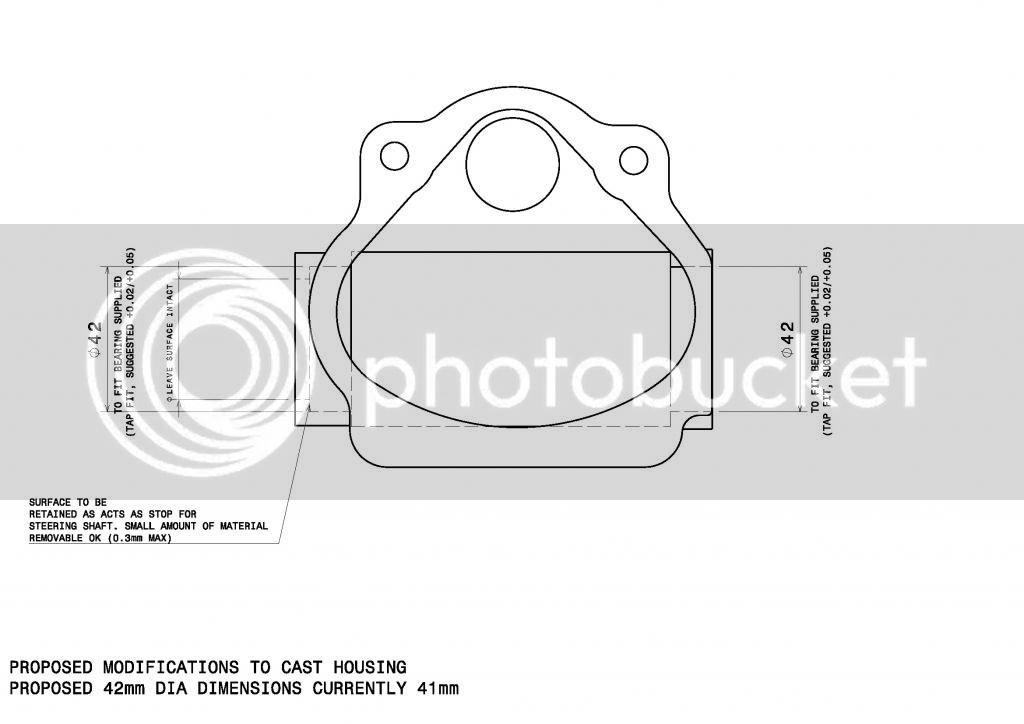
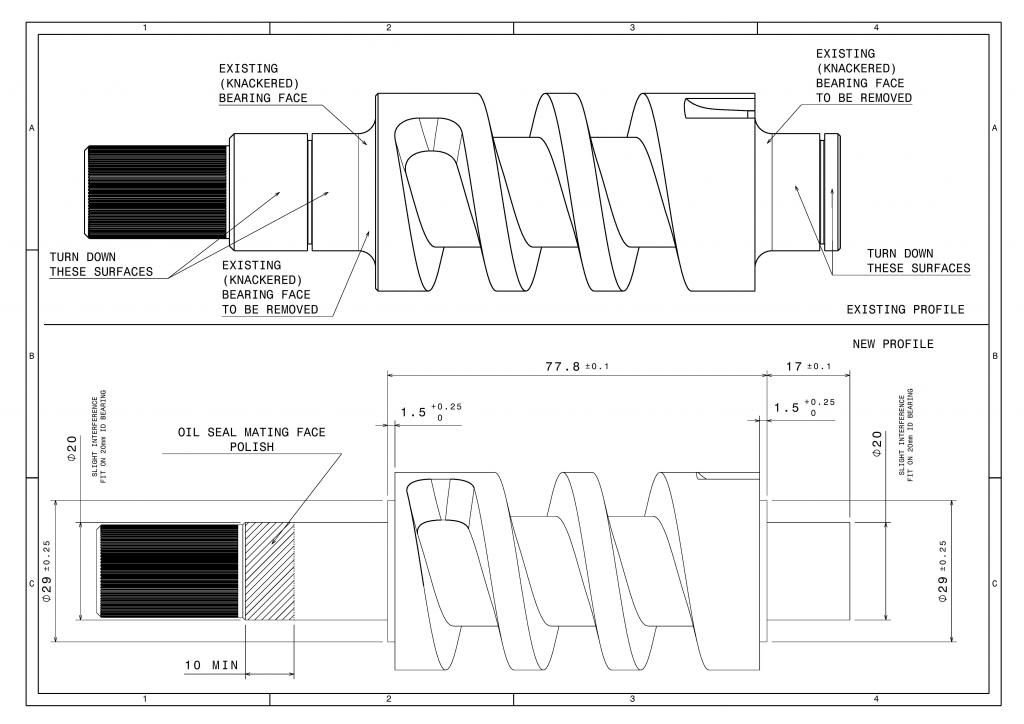
Not a problem at all- Here are the (rough) drawings I came up with-

Steering box modification (links are higher quality):

http://1drv.ms/1KG4d3d


Steering worm modification:

http://1drv.ms/1KG4naV


You also need 2 X Bearings, either 7004 ACD (angular contact) or 6004 (standard bearings- deep groove) and an oil seal with a smaller ID (20mm x 37mm x 7mm). I'm using the deep groove at the moment, if they don't last then the angular contact may be necessary.

And I'm sure it goes without saying, but I accept no responsibility for accidental injury or death resulting from this modification... Smileyface.
 
Great work Simon, a well thought out solution. And good on you for offering it up for others to try or to offer a potential service to someone else for a common problem, given the inconsistent reports on success of other overhauls/refurbs of existing boxes.

Al
 

Latest posts

Top