Crank trigger ignition - info and ramblings!

Early Bay Forum

Help Support Early Bay Forum:

This site may earn a commission from merchant affiliate links, including eBay, Amazon, and others.
cheers...

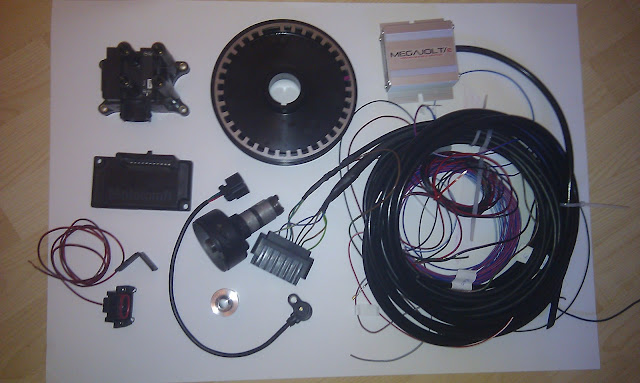
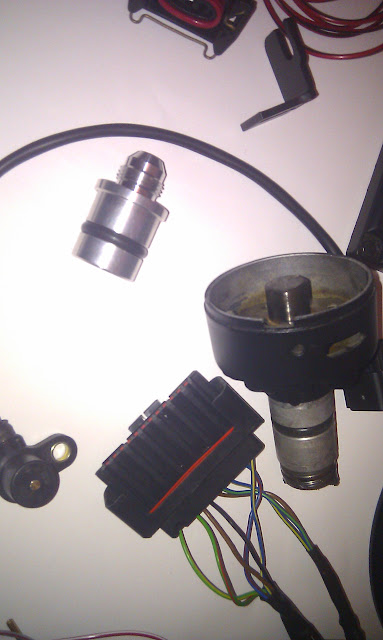
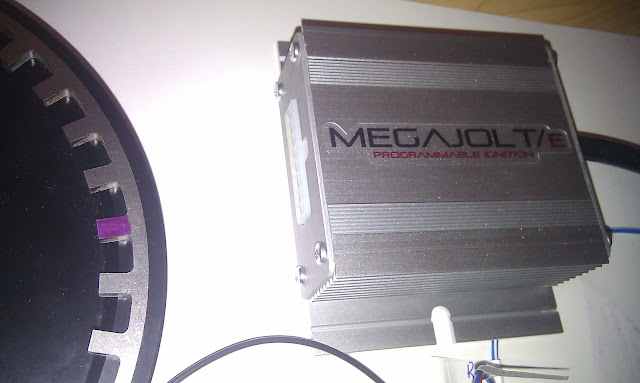
does the MJ need an array of extra sensors? the microsquirt is confusing me as it mentions TPS and MAP, plus IAT, EGO and coolant???

need to read some more - I'd like to make it simple and that may mean MJ and not doing EFI, the dells are supposed to be one of the best carbs next to EFI, so perhaps that's the cutoff point for me....

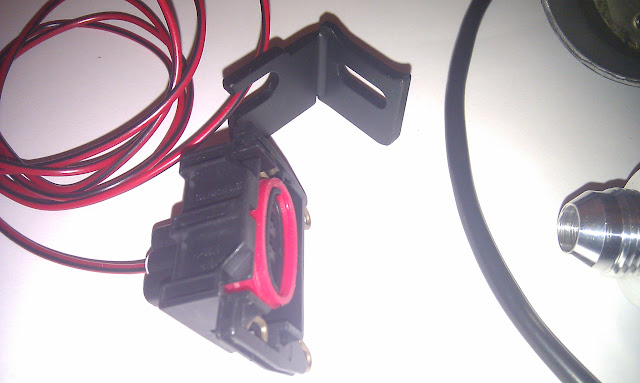
can you add anything extra to MJ to help it work ?
 
It is a simple as you want to make it.

The bare bones just needs the crank trigger sensor and either the MAP or TPS. You can then add an temp sensor to take account of hot or cold running. There are outputs for the Tacho, shift light and user defined outputs based upon different Rev Trigger points. There is also a max Rev limit that once passed pulls the timing back to 0 BTDC do effectively limits the rev.
 
Some shots of the kit I have assembled for the Megjolt on the new engine:

The EDIS, Coil pack, Trigger wheel, sensor, brackets Megajolt and looms etc.. Only thing missing are the plug leads and vacuum take offs.
IMAG0456.jpg


Dizzy is used to keep the dizzy drive intact, the silver thingy is a dizzy plug that will plug the hole if I decide to remove the dizzy drive later on. The Dizzy is a cut down one that a kind person sent me, this will be capped with some plastic pipe endcap.
IMAG0458.jpg


The crank sensor bracket, dizzy plug and the coil pack connector.
IMAG0460.jpg


The trigger wheel will be mounted to the rear of the BMD pulley. I need to have a groove turned in the pulley and then fix the Trigger wheel in the correct position. I will probably paint the TR.
IMAG0461.jpg


The Megajolt
IMAG0462.jpg
 
I LIKE.... thumbs up smiley

awesome - I'm still struggling with the MJ or microS decision - full MegaS is too much money.

I'll do some more research [btw ignore my initial request for Stickers this thread is plenty payment in kind!!]

cheers

Jon happy for you to lead the way and use this thread as basis for your mutterings - I can always change the thread title! unless you fancy starting another thread?
 
No Probs Darren,
Change the thread title if you want. I'll keep posting up here as I progress.
I have a base map sorted but it will be a while before I am ready to mount it on an engine and run it.

BTW,
If you do decide to go MJ over MS, let me know and I'll send you all the info on suppliers and also how to do the loom as it is a PITA to get it all neat and electrically correct.
I will be using a relay for the 12V supply, switched by the coil supply on the current ignition. I can also sort extra security as well ;)


Edit to add, if you do MJ first, you can always sell off the MJ when you go to MS, but keep all the fittings and sensors in place and you will also have an ignition map to go off, just a thought...
 
I have done the Megajolt before on my crossflow powered Caterham7 so have been reading this for a while.
Best resources for Megajolt is the autosportlabs pages:
http://www.autosportlabs.net/Main_Page

If you look on the Samba there is quite a lot on MegaSquirt installations.

Or just search for Crank Fired Ignition VW T1 in your favourite seach engine.
 
Funny you should ask :)

Took the BDM pulley to a local engineering shop to get a relief machined in the back for the trigger wheel to locate. Top job the fellas did, all for £16:50 + Vat.

Photos:

IMAG0471.jpg


IMAG0473.jpg


IMAG0475.jpg


IMAG0477.jpg


IMAG0478.jpg


IMAG0479.jpg


Next will be to Tap the Manifolds for the VAC take off. I bought some 1/8 NPT brass hose barbs from Canada via ebay for a bargain and have the relevant tap ready. I also need to finalize the position of the TR relative to the Crank Sensor and Paint the TR and fix it permanently to the BMD pulley (likely to use some sort of very strong adhesive or small machine screws, undecided at the moment...

Once that is completed then I need to wait for my nice new engine from Laurie.
 
that's super neat...what size is the trigger wheel external measurement [please]

The TR is steel and the pulley is ally, so perhaps screws AND glue? I think I might weld my TR to my D marked pulley, but really like a serpentine setup...

I have moved now so other than the box shifting and sorting - I'm going to start the research proper [and probably just copy you LOL!]
 
The Pulley is 5.75 inches OD (BMD). Mario managed to sort me out using his "small" triggerwheel. I am sure if you ask him to copy my order you will be fine :)

I painted the TR and then epoxy'd it to the pulley today.
Some photos of the mock instal:

IMAG0490.jpg


IMAG0489.jpg


IMAG0488.jpg


IMAG0481.jpg


IMAG0482.jpg


The gap between the TR and sensor is critical, it needs to be as close as possible for a good signal. The VR sensor I am using is very magnetic so it kept pulling the TR out the pulley as it was only taped in position.

More to follow... The finished pulley and then a layout of the loom and all parts. May need to order new plug leads as well, but we will cross that bridge when I come to it.
 
Managed to paint the TR and mount it to the pullet last night. I used from ultra-strong Metal Epoxy that should be ok. I put a tin bead around the machined lip then pressed the TR in at the correct orientation so the missing tooth is correct. This has now cured and looks to be strong enough. I was considering some small machine screws, but I think that is not necessary.

I also tapped a scrap manifold for 1/8 NPT so I could put in the Vac hose barb. Ideally this wants to be in a slight downward orientation to stop any fuel collecting in it. I will tap the proper manifolds when I have the engine here so I can work out the best place for clearance.

I was looking at the Carbs last night and will need to work out the linkage a bit as these are exchange carbs and I am not sure if I need to modify the original linkage to work with my new linkage... I will work it out shortly.

More photos of the Pulley:

IMAG0494.jpg


IMAG0496.jpg

That is dust on the pulley, you can also see the epoxy compound between the teeth.

IMAG0500.jpg

More photos of the Triggerwheel and Pulley. I will clear up some of the epoxy later.
 
good work - how did you work out the orientation of the TR? I know the MJ will allow some adjustment if it is out slightly?

and where did you get the epoxy from?

if it ever comes off then the EDIS will drop to it's limp, yes?
 
For the orientation, I put the crank sensor into position ans then lined up the TR so that the 9th tooth behind the missing tooth was located over the sensor. I then market the position of the TR at TDC (Centre punched it). You can see the placement of the Sensor in the pictures above.

The Epoxy was from B&Q, Evostick stuff that is chemical and liquid inert so should not be affected by the surroundings.
If the TR does come off then no, the EDIS will not go to limp mode, as it will not know the crank angle so will just stop working.
I am pretty certain the Epoxy will hold, but if in any doubt, some small engineering screws around the circumference of the TR will do the job.
 
Because that is required fro the MJ system to work. The MJ sends signals ot the EDIS which then calculates the dwell and sends out the firing signal to the coil pack. The EDIS needs to know the crank angle/RPM etc to work out when to fire the spark plugs. It then sends the RPM signal to the MJ which then returns a signal to set the correct advance.
The EDIS will run in limp mode if the MJ goes down, but it must have a crank signal to know when to fire the plugs.

Hope that is clear.
 

Latest posts

Top