71 Devon Project 'Bella'

Early Bay Forum

Help Support Early Bay Forum:

This site may earn a commission from merchant affiliate links, including eBay, Amazon, and others.

veedubd

Active member
Joined
Sep 13, 2014
Messages
35
Reaction score
0
Location
Norfolk
Hi All been on here for a while and got some great advice and even a couple of bargains but now finally got round to adding details of my project.
'Bella' is a 1971 Devon conversion I got her in May 2012 and was named Bella by the family shortly after!
Here she is being loaded up ready for her new home
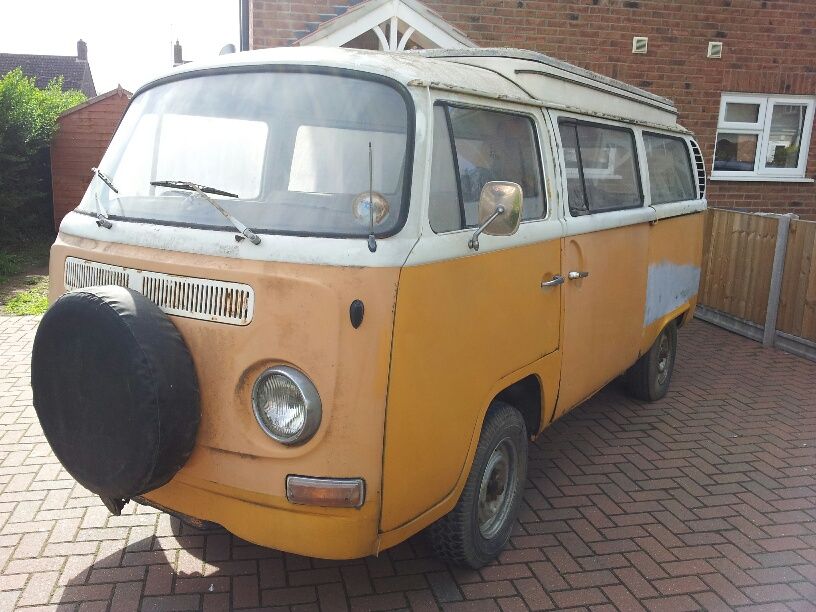
And now home


Nothing much happened for a while other than the usual sit in start up and dream lol......
 
I will update progress as and when I get time, but plans are for a full strip down including the dreaded belly pans and replace any parts that have been previously repaired, rotted or damaged it will be a while lol.....
 
So finally after having it sit on the drive and also erecting a shelter to prevent her from enduring the winter months I started a search for someone with more welding skills to help and this is when I came across Jason @ Dubs and Classics which after several chats and going to see his work I booked Bella in for the start of her restoration.
Then it was time to get her delivered to Jason


I also decided that in the best interest of doing a great job as easy as possible I got a roll over jig, so the strip down began...


Making Bella ready for the Jig


More soon...
 
Just a little more info on the bus
It was owned by the previous owner for around 14 years with half of that being stored under a carport until I found it.
It is a 71 Devon originally a Sunlander finished in Sierra Yellow although the main parts of interior have long gone, looking at first glance at van it appears to be reasonably genuine and honest with previous repairs notable as to be expected some ok some not so...

Engine ran but roughly, as in pics she drove herself onto the recovery truck when collected :)

so just to summarise on first appearances:
Both rear arches previously replaced
Both front arches previously replaced (drivers side partly attached)
Front valance previously replaced
Sill sections repaired/filled
Rear lower corners and battery tray replaced
Cab floor patched
Wheelarch tubs patched
Doors rough
Rear hatch rough
Side door bottom needing repair
Front chassis y section holed
Belly pans to come off for inspection to chassis and jacking points

All in all for her age and series of repairs throughout her life so far ive seen a lot worse, what I like is that the bulk of her is still original :)

I have acquired a good replacement tailgate, engine lid, bumpers and a couple of solid doors (to be reskinned) and my intention is to have all previous repairs and current issues redone/repaired properly 8)
 
So now on the jig over she goes and belly pans come off :|


All in all could of been a lot worse, chassis sections holed where the bellypans were attached, jacking points previously repaired and not finished off, as with the battery tray etc as said all will be replaced so I know the repairs are good :)

As for other areas since stripdown


Patches to cab floor and wheelarch tub/seatbelt mounting points as seen on many buses!


Windscreen scuttle in need of repairs...

TBC....
 
Well when I first got her I didn't like the colour and have had VW light grey with white roof combo in mind, however since owning her the Sierra yellow has grown on me so I am now undecided still ive plenty of time ahead to make the decision lol :lol:
 
Right I have a little more time to update and try to catch up to where we are now with the bus

Chassis repairs


old previous repair out re-fabricated and repaired :)


At this point I have to say a big thanks to Jason@ Dubs and Classics for his excellent fabrication and welding :D
 
Jacking points and sills fully cut out and replaced :D


As you can see we are using Preservation panels which so far have been a great fit and the guage of the steel beats many other replacement panels :)

Cab floor time... :shock:


slowly coming together ;)
 
With most of the underside solid now (front valance etc still to attend to) we was wondering what the rear arch repair was hiding as it sporting a strange angle :?:


If you look at the primer angle that's where its been attached previously??? maybe they didn't have a level or tape and a wonky leg lol
also inside the arch had fibreglass visible


repair to the arch tub followed


Followed by the addition of the new arch panel, because of the amount needed to cut away to make the panel repairs level a infill piece was required


rear corner next, again it has had previous replacement but will be cut out and redone to Jasons high standards of quality repairs :)
 
right so... currently im awaiting to catch up and get some more photos of the progress, because of the previous repairs to the seatbelt points etc I decided to order new arch tubs along with new arches etc, having seen the shocking quality of some of the pattern arches it was either going to be sourcing some good condition body cut arches or trying the new 'good quality' arches that have become available... I decided to take a chance and order the latter I know they are more than twice the price of others available but if the quality is there then its worth it - glad I did because I can confirm these to be of very good quality and fit photos to follow :)

as the bus stands im now waiting for some more panels that are on back order but is still making good progress.. 8)

no mad rush as im still debating the final colour lol :)
 
Few more pics to show progress, ive had new door skin fitted to the solid frame doors that I had before the arch and tub was cut out and replaced


The more expensive 'better' quality wheel arch panels were definitely worth the extra £££ goes to show it is true you get what you pay for etc...

Then to finish the back end the previously repaired rear corner has been cut out, tray repaired and d post repaired before new rear corner welded in


Im still waiting for a few panels that are on backorder to keep on with the resto but making steady progress... updates to follow :)
 
A little update before xmas drivers side door skin replaced, door rehung to align the replacement arch and wheelarch tub :D


Front panel and rear arch and corner left to do then will be just small repairs left before I have to decide what colour I am to go with :eek:

Happy Chrimbo and new year to all you guys :D
 
Hi veedub,
Just read your thread with interest. Doing something very much like this myself. The bus is with the expert as I type. It'll be interesting reading to see how yours progresses over the months. Hope there will be ideas/advice that help my project. Good fortune with this massive task. I'll say what members on the site tell me on my thread.........great to see you doing the work properly and saving another bus.
 
Cheers, there has been a little more progress on the bus but im yet to get some photos uploaded, im also busy at present doing a tdi conversion on my T4 which is taking up a load of my time :)
 
Which roll over jig did you buy, got a fair bit of work to do under mine and thinking it would make life a lot easier.
 
I'll be keeping an eye on this thread, as I recently got lumbered with a '71 Danbury conversion with substantially more rot that Bella, but a lot of the same repairs are obviously necessary.
Nice to see others feeling the same pain as me.
Good luck.
 

Latest posts

Top