1972 Crossover Dormobile - Full Restoration Work In Progress

Early Bay Forum

Help Support Early Bay Forum:

This site may earn a commission from merchant affiliate links, including eBay, Amazon, and others.
Thanks Andy! Yes things are moving and you are right, I am certainly leaning towards getting that type 4 engine in and at least hear the camper running again. Sorry again to hear about your troubles.

I checked the intake head studs this evening and looks like they are all good. Will double check the lower ones in the next day or two but looks like just the single broken. Then it's reset the valve clearances and check compression
 
The engine is now out and on the floor - with a bit of help from the wife! She's been promising for the past 12yrs to help and finally volunteered to give us a hand! AND SHE ENJOYED IT!

A bit of prep before work starts:

20170612_151201_zps4hnbv5vh.jpg


20170612_162703_zpszko2h2ac.jpg


20170625_161249_zpsgvndriik.jpg


20170806_142807_zpsilse7tun.jpg


evidence of the wife:

20170806_150529_zpsxsnhs2jj.jpg


separating the box from engine:

20170806_153845_zpsrp4mm8yj.jpg


I await the arrival of my engine stand mount before getting it on the stand. I'm going to carry out a leakdown test before the teardown. Not sure whether there's much point though as I'm stripping it down to a short block anyways. The plan (at present) isn't to split the case but time may tell otherwise. I'll be replacing all 24 headstuds with standard steels and will inspect parts for condition as I go.


So things have started a little slower than planned. So slow that It looks like a couple of other rebuilds have cropped up on here :)

So the engine

K-Jet setup lifted in one go and shelved for later:

20170812_173138_zpsyavllrww.jpg


20170812_173153_zpsgto6k9n2.jpg


Engine mount arrived and borrowed crane from a mate:

20170828_195238_zpsebtprhmb.jpg.html


distributor shaft: Wear isnt too bad is it?

20170907_184859_001_zpsysikesvx.jpg


20170907_184947_zpshkdoo21w.jpg


Oil cooler is a bit beaten up, but not sure its leaking? Will pressure test at later date
20170907_190919_zpswkib2ygh.jpg


20170907_191954_zpsob0cng5l.jpg


20170907_192015_zpsucu8g0xw.jpg


Managed to start removing the cam chain covers which I'll hopefully finish off over the weekend. the Right hand cover was pretty stuck so a soft mallet was gently use to loosen the cover from the gasket.


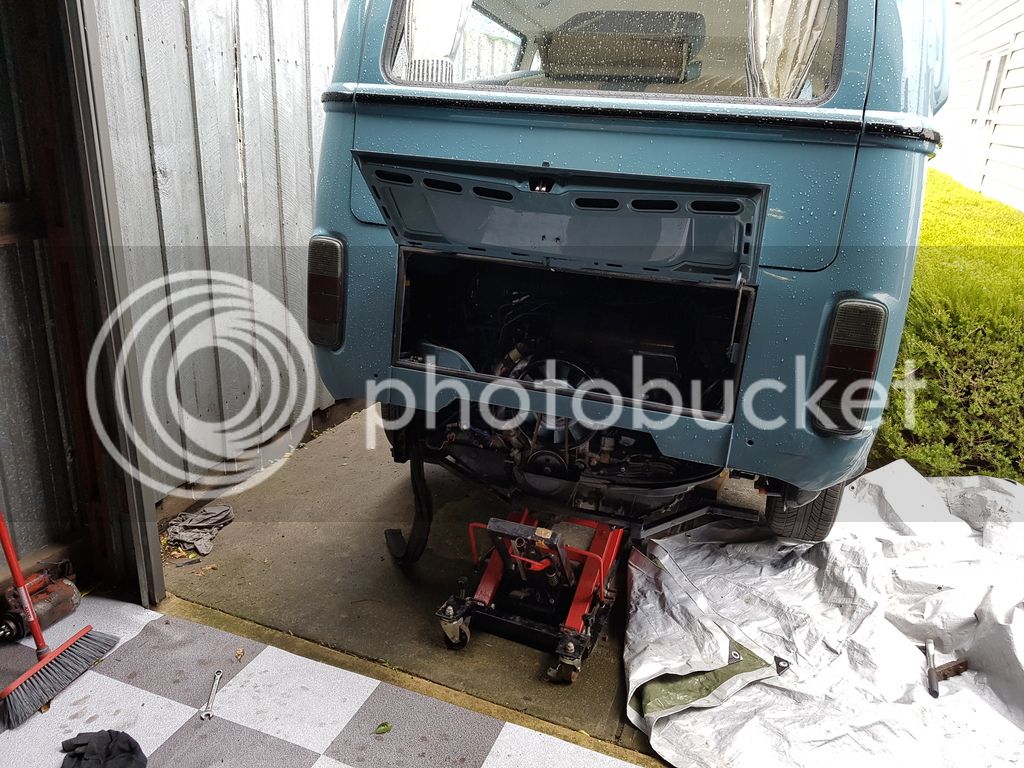
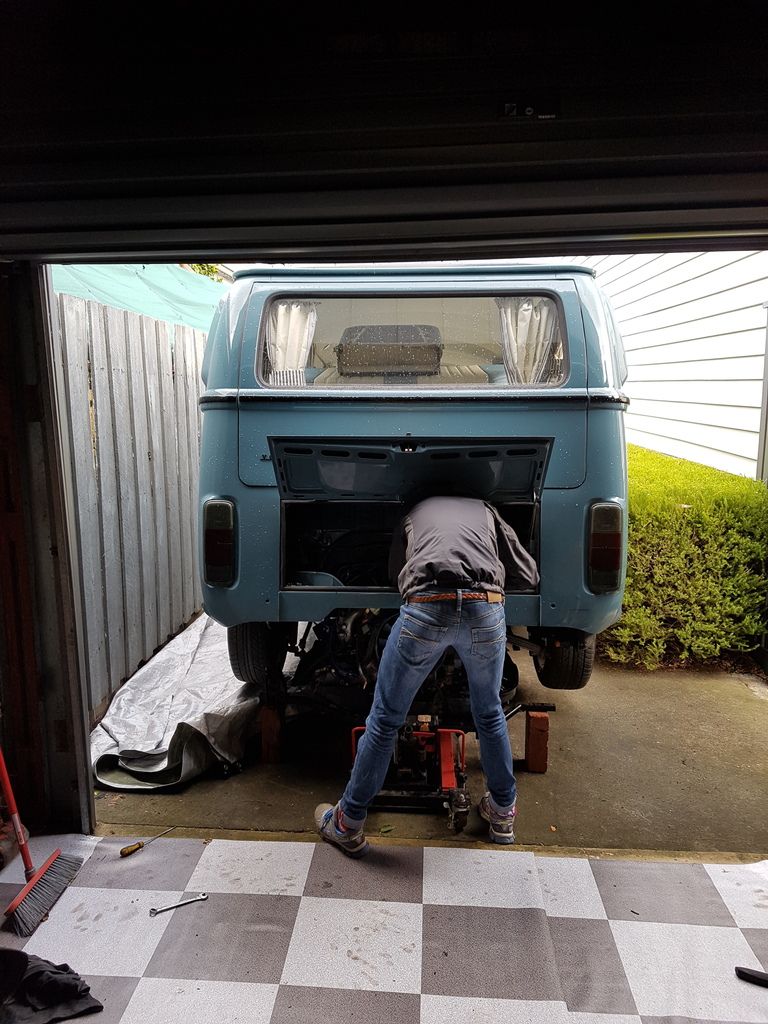
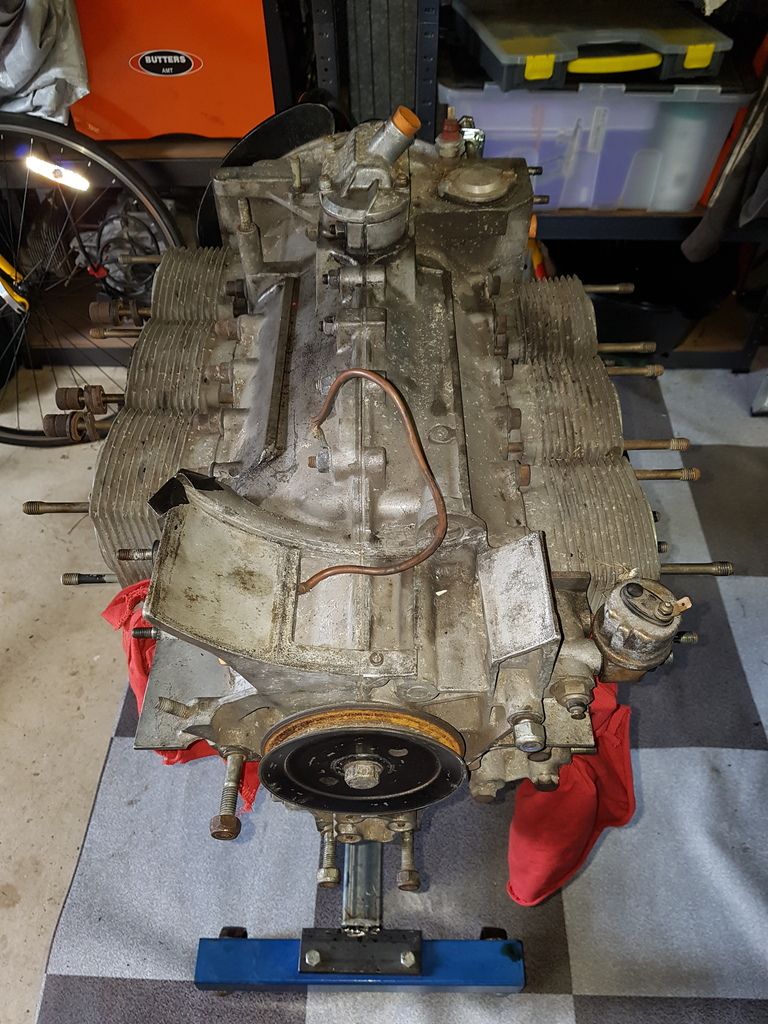
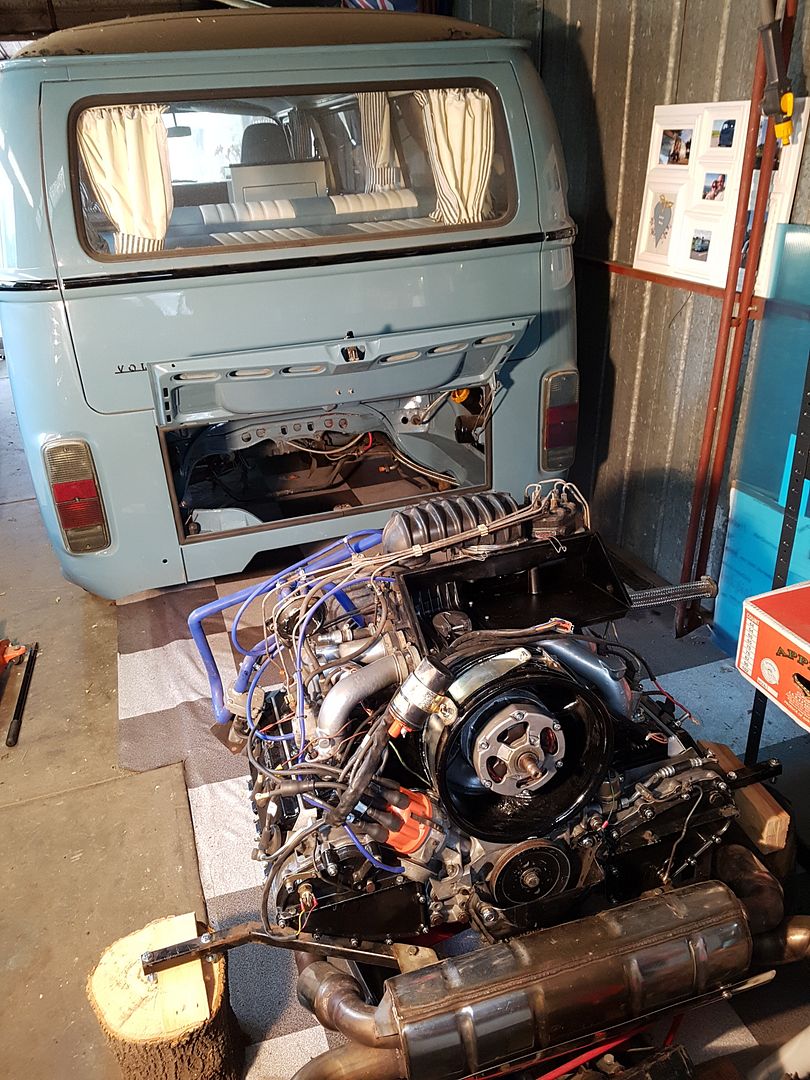
Was hoping to make some good progress over the weekend, but I mis-read Wayne's book and didn't order myself a 46mm crowsfoot wrench for the removal of the cams, so only managed to remove carrera upgrade oil lines and cam covers.

O ye, and a bit more oil that was left in the engine when I rotated it a little ;-)
20170909_151451_zpsfxaswgrr.jpg


20170909_155414_zpsep030mkr.jpg


20170909_155402_zpss69ikye7.jpg


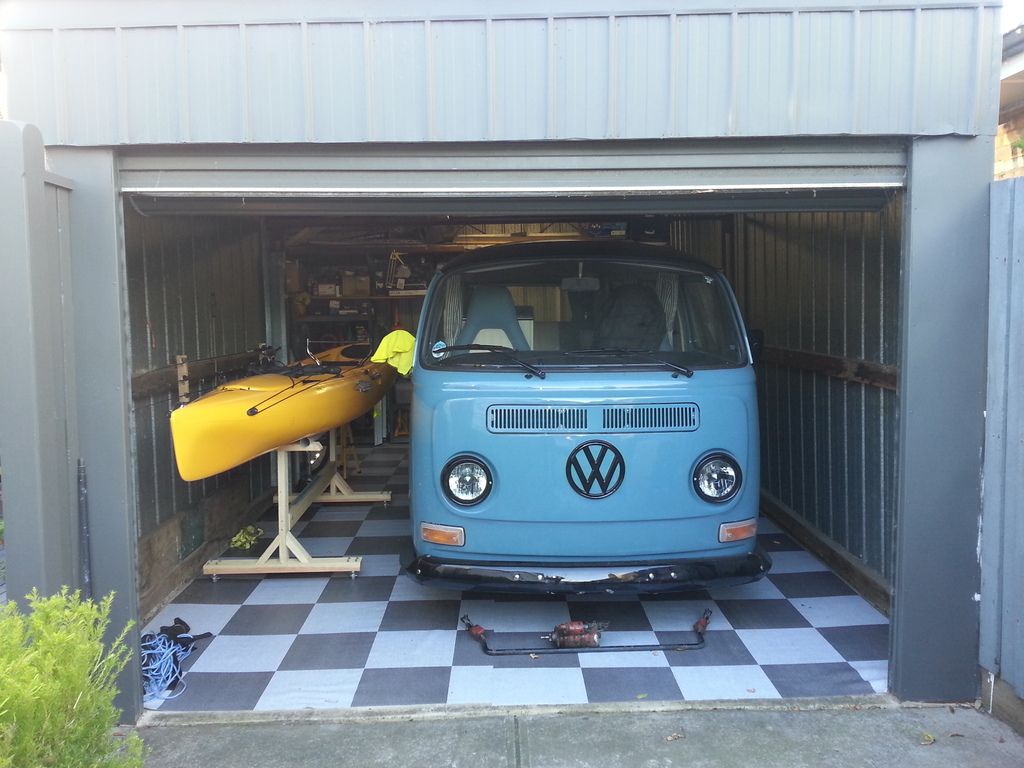
Damn my bloody kayak for spoiling the view!

I've got a crowsfoot on order...along with a few of the other tools I'll be needing along the way

-------------------------------------------------------------

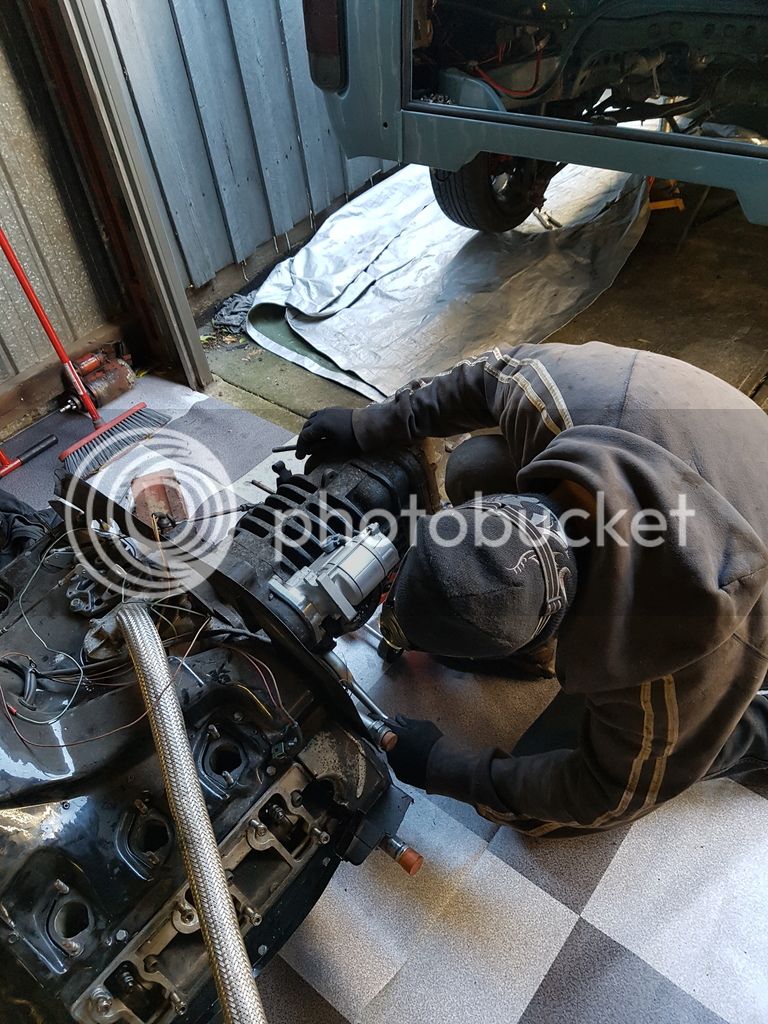
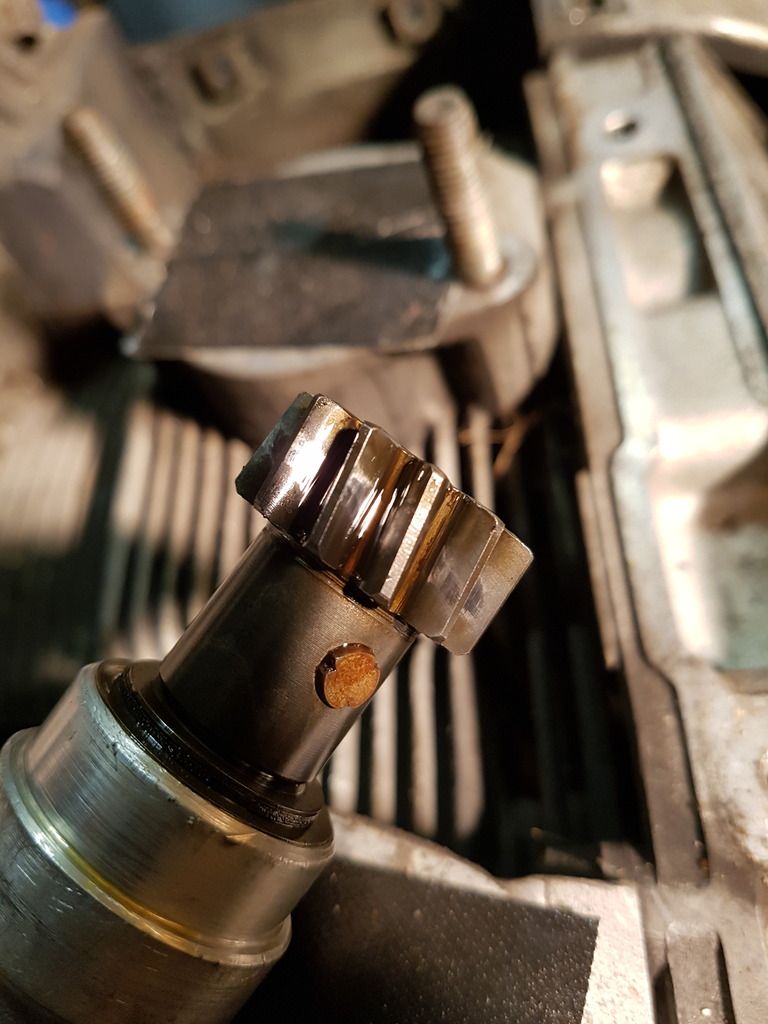
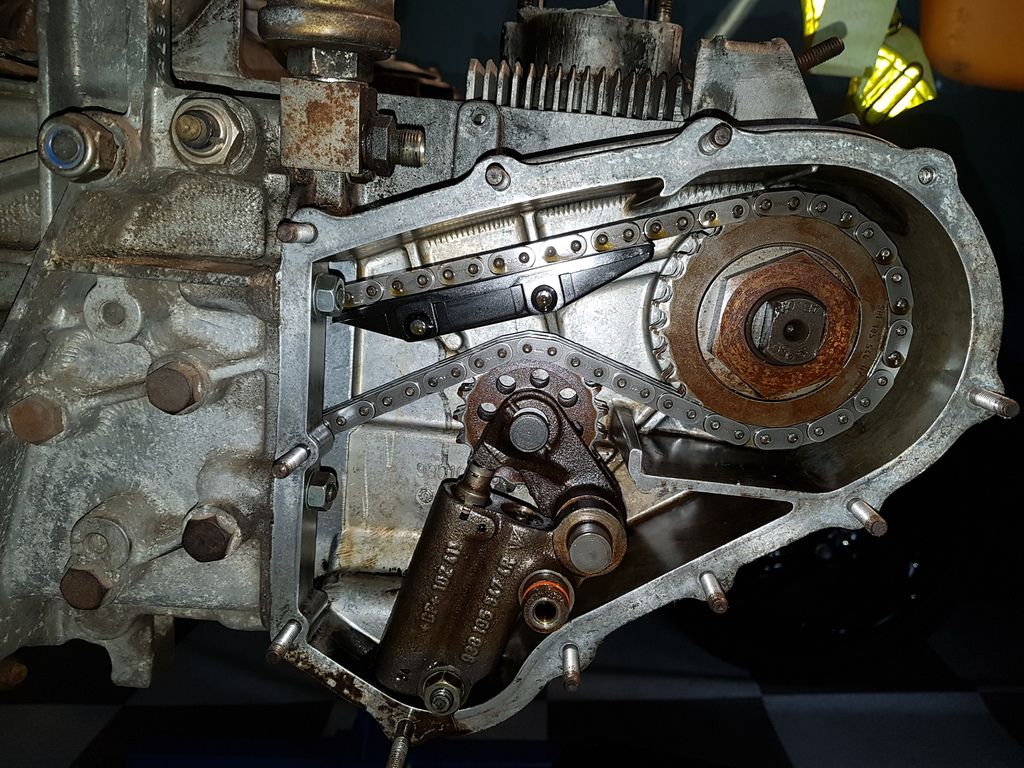
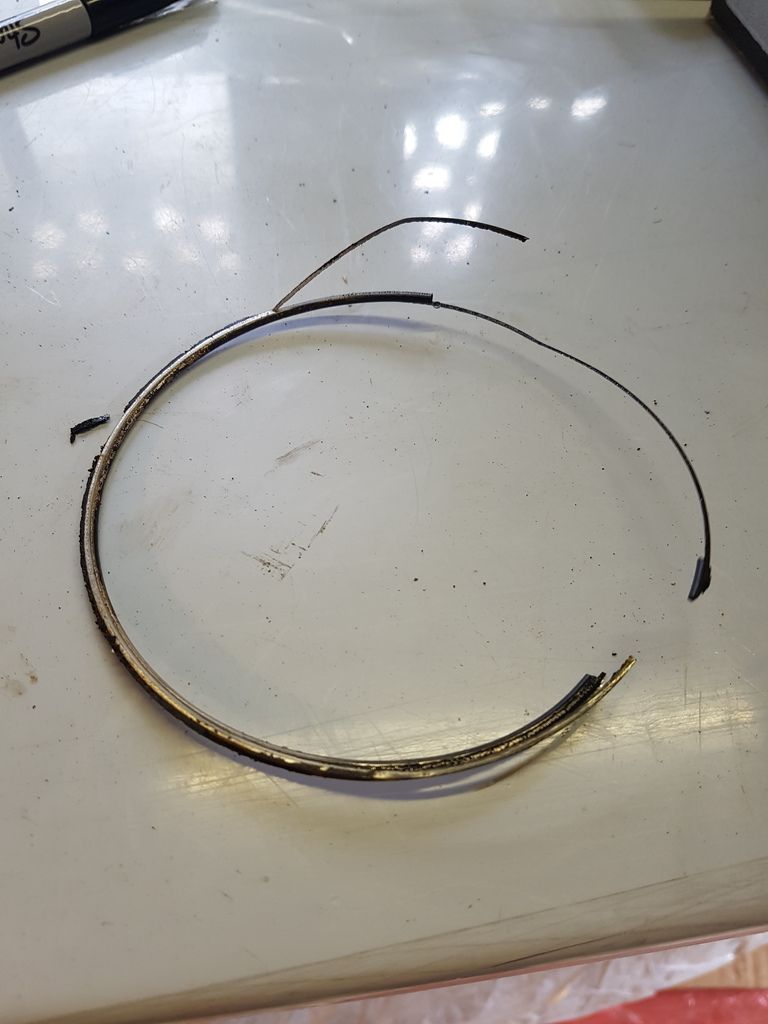
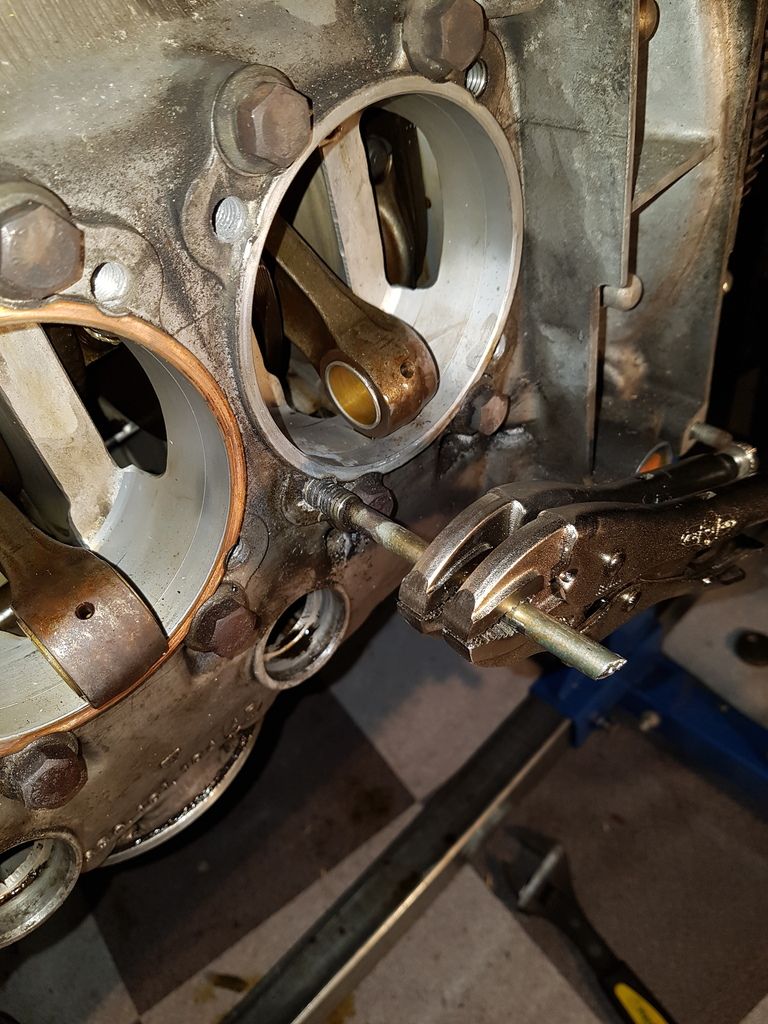
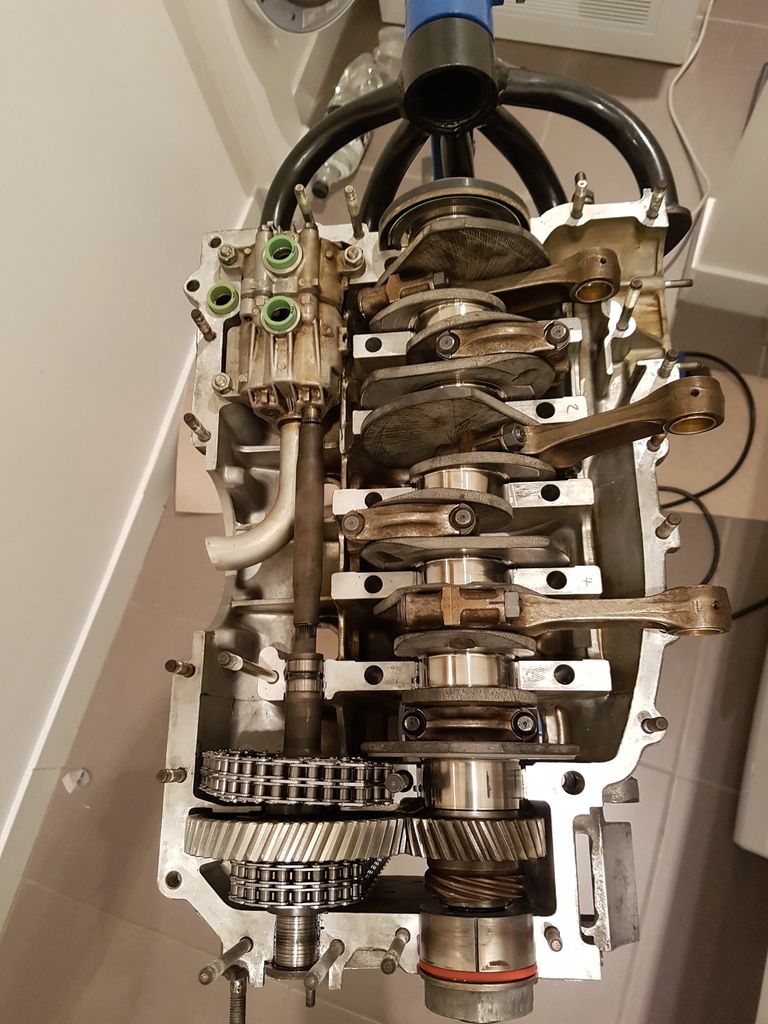
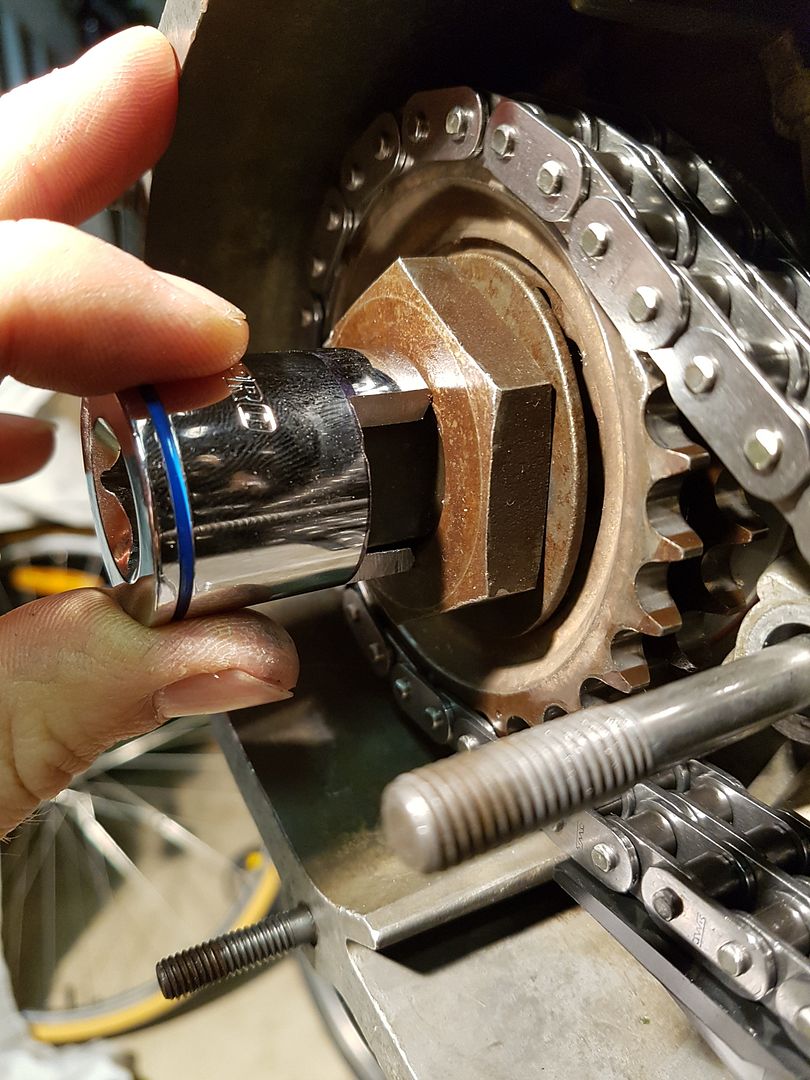
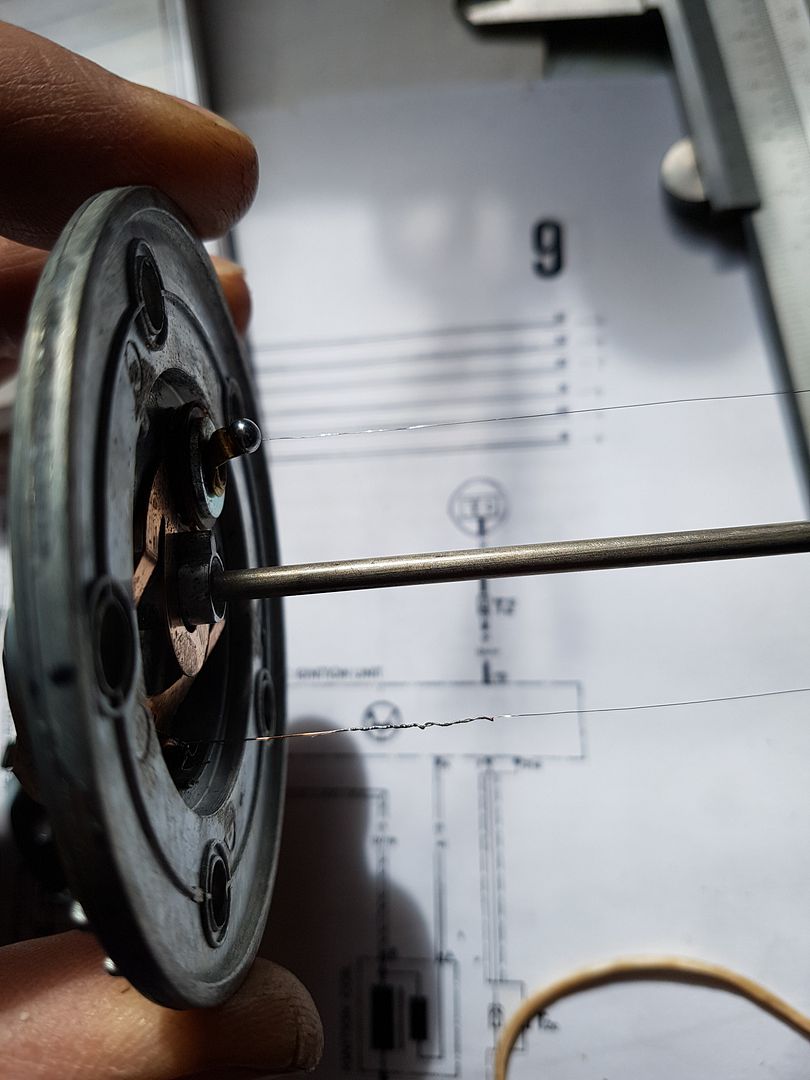
Had a good couple of hours on the engine teardown yesterday. Before I removed the cam towers I fit fitted the bolt into the end of the cam for cam sync using the Clewett Engineering cam sync setup:

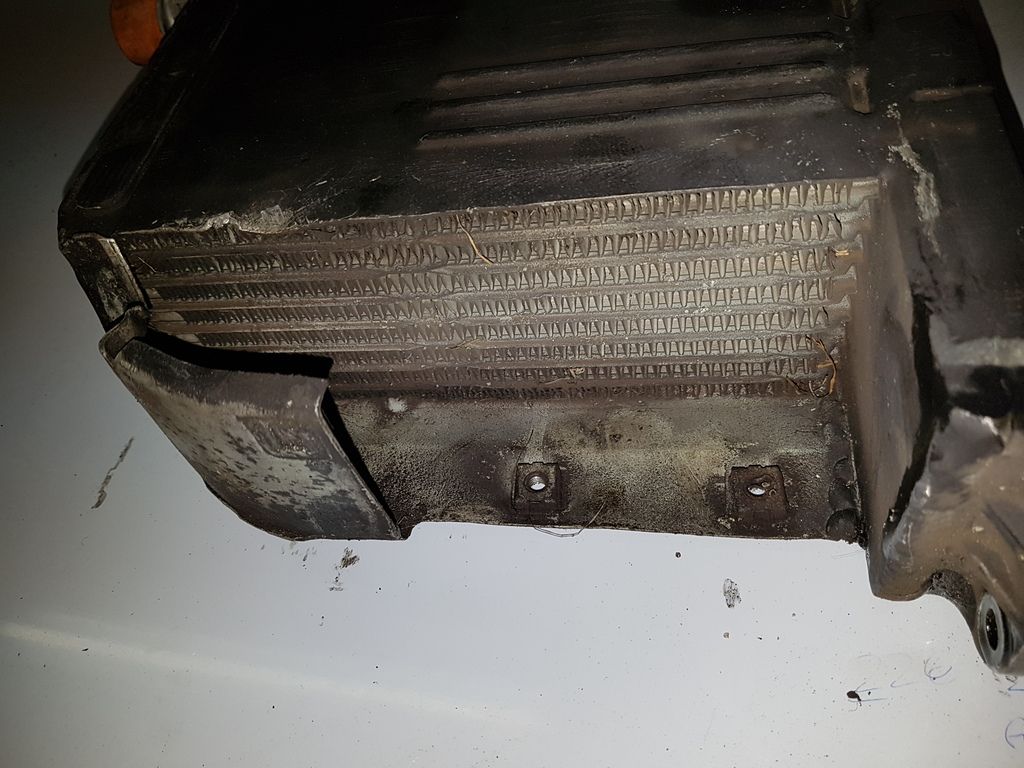
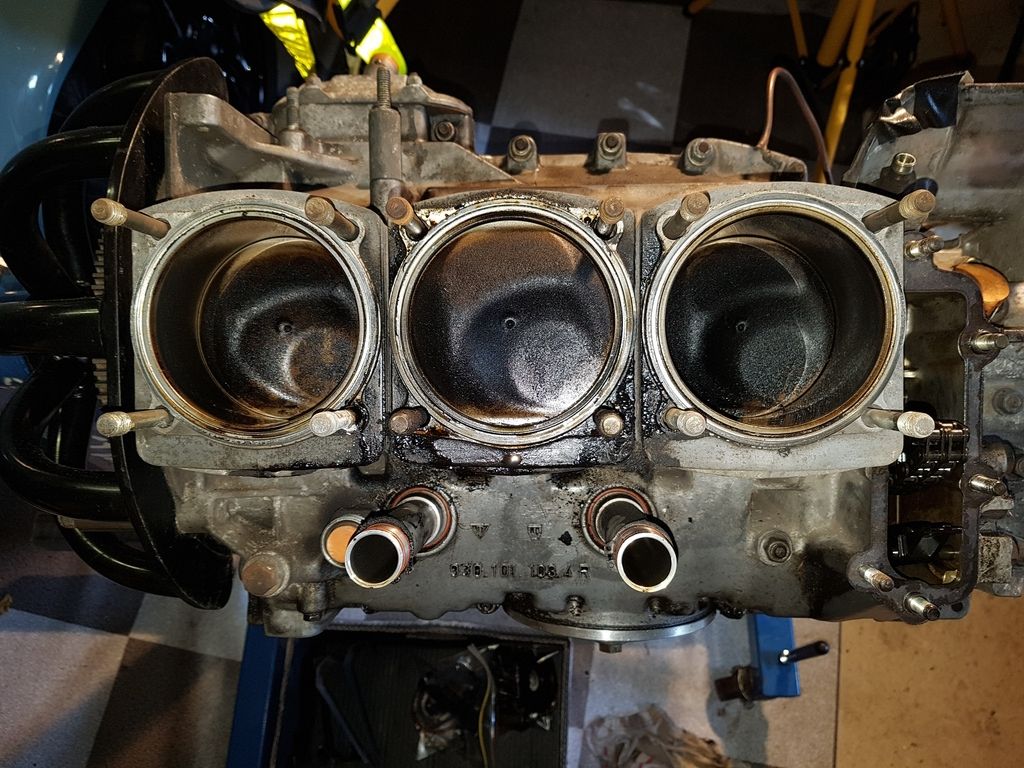
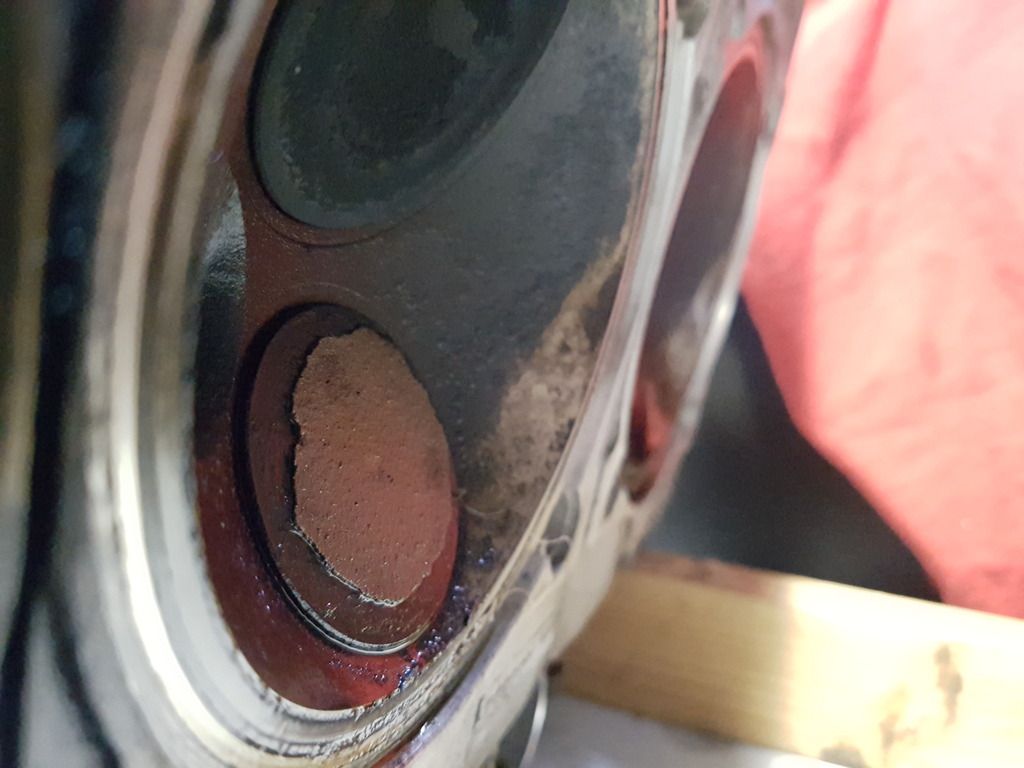
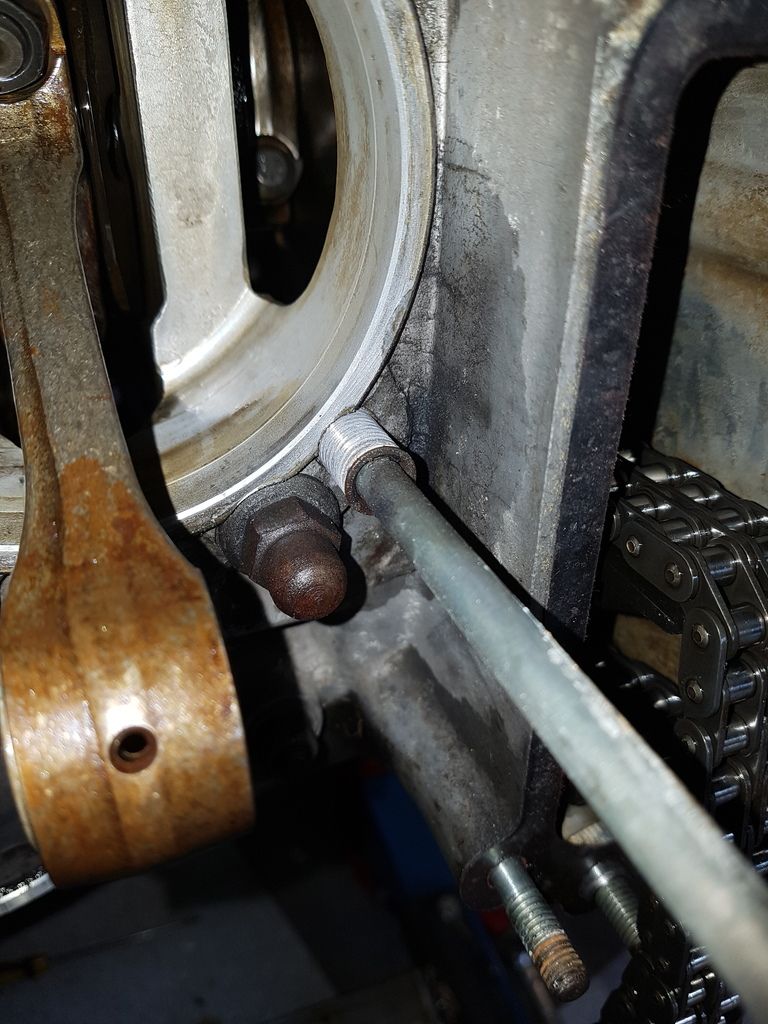
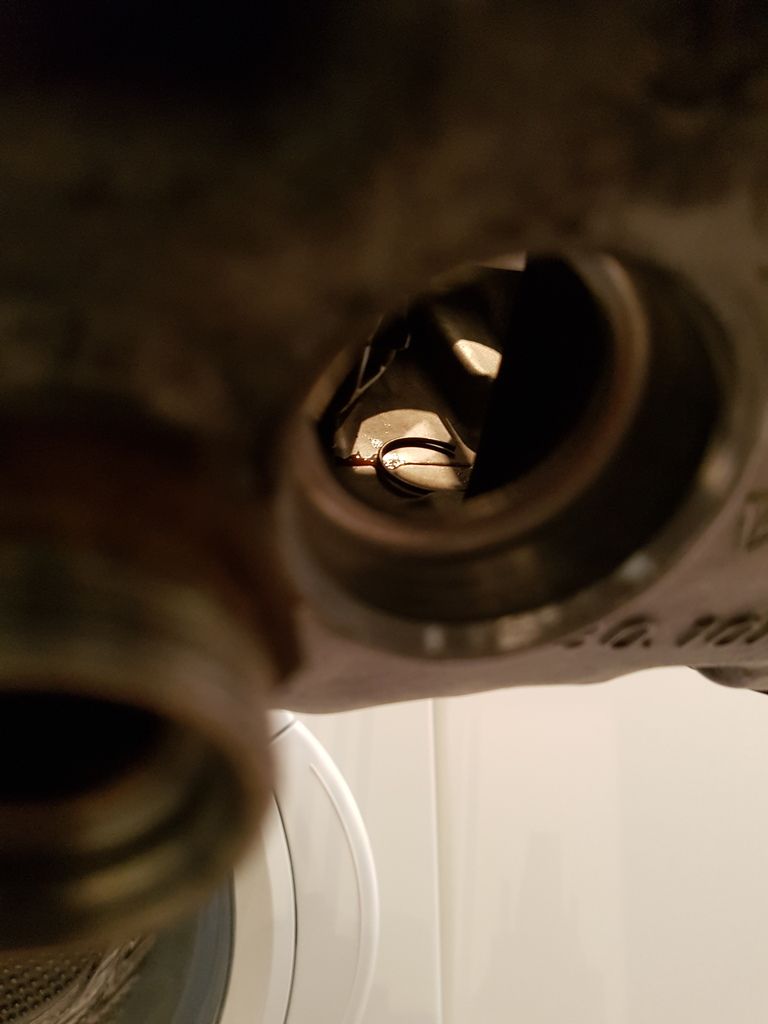
Historically I had low compression on no.2 and found that one of the exhaust headstuds didnt have much torque left on it when i removed it. When I have previously tested compression i had around 85psi on no.2 and all others were around 100-105psi (efore the headstud issue on no.6 that is. clear leakage on no.2

5611f612-f49f-49e8-9ba4-b1c50de8a9a9_zpszir2qsub.jpg


no. 6 with its snapped headstud showing clear leakage on exhaust side also

20170924_161452_zpsxhkzoja3.jpg


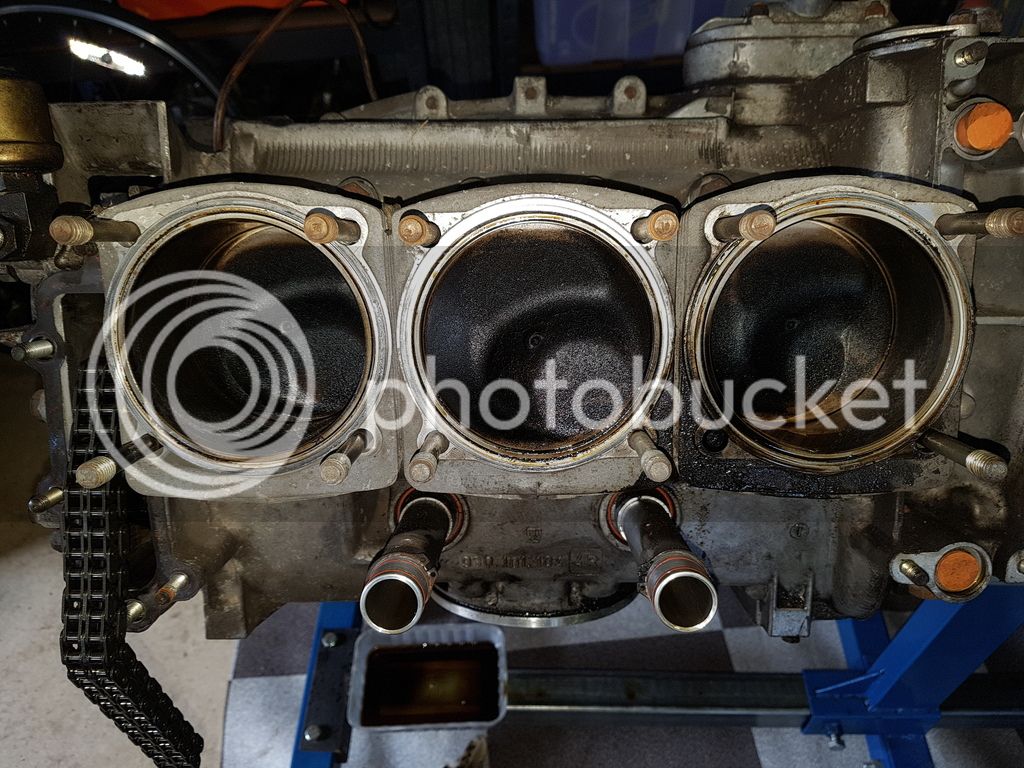
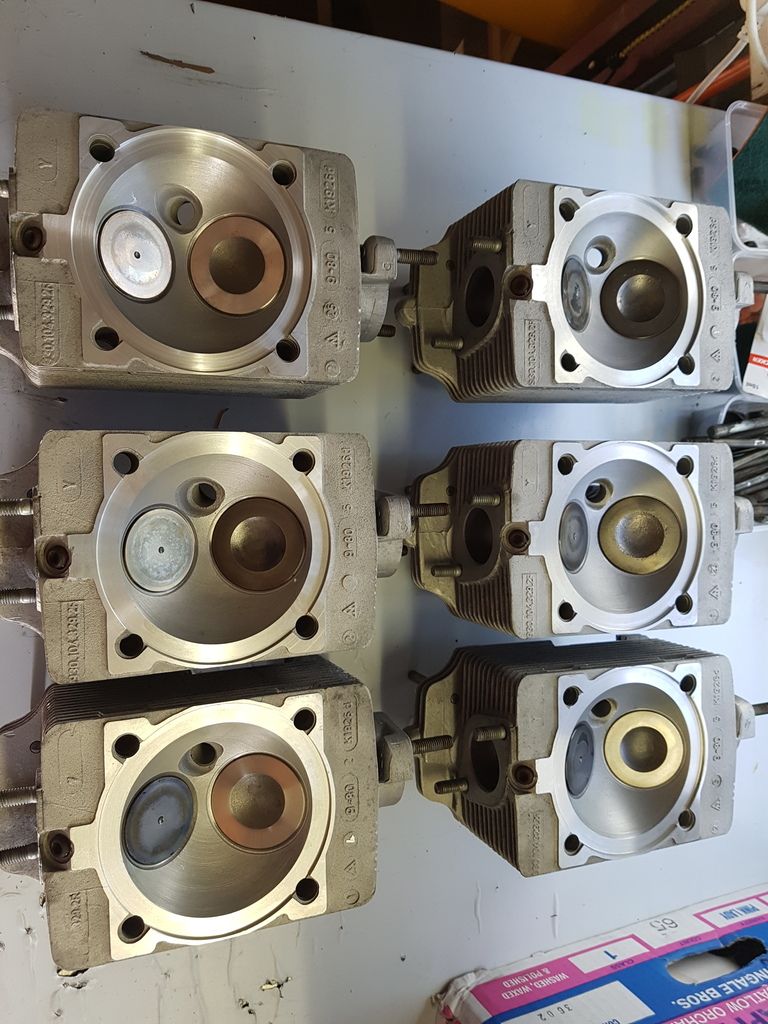
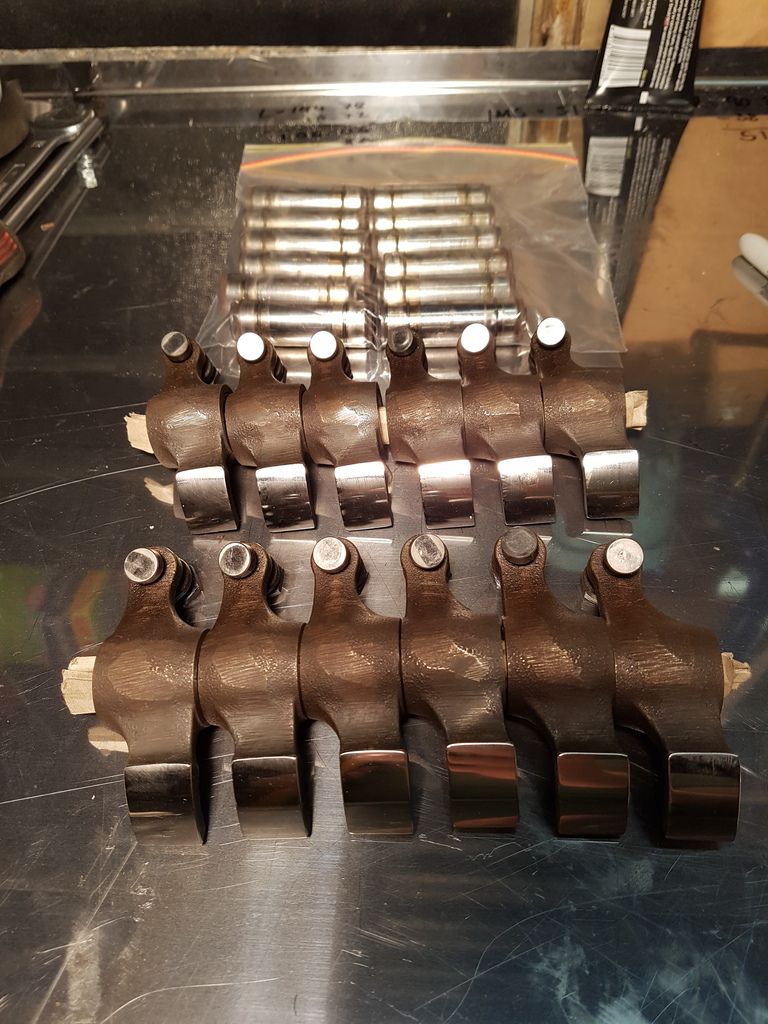
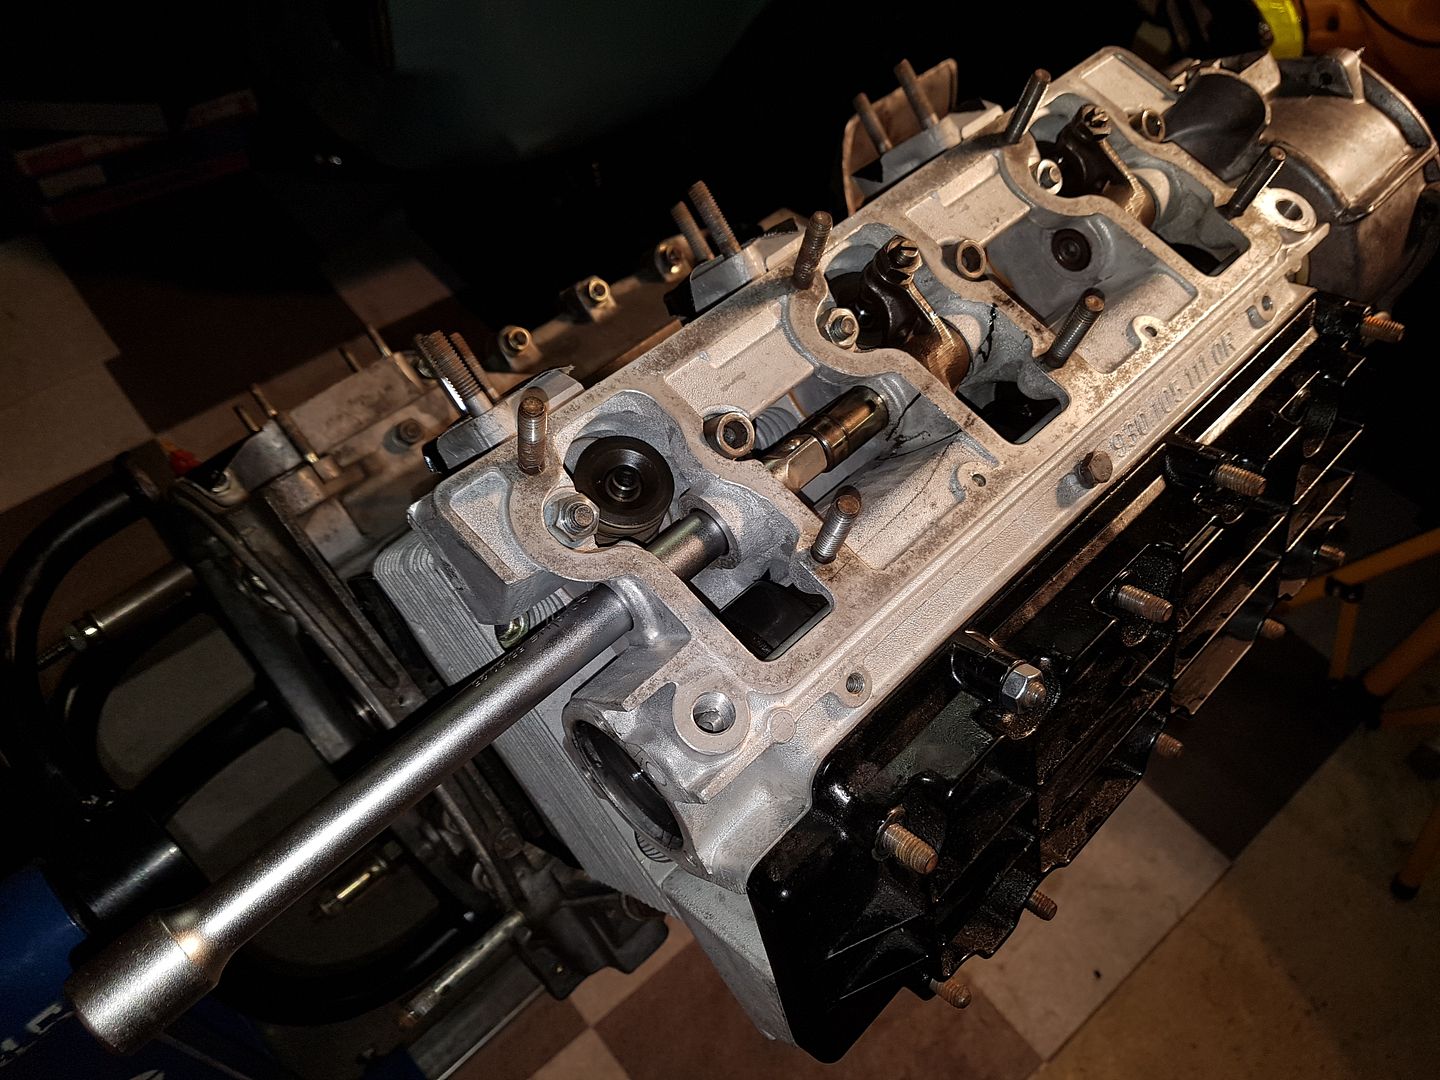
LHS cam assembly (no.1-3)

20170924_161806_zpszyzkh79x.jpg


RHS cam assembly (no.4-6)

20170924_161818_zpsiyh56cdq.jpg


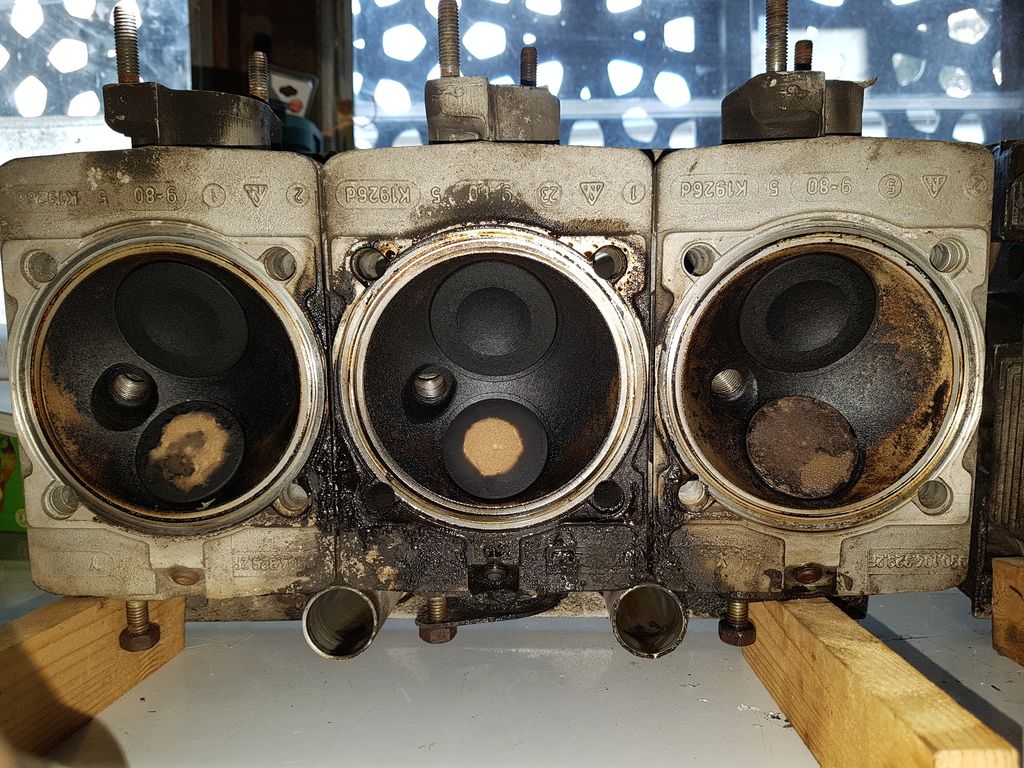
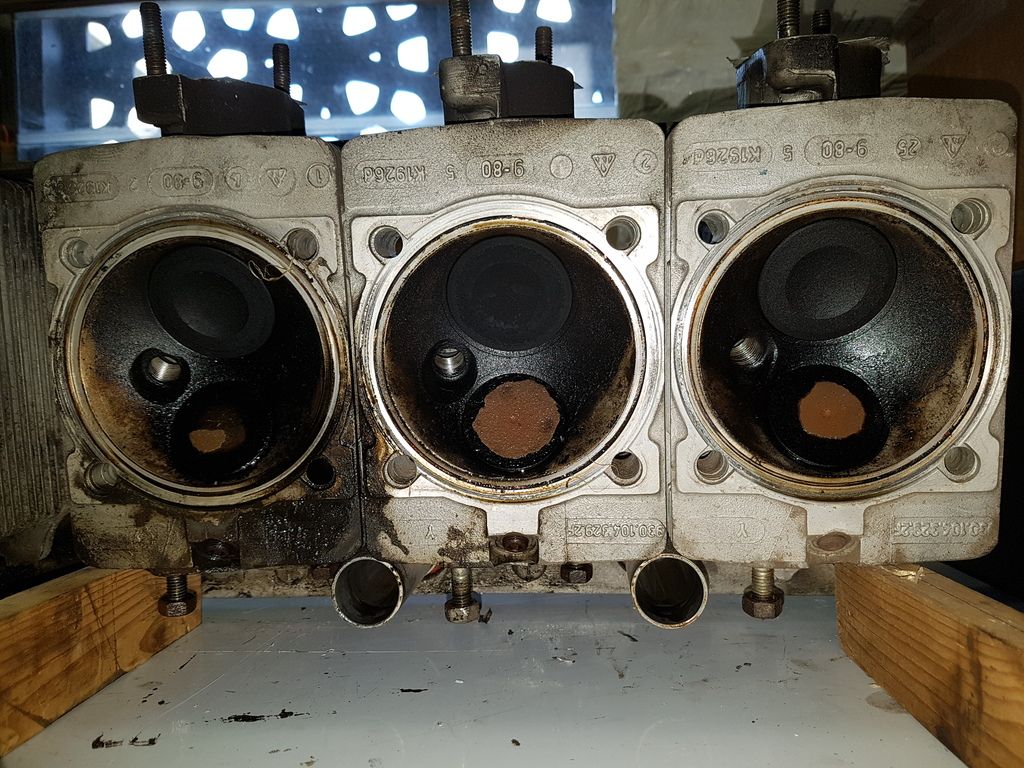
would you say this is excessive carbon buildup on the valves? The engine has had several known periods where is hasnt run for couple of years:

20170924_161923_001_zps7gnavqqo.jpg


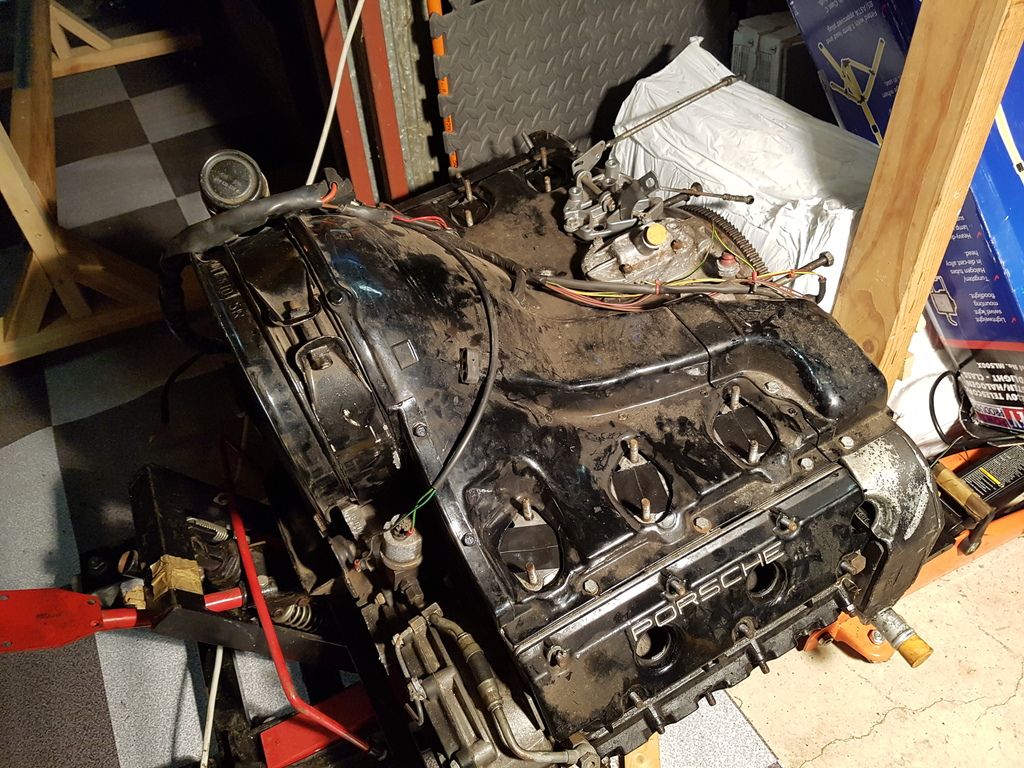
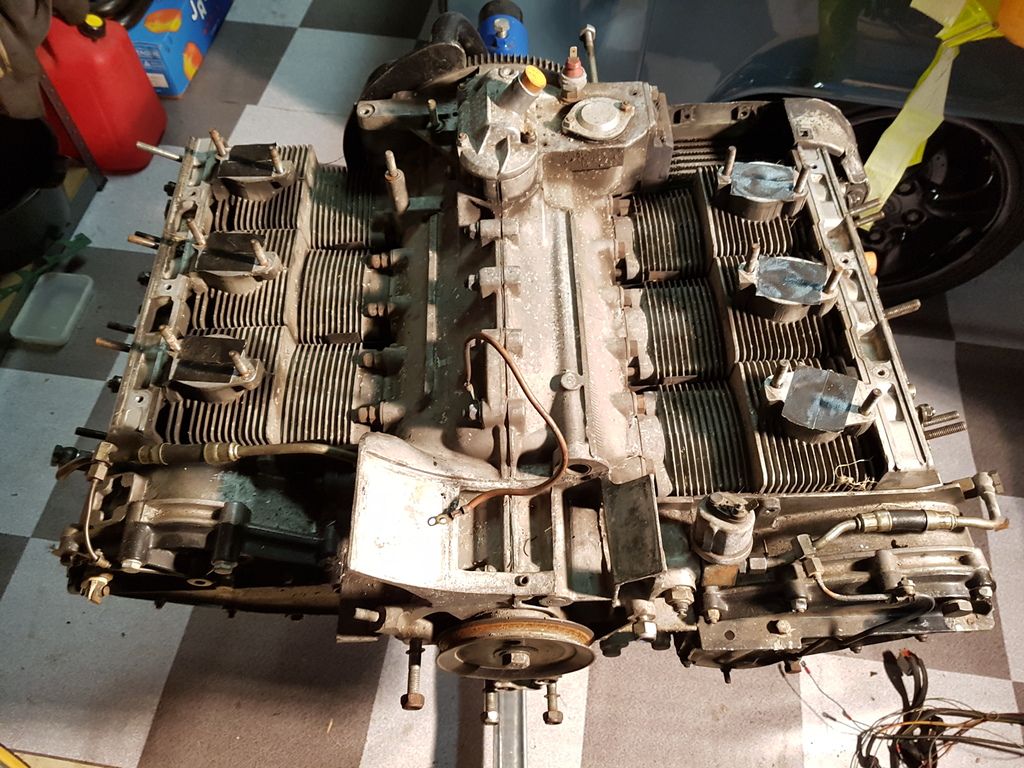
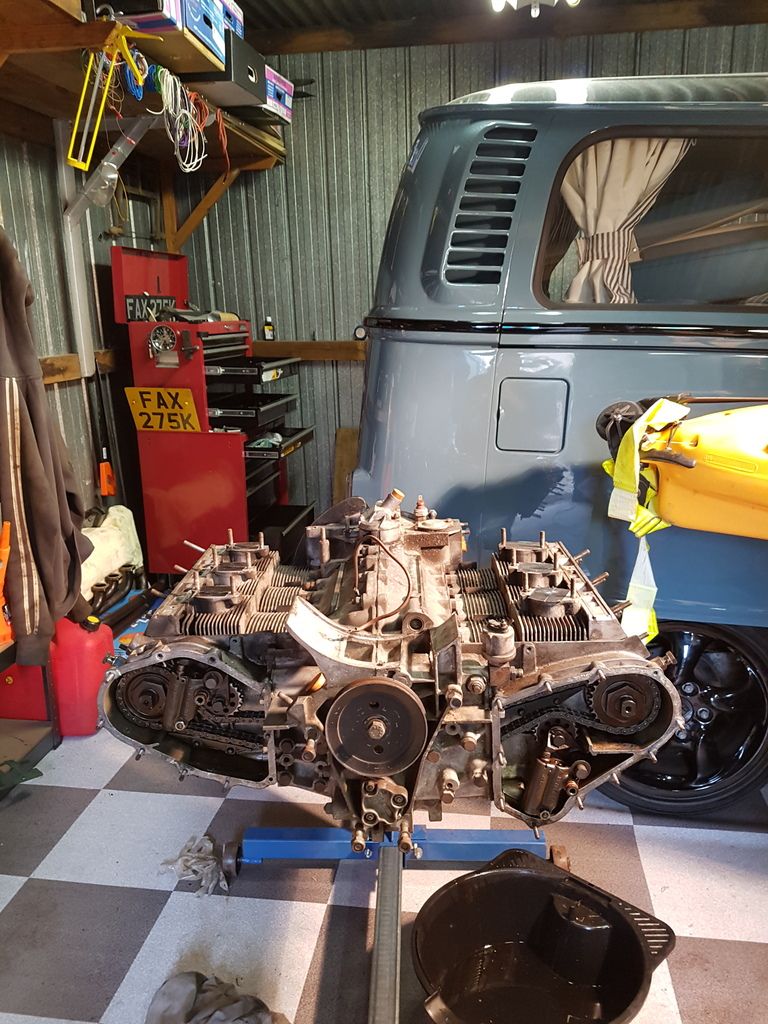
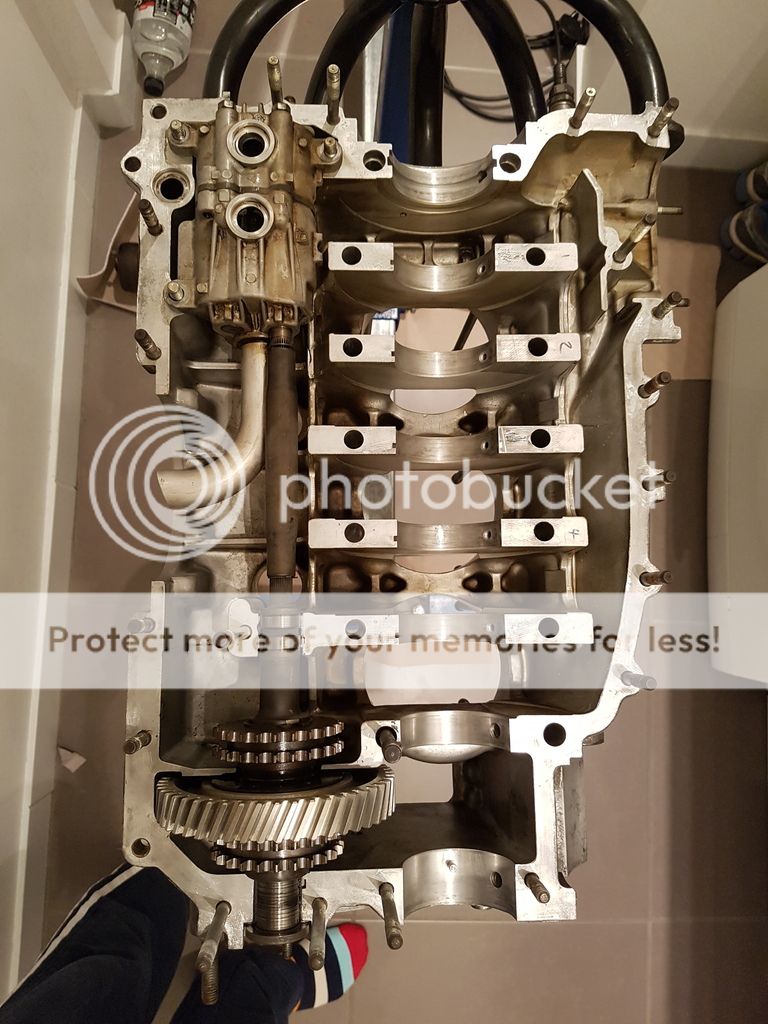
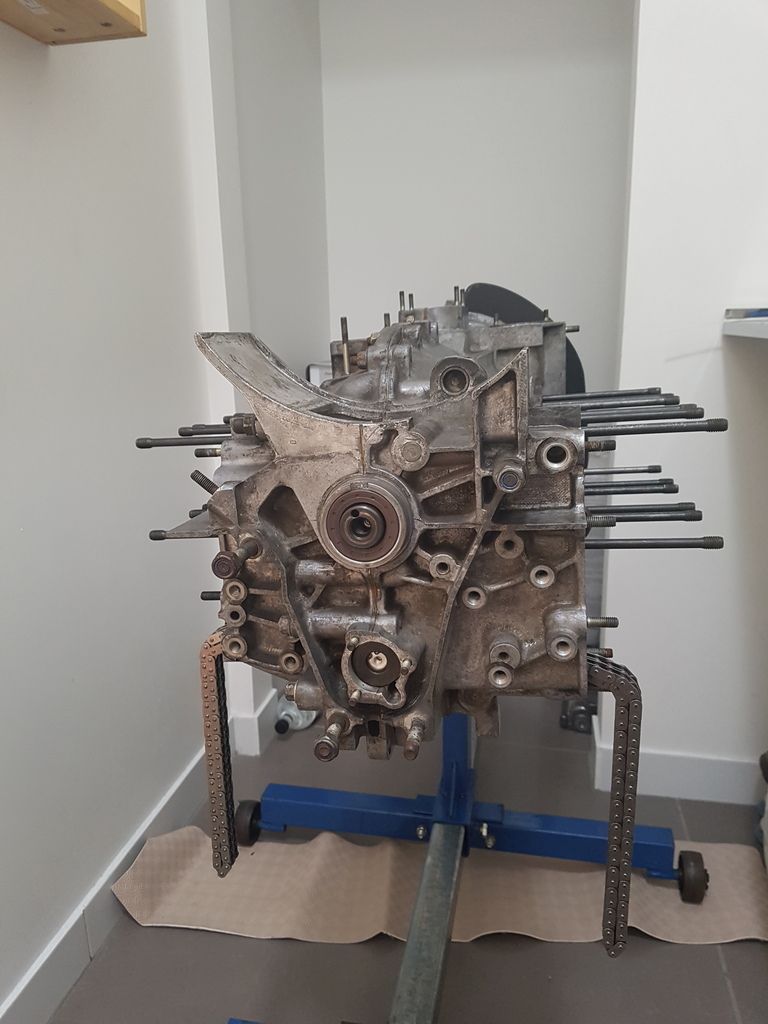
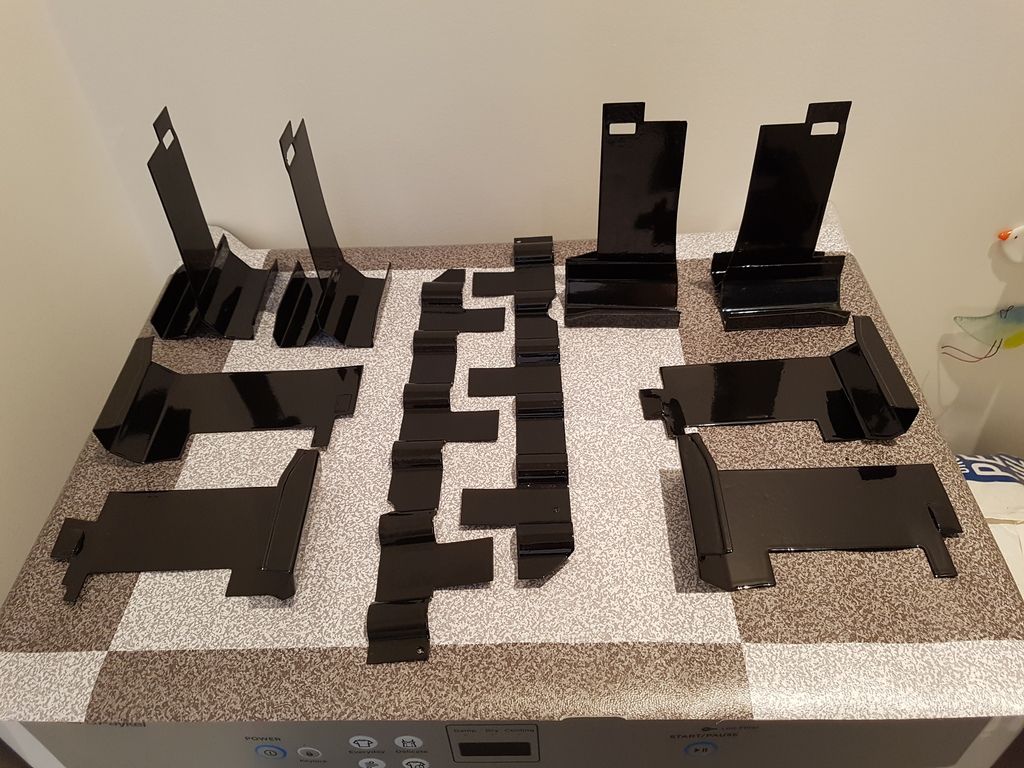
This is what I'm down to as of yesterday:

20170924_165303_zpsyhqy5uss.jpg


--------------------------

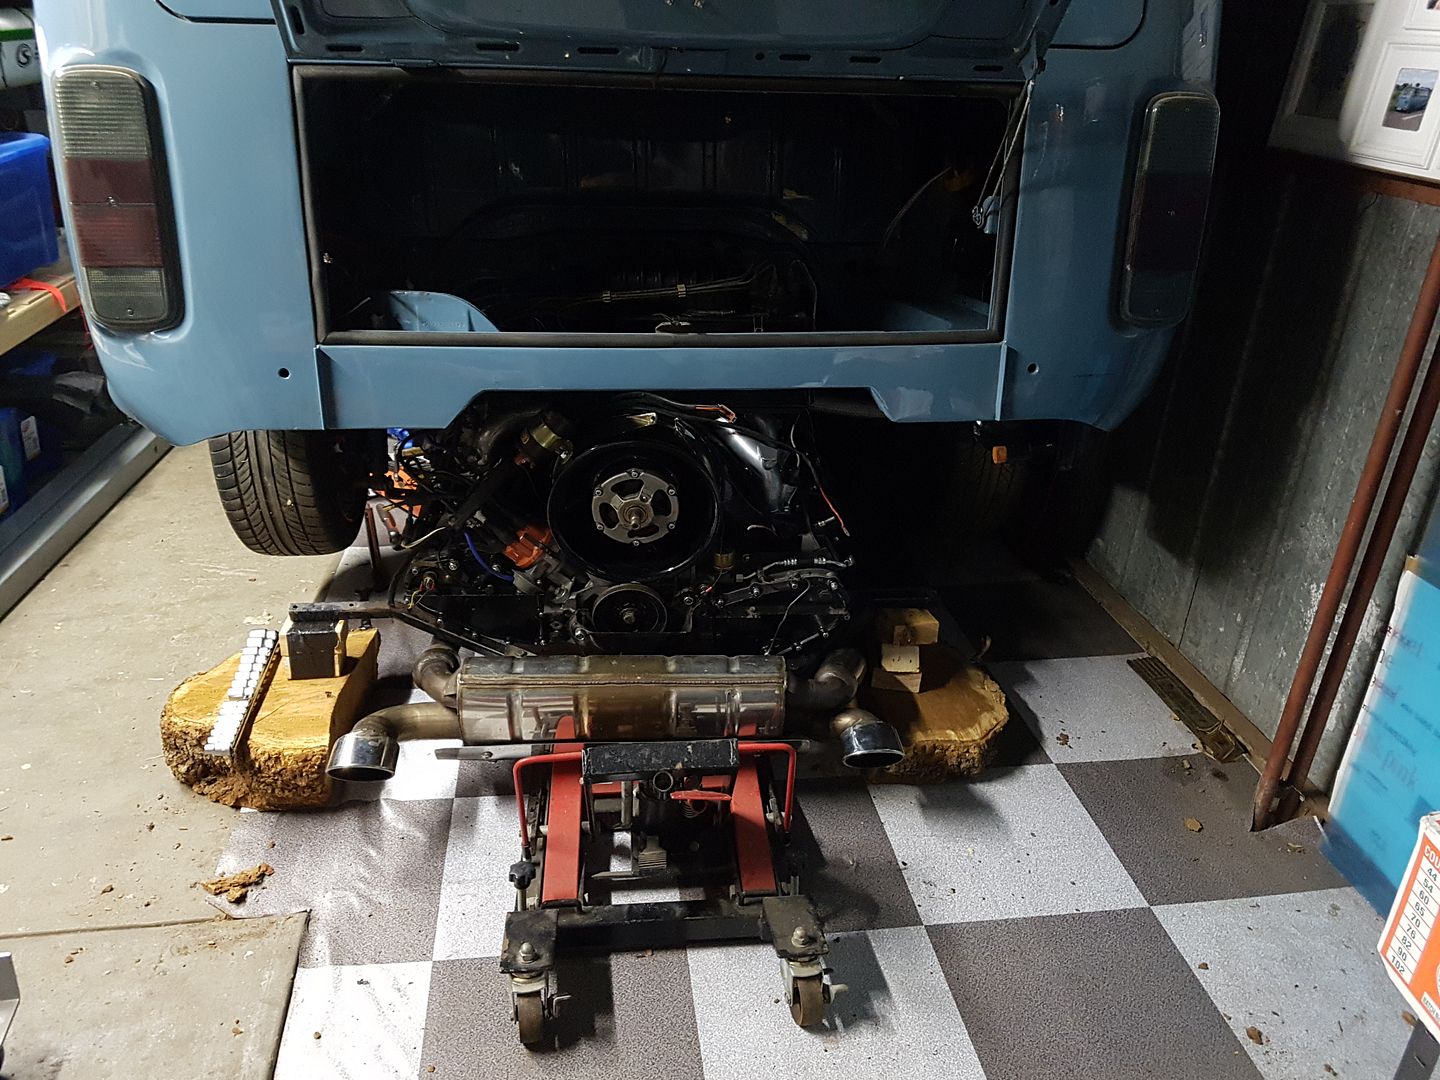
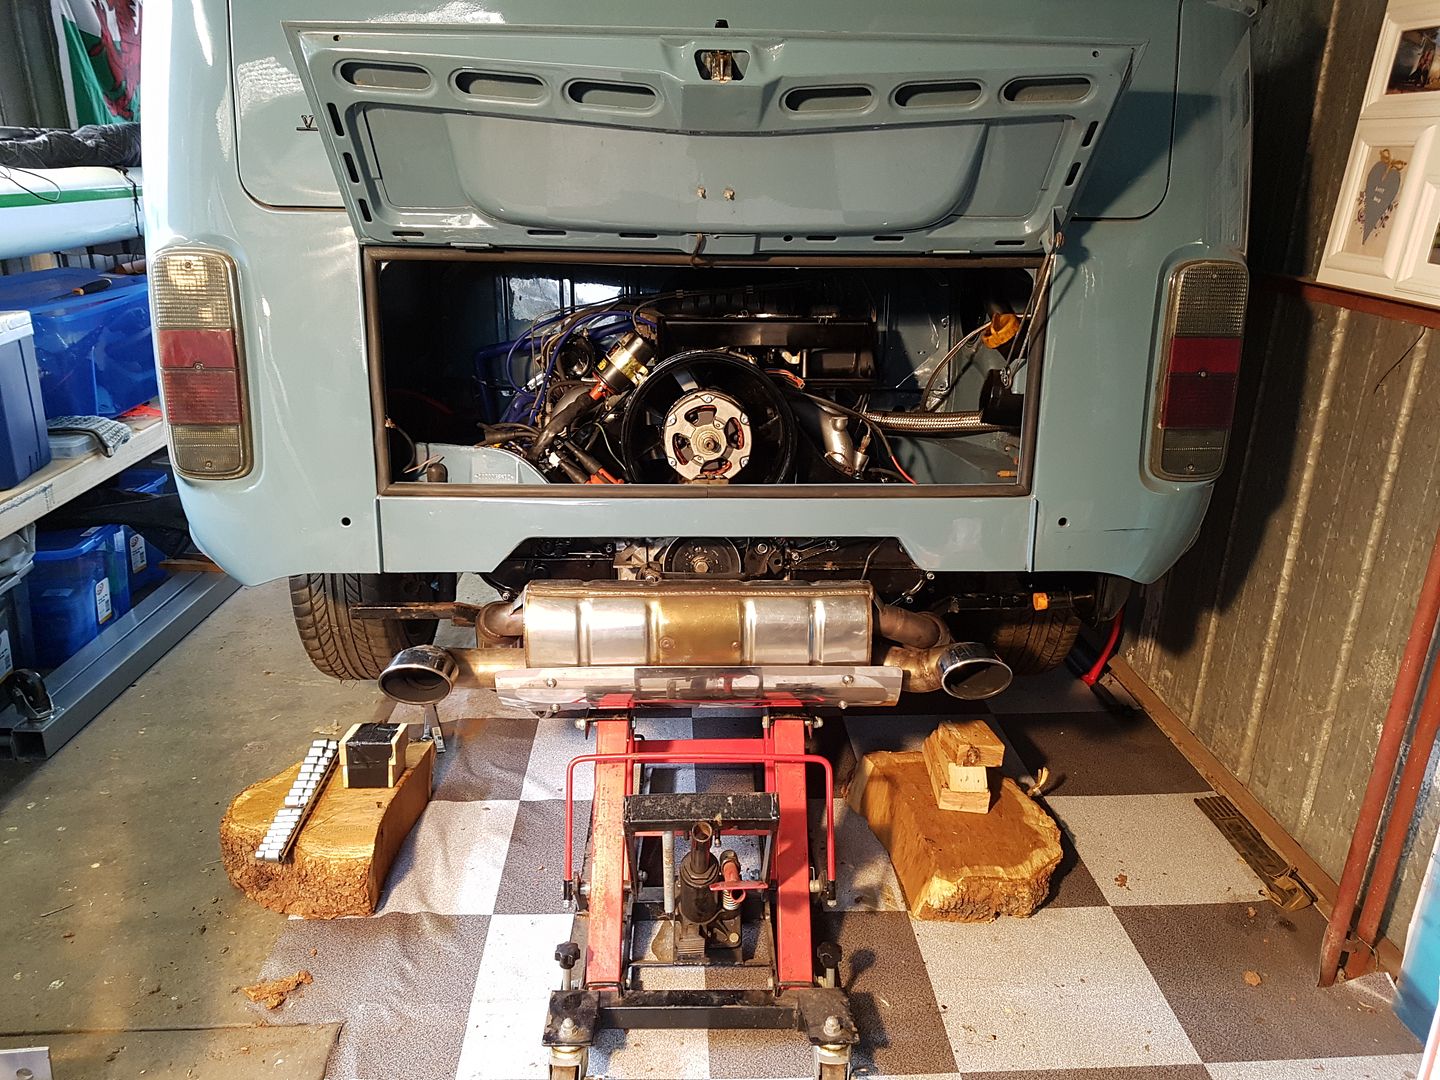
Well I have managed to get a couple more hours on the engine teardown this arvo. Been too busy this weekend to get any other time in the garage.

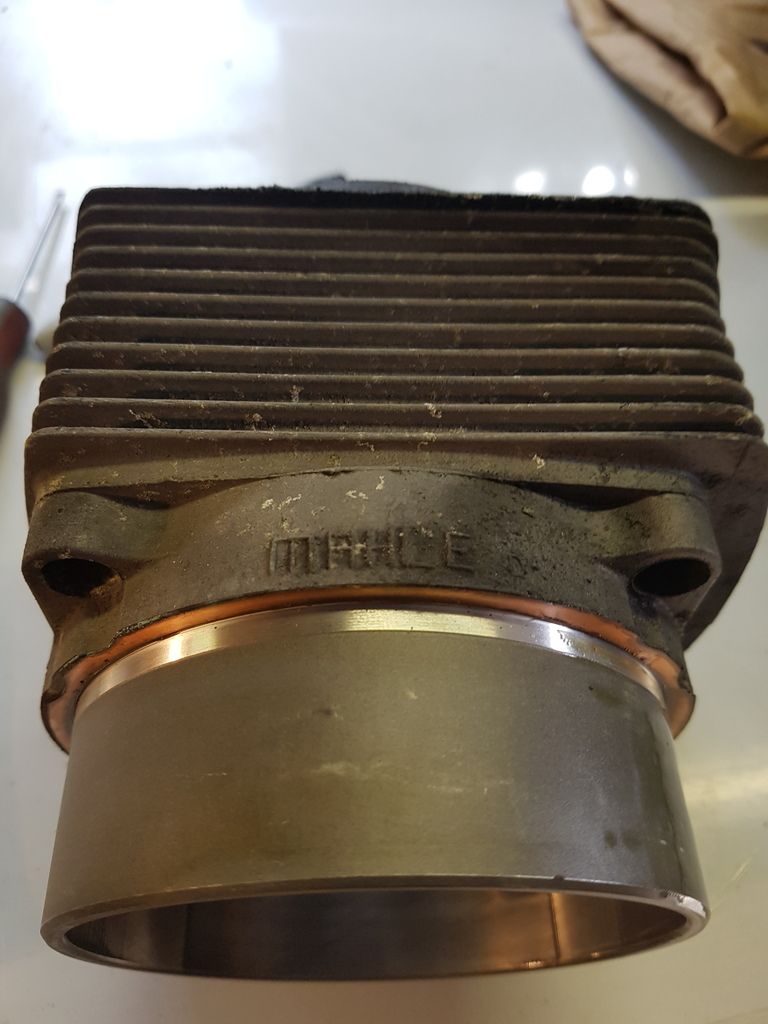
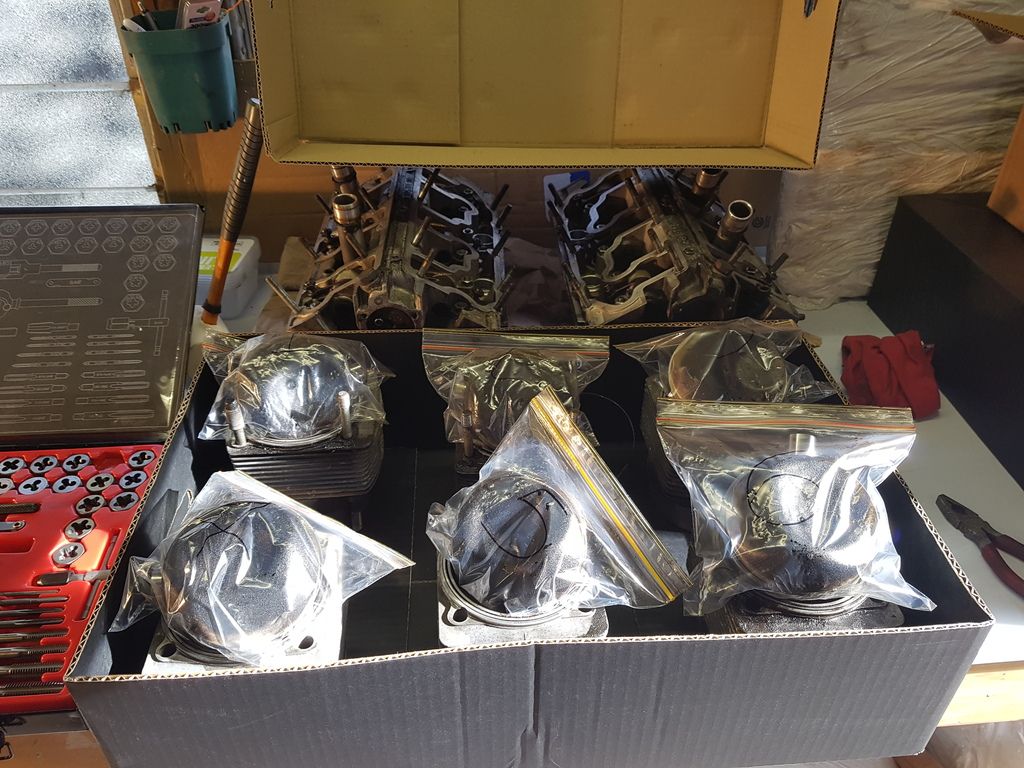
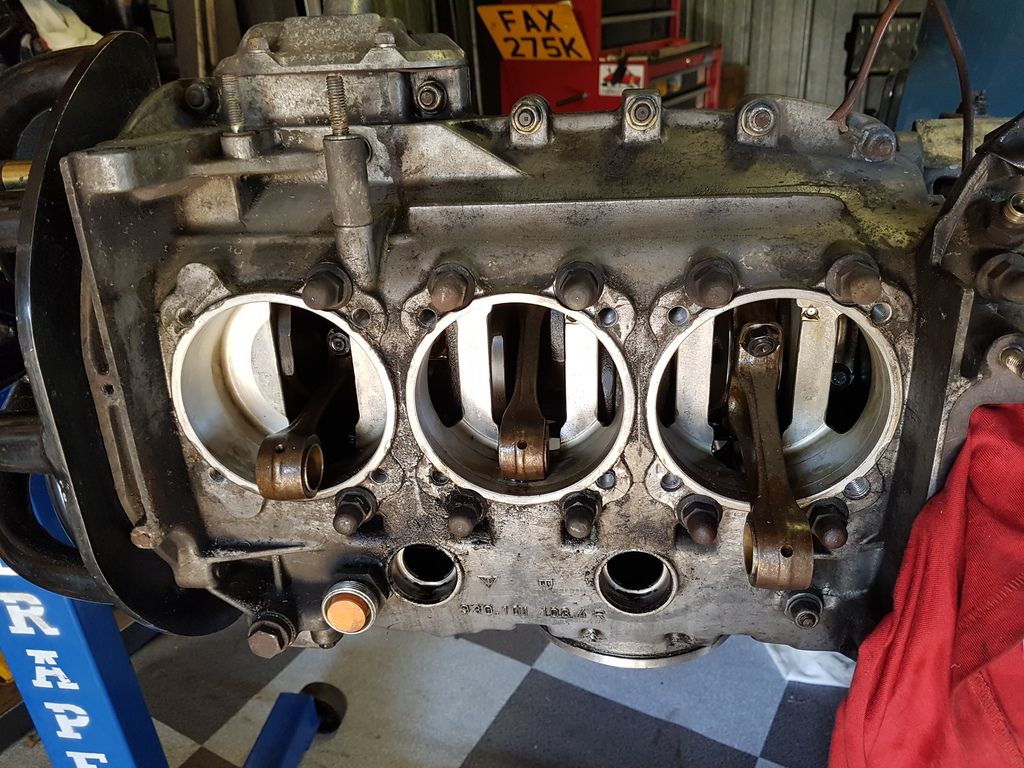
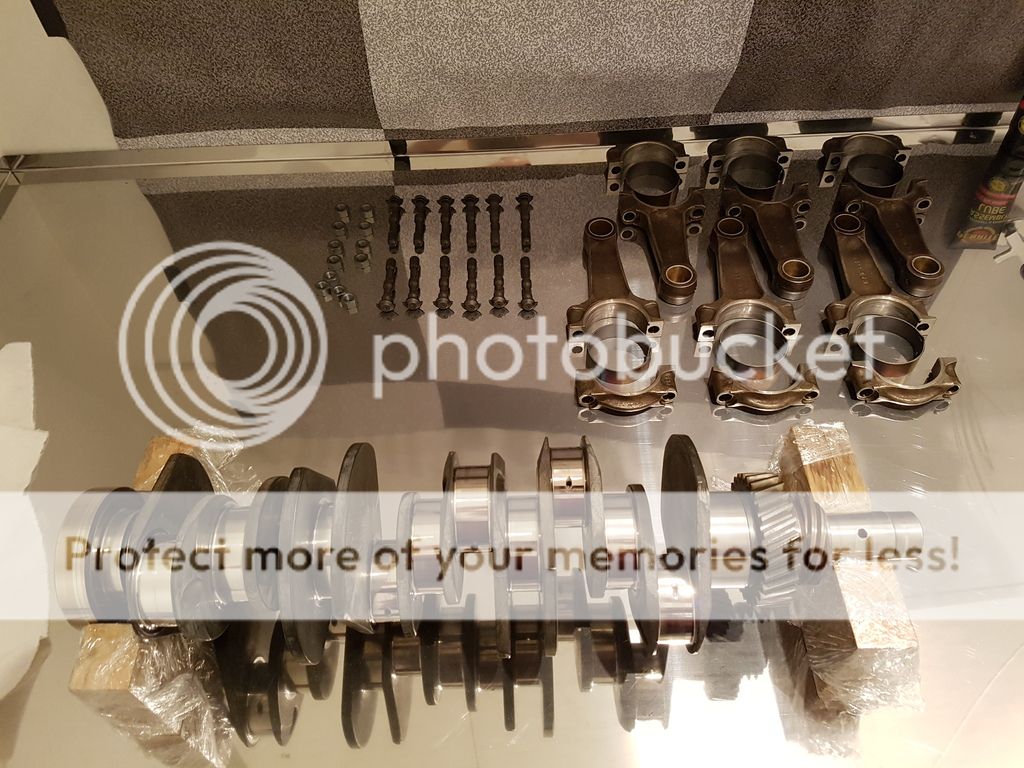
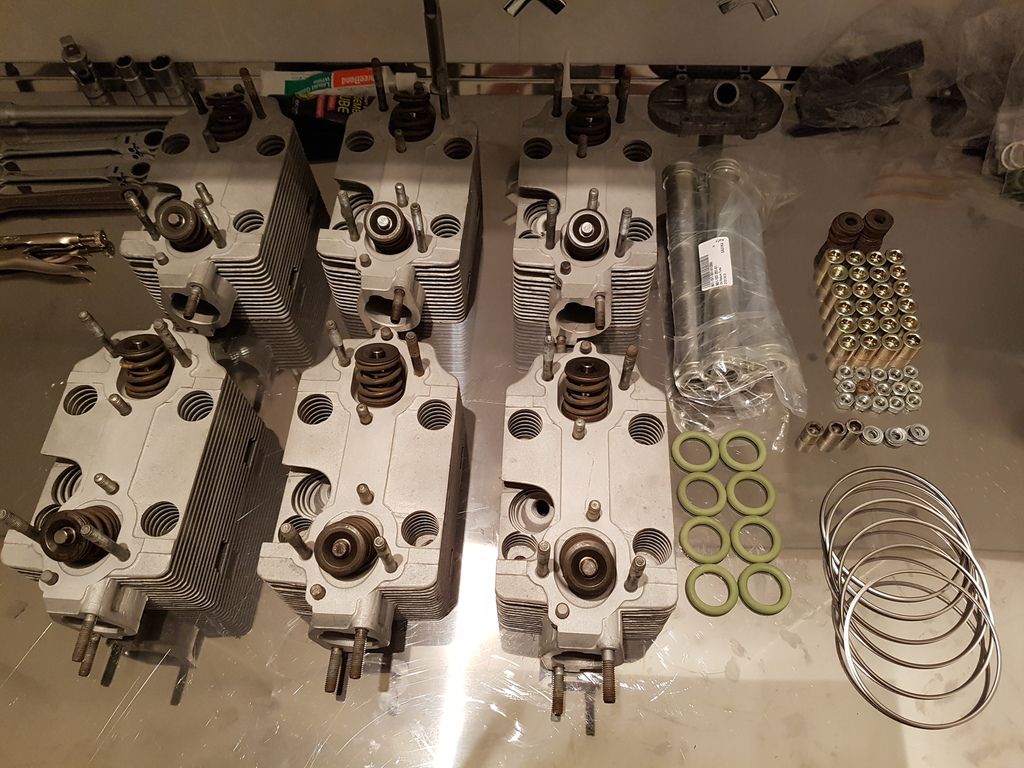
Managed to get all of the cylinders and pistons bagged and tagged. All cylinders and pistons had already been numbered, I had presumed by a PO's rebuild. Cylinders were all numbered correctly in the engine, but bizarrely no.4 and no.6 piston were the wrong way around. Initial inspection of the cylinders appear to look OK and I I have confirmed that I have NIKASIL cylinders. MAHLE!!!!

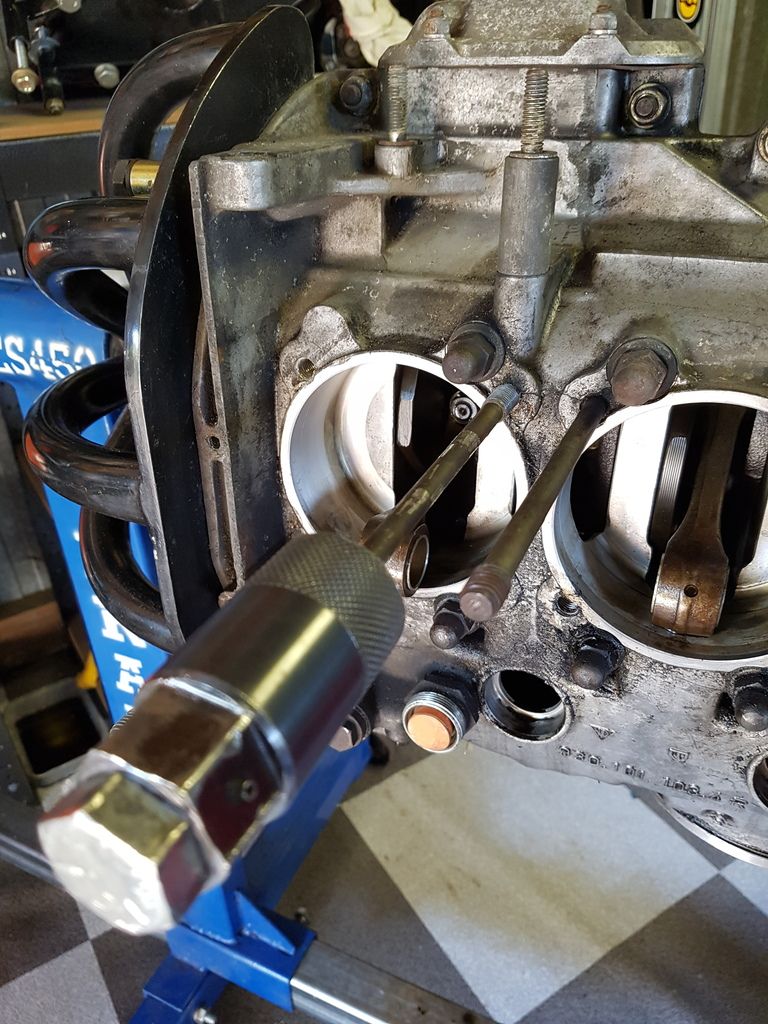
I got enough time to try and remove some of the headstuds, which is a bit of a NERVY process. I managed to remove 3 (exhaust side) so far.

20171001_151421_zpsshgdw2ha.jpg


20171001_170923_zpsjpgpkiwd.jpg


The low torque left on one of the no.2 exhaust studs and this blown seal will explain the evidence and recorded low compression on this cylinder:

20171001_151108_zpsovdtjby9.jpg


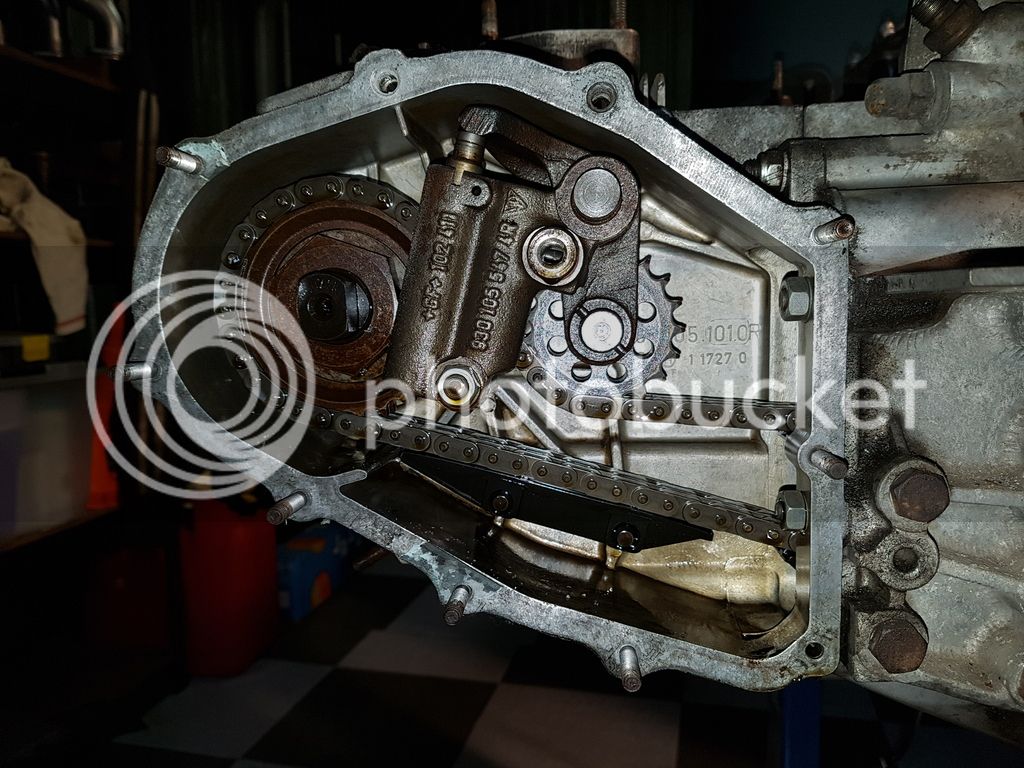
Found this too.... is it a casesaver or timecert. I think a casesaver???? I wasn't planning on splitting the case, but is my hand forced or can another insert be put back in on rebuild?

20171001_163034_zpsroct5qsg.jpg


------------------------

Well after a guy sent me his tool to borrow I really struggled to remove the studs, but managed all but 5 stubborn ones - 4 complete and the 1 snapped stud

I was very worried about buying a torch and then applying the heat for fear of damaging the engine and the inevitable expense as a result. I really do not know what I was worried about. I wish I bought the torch from the off and removed all of them with a bit of heat. So much easier. It wasn't easy still, but it was much easier than without any heat!

I read on a few places like PP about once you heated the case up then melting beeswax into onto the loctite thread helps to melt and I suppose stop the loctite resetting to some extent. Either than or just help to provide a little lubrication in removing.

Well, low and behold, I managed to remove all 5 studs this way. And bizarrely, the snapped stud was the easiest to remove with double vice grips.

TIP: I had some solder at hand as this has a melting point of 180-210deg (brand/composition) which was a good indicator for me to ensure that I didnt under/overheat. If the solder melted when I touched the stud with it then I wouldnt heat any more. As is turned out I didnt have to heat as much as this to remove.

20171029_155815_zpsrchjcdy1.jpg


20171029_163052_zpsjkjzoapf.jpg


20171031_204119_zpsasbldbza.jpg


SO RELIEVED that all studs are now out as I was getting a bit worried :)

 
So house buying and renovating over here in Melbourne took over my life the last 6months in addition to work and a few other commitments.

I had been chipping away at the rebuild but had a bit stint without doing anything on it. With a bit of new enthusiasm I'm determined to get this engine built and back in the bus....here are the pics that show the progress. any questions, feel free to ask

20180217_181337_zpsnwbfcnkq.jpg


20180224_152057_zpsalx7dpoa.jpg


20180417_205128_zpsbvdrscgl.jpg


20180418_213654_zpsexy1pzni.jpg


20180424_195929_zpsbcjdibyy.jpg


20180430_183254_zpsjxhsewcy.jpg


20180506_130825_zps2cw7dnyl.jpg


There's always one
20180507_144354_zpsf038hipk.jpg


20180507_191641_zpsa9pnncdg.jpg


20180519_092149_zpstlmmygpi.jpg


The struggle is real:
20180523_190509_zpslf7cib7j.jpg


Reunited

20180527_150643_zps0g3dnk9k.jpg


20180529_210209_zpsthhbjest.jpg


20180531_175849_zpshouhjngf.jpg


20180605_185457_zps9tmycdtn.jpg


20180607_194159_zps9z8dym1c.jpg


20190330_175526_zpskohqc6mc.jpg


As of last night.
20190402_190314_zpsgjo7ja6f.jpg
 
Welcome back and glad the move is going good:)
The work on the engine looks epic so glad it is now coming together!
 
a bit more action over the past few days:

my new air deflector that sits on the back of the alternator/fan housing arrived so got crack on. Fan housing fitted, new injector inserts that are fitted in the manifolds were pressed in and the injection system mounted back onto the engine....I'm second guessing whether this whole thing ever fitted in the engine bay haha:

20190409_195019_zpstg2az6mp.jpg


Inserts
20190410_195151_zpst2en1eqk.jpg


also fitted a "pop-off valve" The 911SC engine had a tendancy to backfire and apparently its been known to crack the airbox and in some extreme cases, blow them up haha. As a NLA part, I thought it was worth the 30bucks.
20190410_215009_zpspmxf8kan.jpg


I'm feeling positive about the electrickery and that I remember where the homemade/custom Porsche/VW engine harness fits
20190411_193525_zpsq3uhsjkv.jpg
 
So before I could fit the engine, I dug out the new fuel sender I had purchased over a year ago for the red9design aluminium fuel

I am running a 911 fuel gauge and my old fuel tank was a late bay fuel injection jobby. The late bay sender resistance range is in the opposite direction to the early bay (and the porsche 911)

The late bay sender has high resistance when full and low resistance when empty.
the early bay sender has low resistance when full and high resistance when empty.

So this is the reason I purchased a new sender. Although the earlybay sender was in the correct direction, the resistance range between the porsche and the earlybay was slightly different so thought I would bench test it to see what I got.

To my surpirse, I didnt get anything! even more to my surprise, when I took the outer cylinder off the sender I discovered the resistance wire was snapped about 20mm from the connection. I'm happy to stay neutral on whether I had broken this or whether it was defective from new, but really have the time to start the conversation with vwheritage about whether they would honour a replacement, given how long it was since i purchased. Also, because it was so close to the connection anyway, I pulled a thread of copper from a 0.5mm wire and re-soldered it.

20190426_122020_zpsb1hbwjhf.jpg


For those purchasing considering the red9design fuel tank, I just want to make you aware of the following:
1. The bolt holes for the fuel sender are not threaded, so you will have to tap these yourself - or maybe ask red9design whether they would do this for you.
2. you can no longer make use of fuel tank straps to secure the tank in place. When I raised this with red9design they told me they just pack it with high density foam
3. The tank does not have any means to maintain atmospheric! When I raised this with red9design they told me they just drill a hole in the filler pipe just behind the fuel cap :roll:

For a fuel tank that commands a fair price I was surprised by some of this! But there you go!

Anyways, I tested the fuel sender sender and my gauge was showing full just beofre the float was at the top, and empty near empty. Chuffed!

I fitted the engine, refitted the filler hoses and could start with getting the engine back in.

Engine off the engine stand
20190427_152750_zpstxsnyaqe.jpg


Easy as she goes
20190427_183316_zpstgrzexxl.jpg


Up she goes
20190428_094544_zpse1ux0op6.jpg


And that's the "4 bolts" people talk about
20190428_174559_zpsiwiozdly.jpg
 
Phew - looks a tight fit!!
Can't believe they sell the tank without any of the mods already done you mentioned - very shoddy :(
 
gninnam said:
Phew - looks a tight fit!!
Can't believe they sell the tank without any of the mods already done you mentioned - very shoddy :(

anyone know who sells the breather pipe connecting from the filler neck to the tank? the 14-16mm breather pipe? couldn't find anyone who sells it... Ratwell has a pic of the pipe in question (smaller of the two, not the filler)...
https://www.ratwell.com/dotmac/Pictures/Parts72Bus2/02-OtherEnd.jpg

I decided to measure the filler neck side and ordered a length of fuel friendly hose. It arrived last night so I decided to fit it...
It turns out, the red9 fuel tank side breather size is different to the bloody filler side? unless there are different sizes of this breather connection or there are differences between USA buses and UK??? both red9 and I have 1972 crossovers. Another frustration to add to the list from red9 fuel tank.

Either way, I managed to squeeze the breather on and clipped it up.

Engine bolted in
Clutch cable connected
Accelerator cable connected
Oil hoses connected

getting closer!
 
Well it finally happened over the weekend. The first startup after the engine rebuild:

https://youtu.be/16DGxwe-Ce8

I have an air leak to sort, that is causing it to run lean and to backfire a little. But so pleased it fired up once oil pressure was up and fuel got through to the injectors with a decent amount of pressure.
 
HELL yeah!!!

Thats so good, watching to clip I was thinking hurry up fuel pressure. it sounds good. keen to see it running after you sort your few bits out.
almost there mate. you must be so keen to have it driving soon

Keep up the good work!!
 

Latest posts

Top