1968 RHD Rot Box

Early Bay Forum

Help Support Early Bay Forum:

This site may earn a commission from merchant affiliate links, including eBay, Amazon, and others.
managed to find some time to do some bits today....
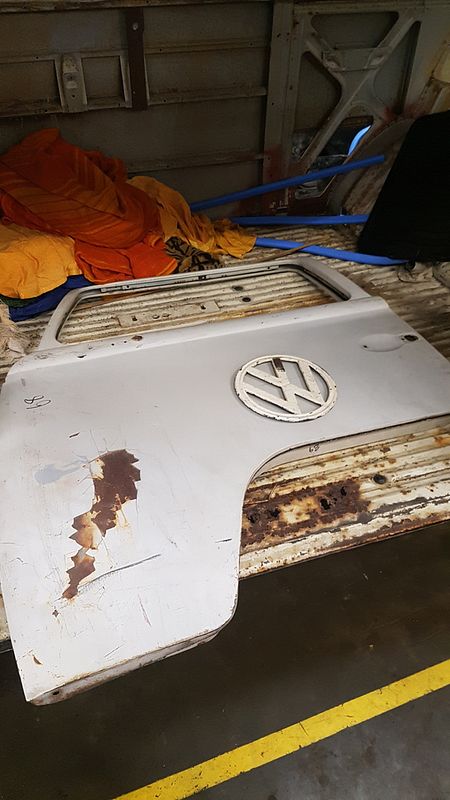
first up i got a door and badge :)


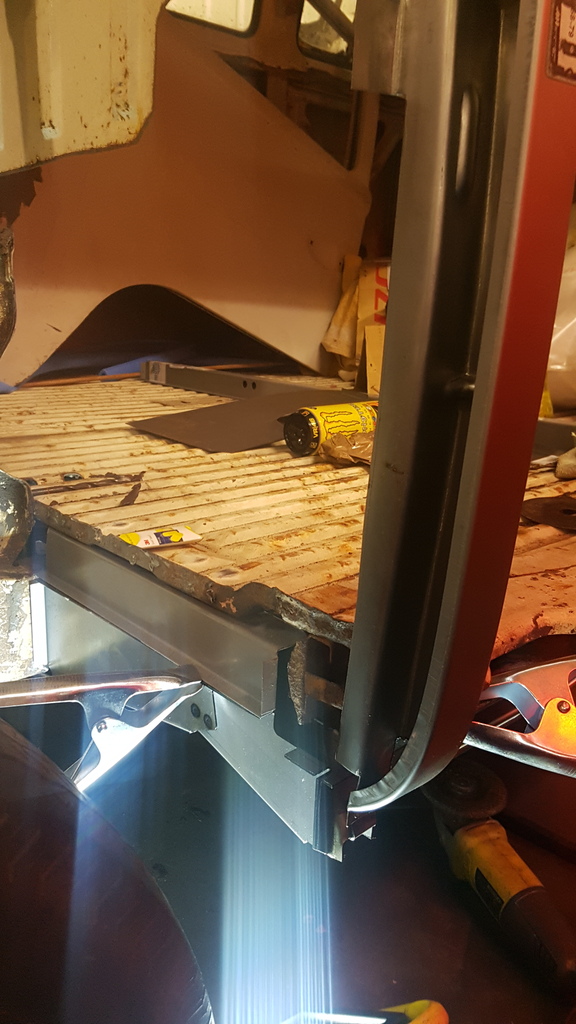
but more importantly i cracked on with some actual repairs!


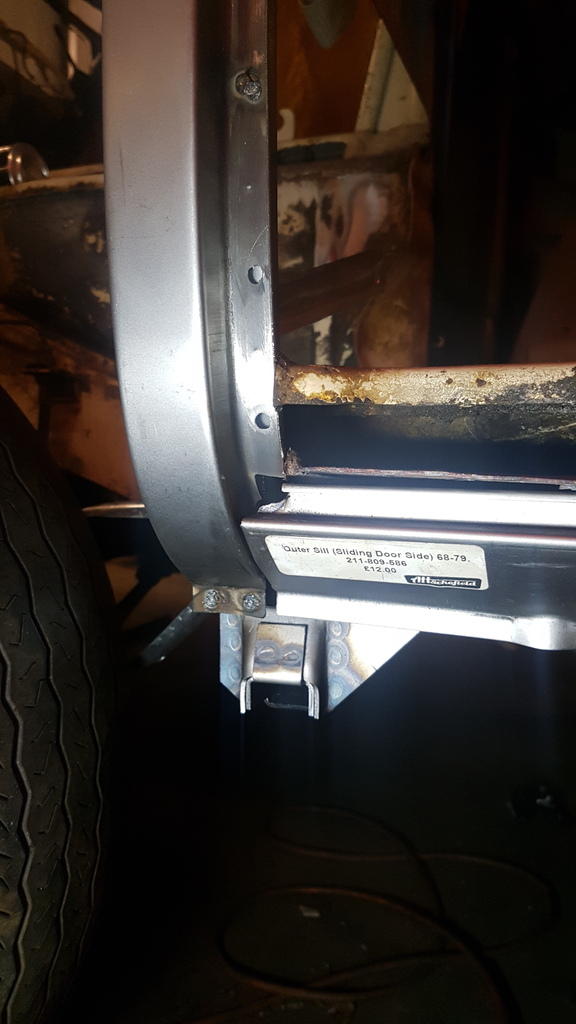
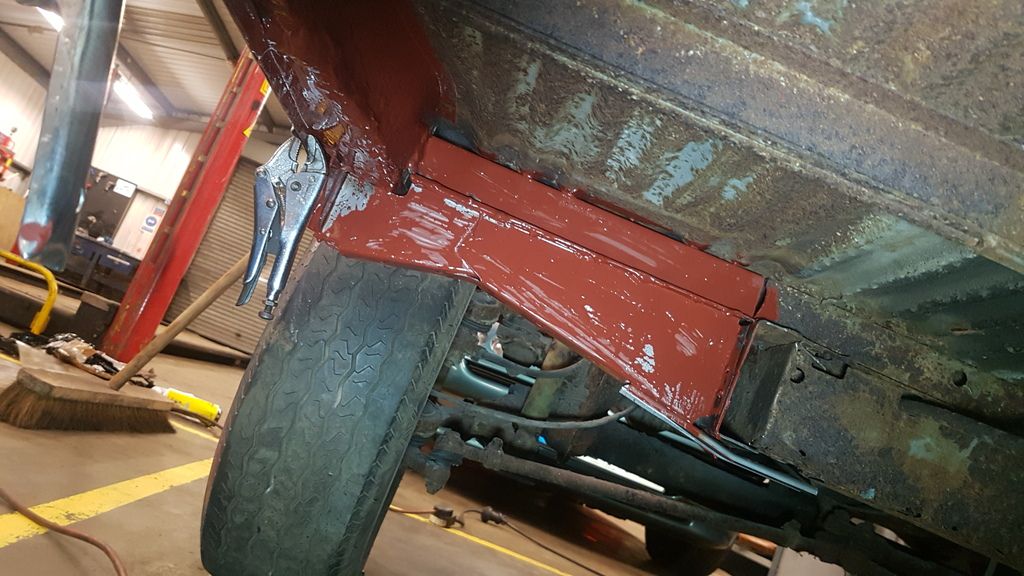
90% of the inner cill was solid so made a repair patch which now i kinda regret because obviously it dusnt look as good as all the new panels, but saved myself almost £40 and noone will see it i guess..

everything else i feel went alright considering im way out my depth :lol: :lol:
lining the b pillar and cill was the hardest part...
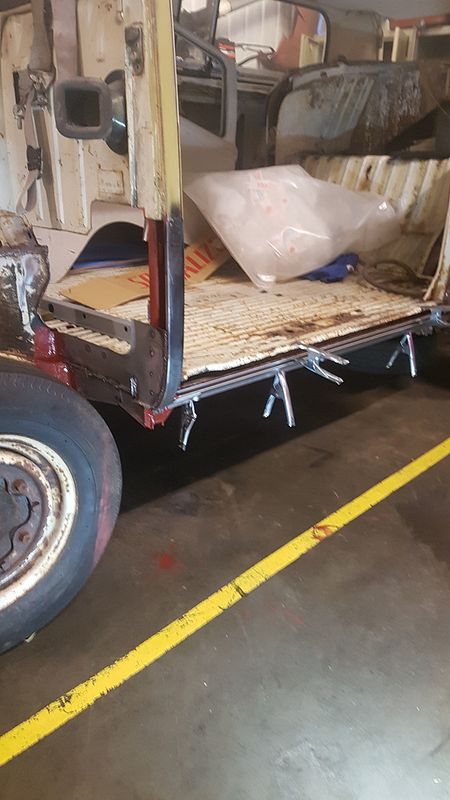
all i need to do is sort the tophat where ive just cut a lengh off and find the part of the chassis rail thats missing
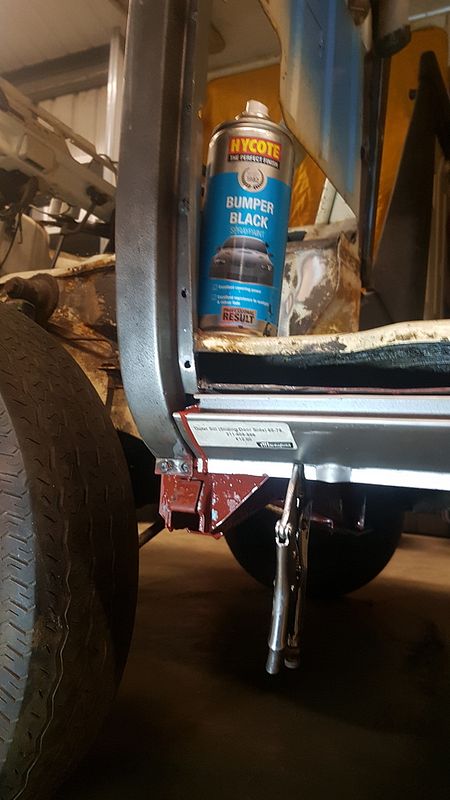
could do with some advice though on finishing off the underside repairs, ive sealed and painted what i did without thinking, once its all done im going to go over the lot in raptor again but was i right to seal or should i have just left it?
 
It doesn't look like the paint is taking to well, personally I'd use a etch primer. Also prime the back of your panels to stop rust in the future, use a weld through primer where needed. I would also fit up the sliding door to check door gaps and panel alignment before fully welding.
 
so get some weld through on the whole lot before welding then etch prime the lot after.. the pillar and cill is just tacked atm so when ive got help i can offer up the door
 
Just use the weld through primer on the rears , etch on the outside after welding.
 
Following this thread to give a fellow RHD '68 owner some support, I know how bad they are! :roll: :party0021:
 
** A clenching update**

the other day me and my buddy decided i should find my balls and replace the rotten A pillars on the bus.. i had all the stuff to do it but was understandably bricking myself.
anyway after an hour planning and calming my nerves in the pub outside we just went for it :lol:

getting the old front panel off was easy, literally fell apart, all we had to do was drill out the spot welds joining the floor and lower panel. Removing the nice dry front end was a whole different story, took about 2 hours in all getting the spot welds off and removing the welds to the chassis.
i decided to keep as much of the lower corner as possible so cut into the step, which i know alot of people wudnt of done but i can still use the rest and join them back together.


i used what i could to support the roof but in fairness it hasnt been supported for years as the pillars had no integrity what so ever.
next time im there ive got the front chassis to repair then i can weld the new panel back.. hopefully should all go well :shock: :shock:
 
went down to the club over my lunch today to check over the caddy and cudnt resist doing a little bit to the van..
nothing life changing...
dug out the rot above the sliding door, wasnt as bad as i thought, i assumed ild have to get another chop and throw tonnes of money at it but it looks to me like another panel of sorts is spot welded to the roof and top sliding part to bridge the gap? anyone know if theres a repair panel for this any where? or is it a case of home made goodness?


and heres a picture of the caddy just because..


another thing i did do is offer up the new front end, however the passenger side a pillar i think is bent, i could get the buldge in the door to line up with the buldge in the front panel and b pillar but the a pillar stopped it from sitting straight :? :? i dont really know how to approach it really, can i just chop the entire top half of the a pillar off? (since im getting a cut as its full of rot) or is there something bad that could be the reason.. please send help.
 
fair play for taking it on mate 8) i restored a bay panel that was the same condition just because evey body said it was to far gone , soon to featured in volksworld
keep up the good work :sign0004:


http://www.nosvw.webs.com" onclick="window.open(this.href);return false;
 
Good on you! Another RHD to be saved :D

My '72 wasn't a lot worse, cargo floor and outriggers were worse than yours. Back-end was better, but still worth doing.

Well done for getting a badge early on in the process, I waited until the end and had a 'mare of a job to find one.

Best of British luck with the job...
 
**Update Time!**

been a while and managed to bag an entire day to work on the bus! Work is mental so its getting put to the side, plus im going to the falklands next year for a few months so its only going to get worse :(

got the front end pretty much on,well its tacked it in place while i sort the doors and front arches out, but it aint going anywhere!
was an absolute nightmare tbh made even worse by the fact my a pillars are rotted to hell.


Ive managed to get the passenger door pretty much bang on, with the help of a .2mm shim in the hinge which is quite annoying but i couldn't get it to match as well as i did without it it just kept throwing itself out by miles. The gap was a pain in the tits especially with this repo arch :shock: just need a little more heating and fettling around the corner 8)


Fitted the dash too for some reason, was sick of tripping over the damn thing.
I wanted to make sure the b pillar was 100% before committing anymore to the passenger side front end like getting the seat bucket in place and finishing off the arch would be pretty hard without it so once the door was hanging and the front end tacked in place i filled the gap, still needs finishing but it was a long ass day.
 
Great effort chap, you certainly aren't wasting any time with this!

Falklands? Always been on my list of obscure places I'm almost certainly never going to get to, but would be fascinated to see...
 
i just wish i could spend a solid week on it, i could get so much more done haha...
yeah the falklands, ive never been before so the boss thought it would be 'beneficial'.. apparently theres one tree and some penguins :lol: :lol:
 
Been a while since i took any pics for an update, so here goes..

got the cab floor almost done, well welded the panel in anyway. Just need to grind down and prime them up..


had to take the steering box out too, was going to send it off for refurb but seems bang on, the bearings are perfect and the worm looked in great shape, so filled it with oil and primed it ready for paint.


waiting for a new door to arrive so i can sort the drivers side arch out, its just tacked in atm.. so while i wait i decided to make a start on the nose. wish i put my hand in my pocket and got an original front end, i just used the panels that came with the bus and there crap, so much fettling to get right and still dont think there 100%, but anyway heres how far i got last night.


bottom panel was a right pig, tacked and untacked about 3 times before it sat right, its that thin the second the heat touches it its warped all over. indicator blanks wernt to bad but i can see me spending ALOT of time on this panel :(
 
@yorkie bar..... i looked through your front panel, looked perfect once you did it! ive managed to get the indicator blanks and bottom panel fully on just need to do the front bulge. think its okay to sort that off the van? i dont want it to warp while im welding a new bit in :?

The evening i had spare for the van got taken up by date night this week :shock:
did manage to drag her to the unit to play with her favourite little truck 8) did manage to sneak test my new drivers door on though, fitted pretty well, now i can sort the arch out and fit that properly (Y)


Front end is in hold until i get some steel to remove the bulge and the indicator mounts.. so i did some more fettling to get the doors to fit and close almost bang on.. used some heat and a dolly to mould the arches a bit more for the door gaps...


put a line of seam sealer between the b pillar and arch to get some body lines back, seemed to go okay hopefully wont crack and fall out like body filler :cry:

shultz the inner front to neaten it up a bit..


then started to look at the passenger b pillar and cill :shock:


not looking to that one bit.
Test fitted the front bumper, to give me some inspiration :lol:
 

Latest posts

Top