1970 devon long winded project :)

Early Bay Forum

Help Support Early Bay Forum:

This site may earn a commission from merchant affiliate links, including eBay, Amazon, and others.

jacks906

Well-known member
Joined
Nov 15, 2009
Messages
567
Reaction score
0
Location
northwich, cheshire
well thought i'd start a thread after someone asking me to :lol: plus always wanted to but dreaded all the typing :lol: but here goes

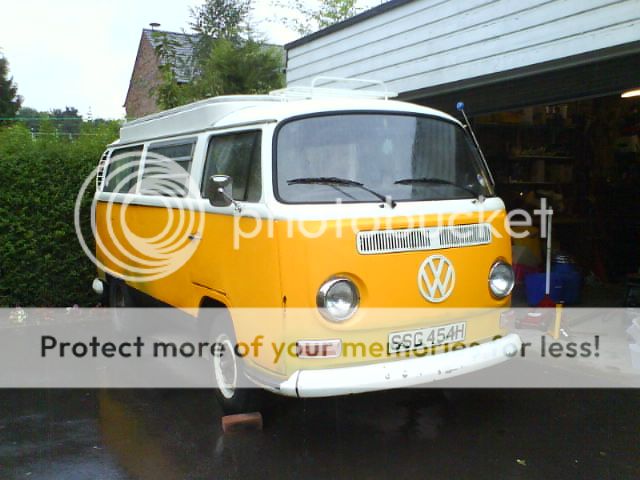
here is my 1970 bay when i got it just over a year ago after seeing it on eBay after looking for a few months saw wanted and bought :mrgreen:

DSC00301.jpg


plan with it was to get it on the road asap (bought with clutch broken!!) so could get it to vanfest 2009, as it was the closest show to when i bought it, so gave me a reason and motivation to get it on the road :)

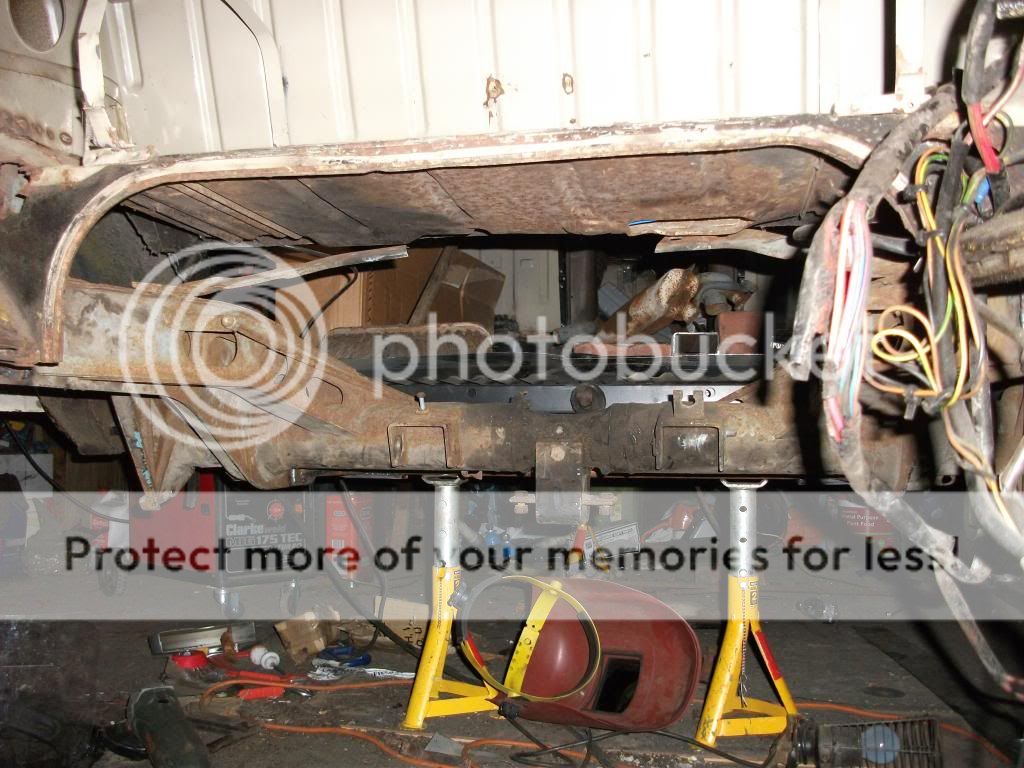
after getting the van back to my house the plan was to check to see what was going on, chocked the wheels got a mate to sit in it with brakes on and engage first while i had a look at what was going on underneath the back end noticed one of the drive shaft spinning so new it wasn't clutch (but too late had already ordered one). took the hub cap off the O/S rear to see the nut spinning, so took the nut off which was only finger tight and all the splines for the drum were gone :shock: anyway tried to order a drum no luck everyone out of stock with an unknown back order, so quick phone to F.B.I wednesday before vanfest and the sorted me one out next day after telling them the situation, was proper chuffed. as they said came next day popped it on and clutch was adjusted wellllllllll out so was constantly slipping :( so for peace of mind friday night engine was out. knowing i was going to vanfest on saturday one clutch out one clutch in half eleven test drive an all good :mrgreen:

Anyway it made it to vanfest :mrgreen: , to all of me mates surprise and amusement my first proper drive in the van was just over 100miles each way, they all thought i was mad but armed with me tool kit i knew i could make it

14261_313286065152_767935152_9636059_8012349_n.jpg


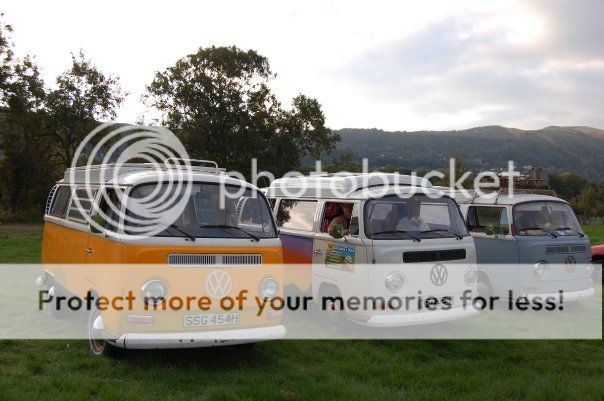
made it there and back no problems so was proper chuffed with it :mrgreen:
 
the plan with the van is to never miss a season :shock: so this is were the project mission starts :)

after vanfest went to bus freeze and a few weekends away and then it came off the road to make sure everything was solid underneath. unfortunately this wasn't the case :cry:

belly pans off to reveal

CopyofDSCF2056.jpg


DSCF2055.jpg


DSCF2053.jpg


DSCF2047.jpg


DSCF2046.jpg


DSCF2040.jpg


after more poking there wasnt much to save the chassis legs were pooped as were the top hats etc sooooooooooooo out came the grinder and

DSC00393.jpg


:shock: :shock: :shock:

after that (and purest look away now) i thought the best way forward was to fab me own chassis to keep everything strong and sturdy, so this is it as the floor comes out to pop a new one in and new top hats etc

DSCF0039.jpg


DSCF0040.jpg


DSCF0042.jpg


all the rot now gone to be replaced with new fresh panels :)
 
after all that was out i had noticed the back torsion tube was buggered :? the old rot worm had taken hold of everything and made the lot totally unsafe (if you look at the bit on the left it was kinked up and that made the wheel not straight)

DSCF0049.jpg


DSCF0046.jpg


DSCF0044.jpg


so ordered a newto me one :mrgreen:

DSCF0158.jpg


plus few other new bits an installed them :)

DSCF0160.jpg


DSCF0162.jpg


DSCF0161.jpg


DSCF0168.jpg


DSCF0164.jpg


then once the floor was in and the van was solid ish again onto the new beam

DSCF0183.jpg


out with the old

DSCF0184.jpg


big hole left :shock: :shock:

DSCF0185.jpg


DSCF0186.jpg


and in with the new to me beam :mrgreen: :mrgreen:

DSCF0187.jpg


DSCF0189.jpg
 
the plan was to get it on the road for big bang but i decided to do a quick top end strip to solve the very leaky push rod tube seals to then find a burnt out valve :( so i decided to do a full rebuild, went to big bang anyway to get the parts :D

my orange tent :mrgreen:

24669_386178677954_515377954_3979951_5363690_n.jpg


by this time it was getting very close to run to the sun so it was a mad rush to get everything together in time :)

Me an me mate made an entire new wiring loom and installed it (everything except the dash wiring was done), all new brake lines, transporterhauz dropped spindles, rear spring plates, horse shoe plates and T2D slam shocks to give it a little more lowness. :mrgreen: and it was all ready to be off to RTTS

28591_401557497954_515377954_4346278_2584962_n.jpg


met up with a few mates

28591_401557512954_515377954_4346281_4553454_n.jpg


all had to follow me at my speed :mrgreen: :lol: :lol:

and then finally me mate in his turned up

28591_401557552954_515377954_4346286_2495942_n.jpg


28591_401557572954_515377954_4346290_6795805_n.jpg


have been away in it loads to wales mainly for lotsa surfing and just general camping fun and lots of shows :mrgreen:
also fitted new creative weedeater beam

40072_420473407954_515377954_4843330_7930189_n.jpg


pre weekend away
59288_432211927954_515377954_5122123_3912196_n.jpg


bus stop over
35842_403969122954_515377954_4416678_6551387_n.jpg


bug jam
38557_415369597954_515377954_4701603_1999374_n.jpg


vanfest 2010
57948_432215837954_515377954_5122251_2048015_n.jpg


then disaster on the way home from van fest the beam caught the floor and boom creased chassis

60206_432597702954_515377954_5132616_172451_n.jpg


but these things happen granted could of done without it a few weeks before i went to newquay but not to worry out with the cutting discs and welder :D

58614_433018947954_515377954_5141856_414213_n.jpg


63883_433675397954_515377954_5153559_1522066_n.jpg


and made it :)

61118_437221827954_515377954_5226772_3175938_n.jpg


after lots of surfing in newquay i did busfreeze 2010

67293_449246542954_515377954_5446795_892573_n.jpg


before setting her in the garage for the work to begin again :)

74528_460908777954_515377954_5625702_3931332_n.jpg
 
and now onto this this winter of repairs :cry:

front chassis leg was a little rotten so had to be replaced

168283_494754547954_515377954_6151437_3289397_n.jpg


when i was removing it i noticed a few previous repairs :?

165768_494755662954_515377954_6151444_3087703_n.jpg


179092_494756212954_515377954_6151449_2602496_n.jpg


so made a new section (one for each side altho i dont think i'll have time for the drivers side :( ) and installed them

179393_495250597954_515377954_6157303_6592545_n.jpg


183662_10150096606907955_515377954_6361789_7281749_n.jpg


also this winter wanted to get some on the go heating sorted, luckally have a deisel Eberspächer for when am parked up but this doesnt like working when i'm on the move i think i need to re-route the inlet as i read somewhere it doesnt like being in a draft :? hopefully i can sort it tho :) but on with the pictures :mrgreen:
new heater Y tube made out of stainless so no more rotting :)

182238_10150100733982955_515377954_6402677_8045038_n.jpg


and modded a LHD front section to fit in the front of mine and more stainless for the front to back section :)

183574_10150100872047955_515377954_6403682_6759461_n.jpg


now just have to decide the best way to insulate all the tubing :? does anyone have any success stories, i've been thinking exhaust manifold wrap for the insulation but this isn't cheap for the amount needed and i'm not sure if it will do the job intended :?
 
Great thread you have started 8)

Love the constant care and attention you are giving the van too.

Can't help with the pipe wrapping as not started that part myself.
 
Christ mate, your bus and mine look like they came out of the same bit of sea!!!!

Nice work, wouldnt have fancied the rear chassis chop :shock:
 
Cheers for the positive comments guys :)

An couldn't believe how rotten she was I've got about a meter ish of the original chassis leg that was the only bit I could save out of both :( seems the chassis was the belly pans :S

Rear chassis chop was a Biggy for me, to say I was pooping my self a bit is an understatement, but to be honest it is as simple as measure a million time, get someone else to check your measurements, measure again an slice 4 times and weld back in new one, only took a day to do the bulk the bracing the next day an it was done
 
you should have called your thread "the bus that's lower then Crazy's" :p :msn4:

i hadn't realised you'd put some much work in, nice metal work :D
 
thats an incredible amount of work. well done and thanks for putting it in the gallery. I think youve proved nothing is impossible.
 
Brilliant work buddy!

You have some tallent to do all that work on your own. Impressive fabrication skills :mrgreen:

jacks906 said:
so ordered a newto me one :mrgreen:

24123_328280927954_515377954_3588526_7661361_n.jpg

?

Wow! I've never seen anyone replace the rear axle before - I have wondered before if it could be done if needed.

How heavy was it? Was it aukuard to get into position?
 
dubscum said:
you should have called your thread "the bus that's lower then Crazy's" :p :msn4: :D

Hahaha :lol: I had thought about it :msn4: An not many people no what's gone into getting it to a stage were I feel it's solid enough as no one gets to see all the work :lol: Eventually (hopefully this time next year) I'll be doing the body panels. The usual have all been replaced over the time, just not the best job done so the body works really shoddy, it's only metal tho so will get sorted :)

An cheers for all the good vibes dudes keeps me focused on the job an the end result :mrgreen:

Back end was supprisingly easy to be honest it is litrily 4 big cuts, I trimmed the new rear beam to just behind the outrigger ( similar length each side) measured it on my Chassis and did the chop, kept the shock towers on the new beam and trimmed my chassis down to just behind them, then it was just a case of lifting the new beam in to place on a trolly jack an wiggling it into place, tacked it up rechecked all me measurements and welded in.. Then made some plates to go over the joints to just add extra strength. An job done Altho my one worry was it was going to crab but luckally it didn't :)

Dave
 
jacks906 said:
Back end was supprisingly easy to be honest it is litrily 4 big cuts, I trimmed the new rear beam to just behind the outrigger ( similar length each side) measured it on my Chassis and did the chop, kept the shock towers on the new beam and trimmed my chassis down to just behind them, then it was just a case of lifting the new beam in to place on a trolly jack an wiggling it into place, tacked it up rechecked all me measurements and welded in.. Then made some plates to go over the joints to just add extra strength. An job done Altho my one worry was it was going to crab but luckally it didn't :)

Dave

Well done to you buddy. There must have been a lot of measuring to make sure it was straight so it didn't crab! :shock: :lol: :D
 
Sphincter moving period when you put wheels on and moved the van for the first time :shock:

Very brave and well done :mrgreen:
 
Great work great inspiration!
Love that you carry on using it after each job, and the "it's only metal" quote!

Im doing a 1970 Devon in a similar state....just waiting to see if I can save it before I put any pictures up.

Keep us posted
 
Ched said:
Great work great inspiration!
Love that you carry on using it after each job, and the "it's only metal" quote!

Im doing a 1970 Devon in a similar state....just waiting to see if I can save it before I put any pictures up.

Keep us posted

Get a thread going everything can be done along as you want it enough :)

I could of got a nice dry bus, if I had done the import myself, for what I've spent on it money wise, I'm lucky I don't have to pay someone to do the welding an fab work. Which is the main killer on any project, a local dude I've been giving a had with his split has just got it on the road, he's shelled out a load on a half arsed part resto at a company an that was before a few of us convinced him to pull it out an we will help him finish it, all it really needed was putting together 2 years ago an they've just taken him for a ride ever since dragging it out an taking his money, we've had to redo loads of there work but only took 3 month an it was on the road.

Not much update on mine except standard heating is now sorted, just got to figure out the control cable tubes but cant do that till bits turn up :(
Tomorrow finishing cab floor an seam sealing an painting

Then all that is left to do is insulate the front to back tube and front Windscreen lip before its back to being road worthy,
An decide on rim colour and weather to tub an notch it at the front before it come back out :?

That's all for now :)
 
8) fair play dude, nice work.really like the stance.kind of hoping you dont paint it as it looks pretty damn awesome :mrgreen:
keep it up dude
 
71dormy said:
8) fair play dude, nice work.really like the stance.kind of hoping you dont paint it as it looks pretty damn awesome :mrgreen:
keep it up dude

cheers dude :D
altho the down side is that the body will need working on at some point, :(, all the arches have been done and some patches along the side too all by the PO and the work is really bad, all been seam welded so the panels have distorted BIG time :(

all will be sorted on day tho :D going to run it like this till saved all the repair panels up then bang them all on with a bit of look :)

dave
 

Latest posts

Top