Progress Pics - Dormobile X-Over

Early Bay Forum

Help Support Early Bay Forum:

This site may earn a commission from merchant affiliate links, including eBay, Amazon, and others.
sparkywig said:
Squirt loads of WD40/plusgas/etc down through the heater cable conduits and leave overnight.
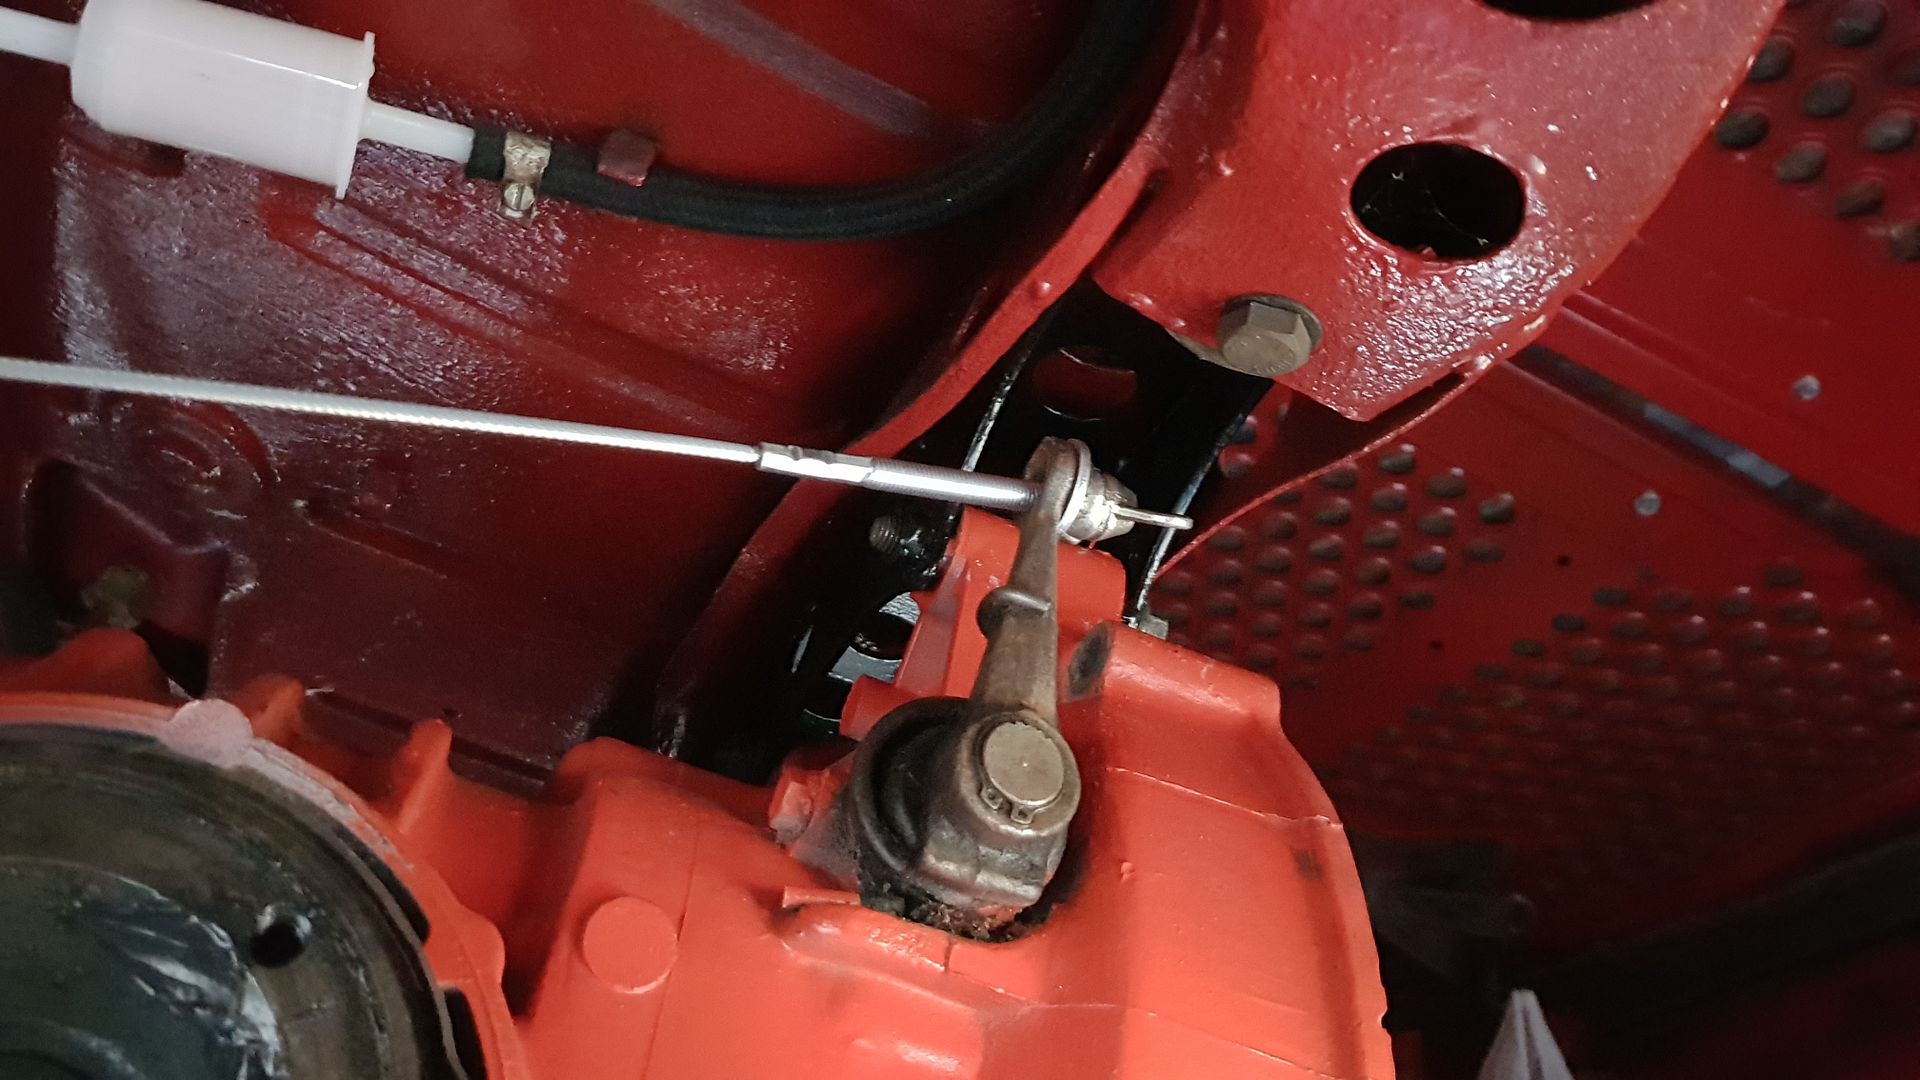
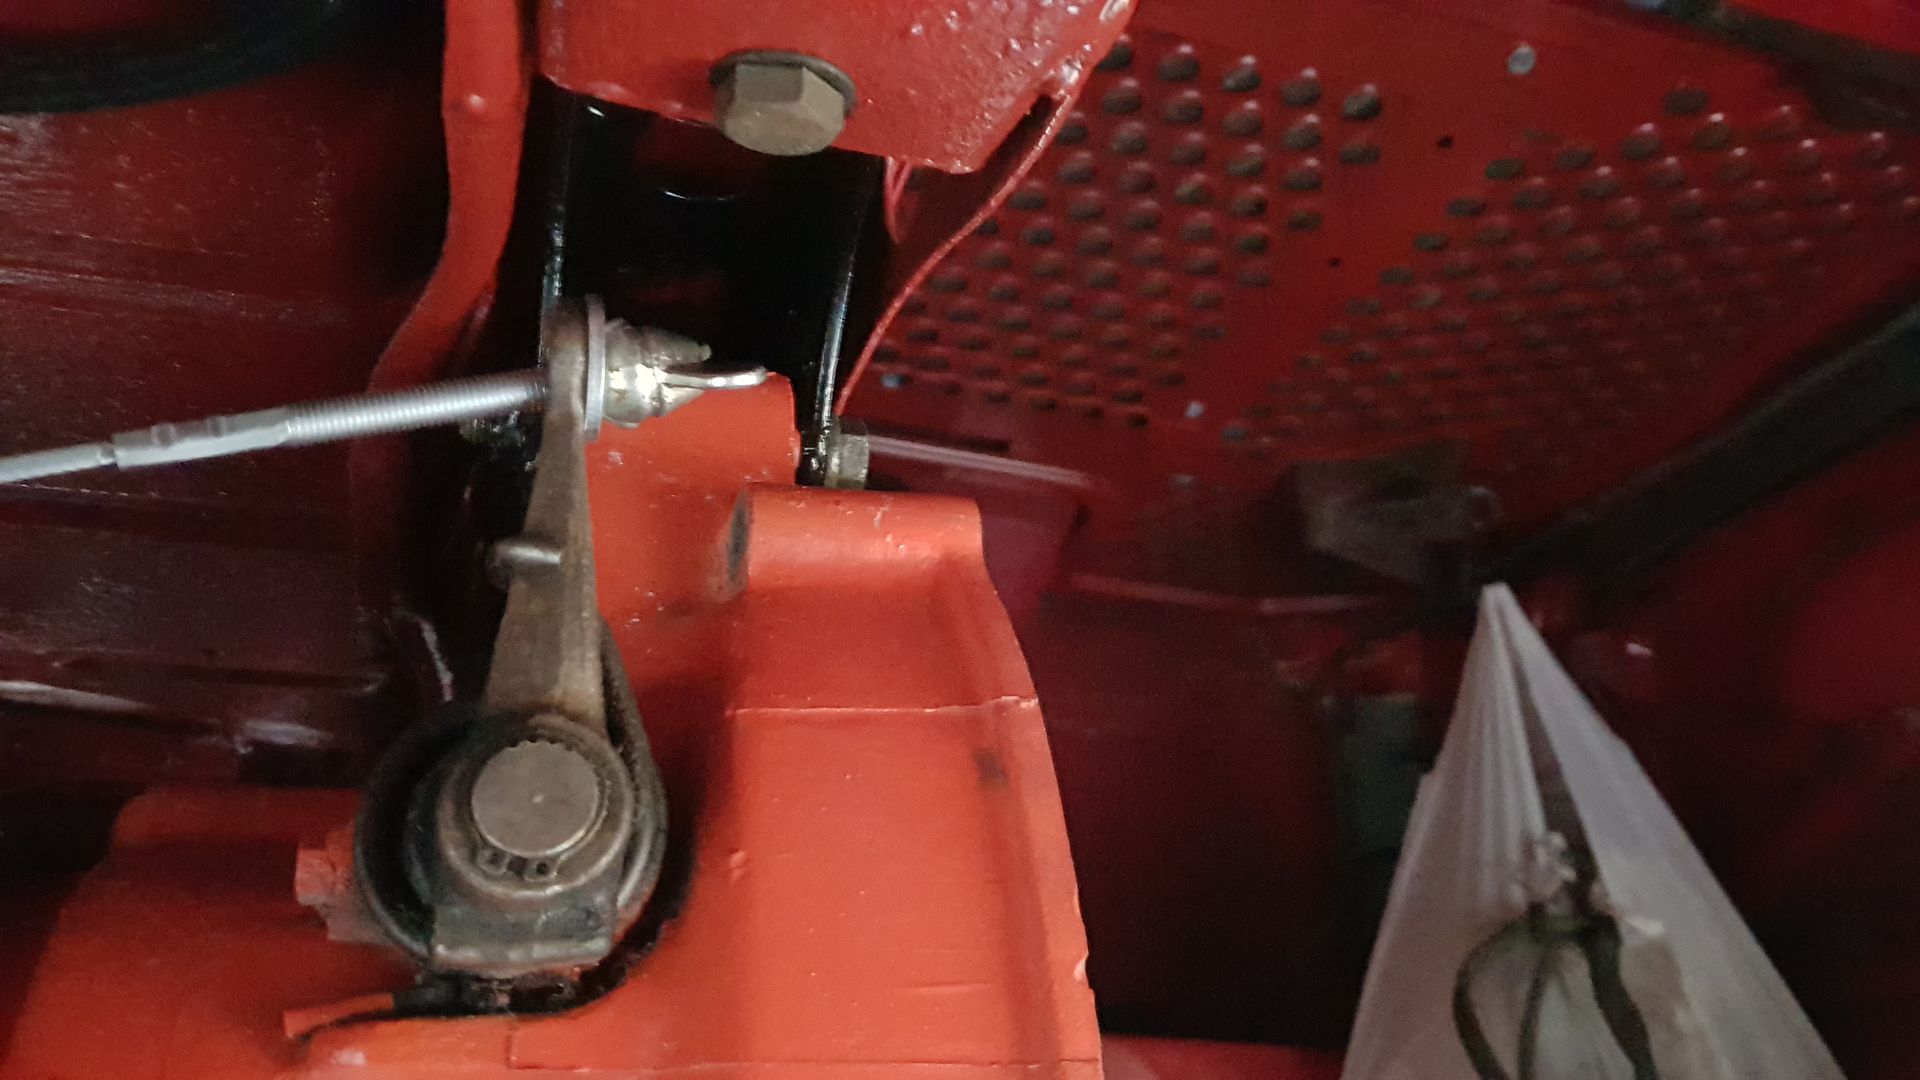
With regards to the clutch cable it does long slightly short, have you actually measured the cable supplied?
Do you have the old one to compare it with?
Will give the 'squirting' a go - ta
The clutch cable was chucked ages ago - I will measure it when I get a chance.
 
Been away in Mallorca/Majorca for a couple of weeks. So just read this quickly. May have missed something I am about to say....so sorry if I’m out of order! Me and Paul (or more appropriately Paul and me) fitted my heater cables. Think one is shorter than the other coz the exchangers are positioned differently at the back. We found that out after offering them up to the cab leavers end. Paul tweaked them somehow and all was ok. Well......I do get a blast of the essential heat onto screen when needed 😉. Your progress is making me smile.
 
Hope you had a nice time on your hols.
Not fitted the heater cables yet as still trying to get the old ones out............
The length issue I have (oh er missus) is the clutch cable as I believe it is too short!
 
Okey dokey. The length you need for a good effective clutch.....Oh er missus! 😂.... I remember Just Kampers getting very inquisitive about the fact it was a Crossover and wanted a little bit of extra info (build dates and stuff) so they could send the right heat exchanger cable type/lengths. Is this maybe post 1971 clutch cable length need as well? Not sure. Holiday was much needed. Paul had my bus while I was away for a ‘going over’ ready for MOT. Going to get in touch with him tomorrow. All the best.
 
Hope Paul finds nothing untoward and all is good then for the MOT :)

So - took the cable out and measured it - give or take 5mm its as per the label it is about 3210 so can't blame them.
It looks like I need the pre '71 cable then so will give them a ring tomorrow and hope we can do a swap.

Also, rain stopped play so no real work made today.
 
27.09.2019

Hurrah - got the longer clutch cable (for the 71 year only) which is perfick :) :)

20190927_181542_zpsu9jqt0gk.jpg


20190927_181605_zpsuzr3qneq.jpg


Will take it out (again) now I know it's good and grease it and fit the rubber boots to go over the ends of the to stop rubbish getting into the tube....

Weather is crap this week so this is all I could do.
 
Nice result. Very nice result. Those specific years of production obviously matter. Funny how you see a 71/72 model year and don’t equate it to the way they inherently think the process of improvement and change. Maybe improvement is a bad choice word. You can’t fix what ain’t broken some will say! I agree. But we’ve got what we’ve got. Early, Crossover or late. My Dad argued that his T25 knocked spots of my wannabe. 😉 Not wishing to offend early or late design. A retro dub is a beautiful dub and whatever the early/late bay years is a very special thing. But.....Crossovers? We are actually a very strange conundrum. I have an imagined wished for dream scenario. Reckon they dipped into various parts boxes in the factory corners and said “Let’s give this a go. Tomorrow maybe we’ll put a different idea/slant into the thinking ‘where we go from here’ process. Sod those scratching their heads over our choices in the future.” Currently Andy? My bus? I’ve had Paul on the case with tune ups and simple aesthetics. I’ll shove pics on my thread when I can. Lovely to see your progress.
 
Yes, the Crossover is a strange beast and one of the bigger sellers also (or so I have heard)!!
Not managed anything this week as had to work on my daily (rear disk issues).

Looking forward to seeing an update on your thread soon :)
 
19.10.2019

Carburetor time so let’s give a clean and replace some gaskets and stuff.

Here we are:

20191019_115543_zpszijh8ms5.jpg


This gasket has seen better days:

20191019_121158_zpsvolqqicq.jpg


Old one on the left but the rubber is thicker:

20191019_122750_zps4amtgme2.jpg


Nice and clean:

20191019_131659_zpsnnzrgcbd.jpg


New one on the right……. Cleaned out the old one and put it back:

20191019_132726_zpsr4sp1hxn.jpg


All done:

20191019_135558_zpskzox3yu6.jpg


20191019_135607_zpscufyofwj.jpg


Just need an air cleaner to go on top.
Connected to the manifold now so almost ready to put the engine in……...
 
Smart finish. Looks ready for action. I’m most probably teaching you to suck eggs and you’ve got a load more knowledge than me anyways. But. The surrounding bits and pieces are worth close inspection when you get to them. Idle cut off valve (already there I see), rubber elbows (air leaks), etc. I’m only saying this coz I have an oil bath filter and a split in the large rubber elbow to the carburettor is split. So I’m kind of wondering if this is causing my cut outs when dropping speed and gears. Also surging when idling. Be great when your engine is up and running.
 
Hi Andy. Now you’ve started your carb and subsequent linkage? Can’t remember if amongst yourself thread you put your accelerator pedal and underside cab floor linkage in. I’ve got to replace my accelerator cable. And we’ve got Crossovers. My linkage doesn’t go straight back to the rear but goes over to the middle and then back. Looked at the length needed and still scratching my head. Says pre July 1972 you need.....and post August 1972 you need.....can’t remember exact mm. lengths. I’ve bought both to make sure I don’t start and then realise the cable is the wrong one. If you have your cable, it’s priceless. It’ll save scratching your head maybe. I’m not taking mine out yet. It may be needed to drag the new one through the housing tubes and holes. Cheers.
 
Hey Andy,
All is looking mighty fine in that carb, did you remove and replace the check balls in the housing?
Was wondering if you had any problems and whether you had any tips as I have another carb to do.
The first was a bit of a nightmare as I managed to loose one on the kitchen floor. :roll: :lol: :roll:

J & P
:D :D :D
 
01.02.2020

Managed to get the heater cables out, the off-side one pulled out OK but the nearside, I had to cut the tube near the engine end so need to find 1.5 metre length of 10mm tube - once I can sort this then I can finish off the underside and be close to getting the engine back in!

Here is the steering wheel - not pretty but salvageable.

20200201_132101_zpsmo5iw0b5.jpg


20200201_132109_zpsj3knu6qw.jpg


20200201_132118_zpsjouzxfhq.jpg


20200201_132126_zpsb79mj8db.jpg


This is it after sanding it all down and making the cracks bigger to get some filler in.

20200201_140046_zpstqb1fbta.jpg


20200201_140054_zpskpyabeb5.jpg


20200201_142235_zpsgy0zz5hb.jpg


20200201_142251_zpsa8lwzj0a.jpg


20200201_142301_zpstykchkwn.jpg


20200201_142856_zpsdujaqzq5.jpg


After a bit of sanding, now ready for some paint.

20200201_155321_zpsafxave5k.jpg


20200201_155331_zpsuy4h19zs.jpg


20200201_170049_zpsfm3iciye.jpg


20200201_170104_zps15bfqinl.jpg
 
02.02.2020

Now painted.
Will need a bit of sanding with some fine paper then a final coat.

20200202_153217_zpsij39ityg.jpg


20200202_153205_zpsm75a6dqf.jpg


20200202_153211_zpskkc9nvxo.jpg
 
Thanks Mike - it's not brilliant but with a bit more live it should be good enough !!
 
16.02.2020

Went over the steering wheel with 600 grade wet and dry sandpaper, then another couple of coats of paint - ready to put back together.

20200216_160048_zpsbbvp3cse.jpg


20200216_160055_zps7ycum3bg.jpg


20200216_160106_zps7h4zqofk.jpg


Also bought 2 x 1 metre 10mm tubing so I can sort out the heater cable tubing once we get weather that will allow me to work outside.
 
14.03.2020

Good weather today and nothing else in the diary so after doing some diy stuff and tidying up the drive and patio area I decided to add the tubing I bought for the heater cables.

I needed around 1.5 metres but could only buy 1 metre lengths of 10mm tubing. I had left over some 12mm tubing that I had from some I bought for the van (can’t remember what for!!) so used this as sleeving to join the pieces today.

A picture before the main work:
20200314_135143_zps6x3ctj09.jpg


Showing the sleeve - had to slit it so it would fit over (nice tight fit) and give me somewhere to weld and not go through the tube.

20200314_135620_zpsmddf9dlz.jpg


The end of the tube still on the van.

20200314_140558_zpszuiux7jw.jpg


First tube added and the sleeve

20200314_151850_zpsmkt98gng.jpg


20200314_151858_zpsso1lw1wf.jpg


After cutting and bending the last section

20200314_151911_zps368fciq5.jpg


20200314_151924_zpsums02yiv.jpg


20200314_151932_zpsnfbqduaj.jpg


I welded the sleeves but the battery on my phone died so will try and get some pics soon of the finished article (minus protective paint which will be soon).
Can now mount the heater tube, feed the cables through and look to mount the engine (gulp)
 

Latest posts

Top