Progress Pics - Dormobile X-Over

Early Bay Forum

Help Support Early Bay Forum:

This site may earn a commission from merchant affiliate links, including eBay, Amazon, and others.
03/11/2018

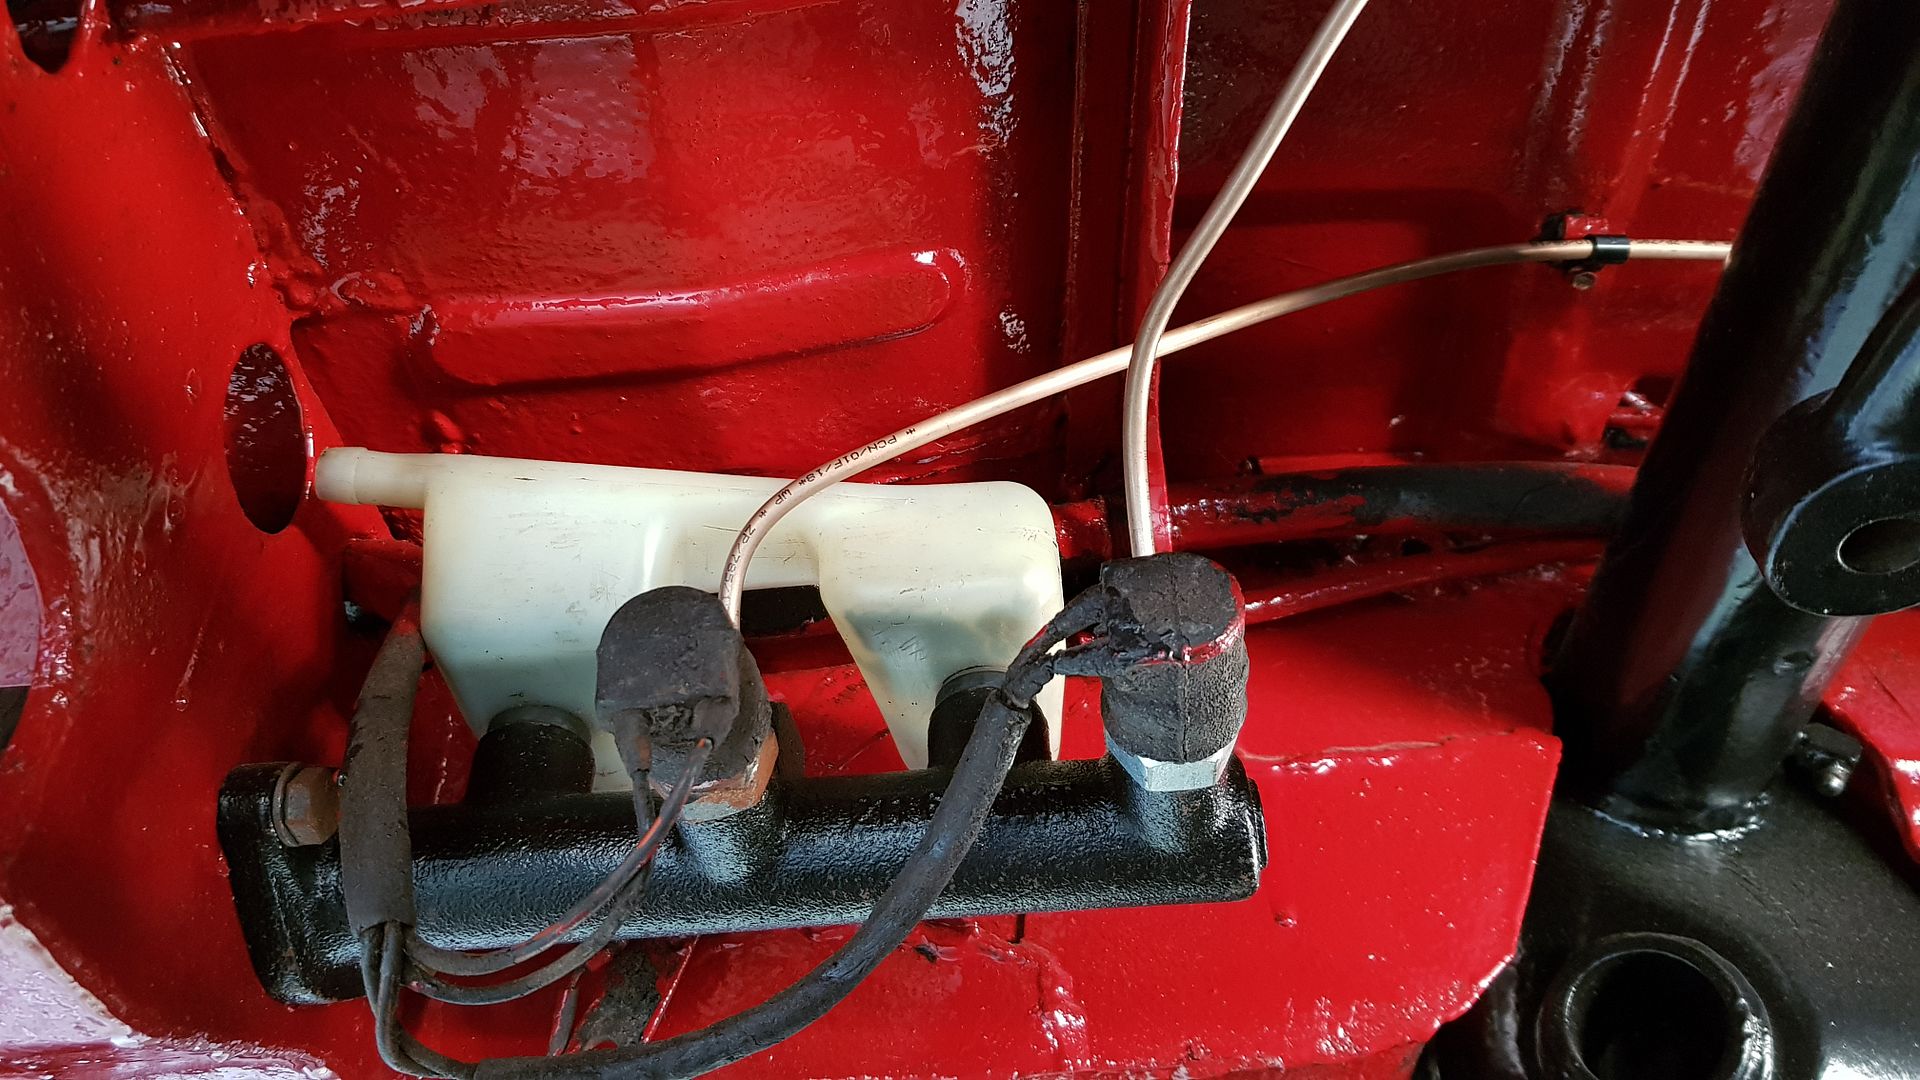
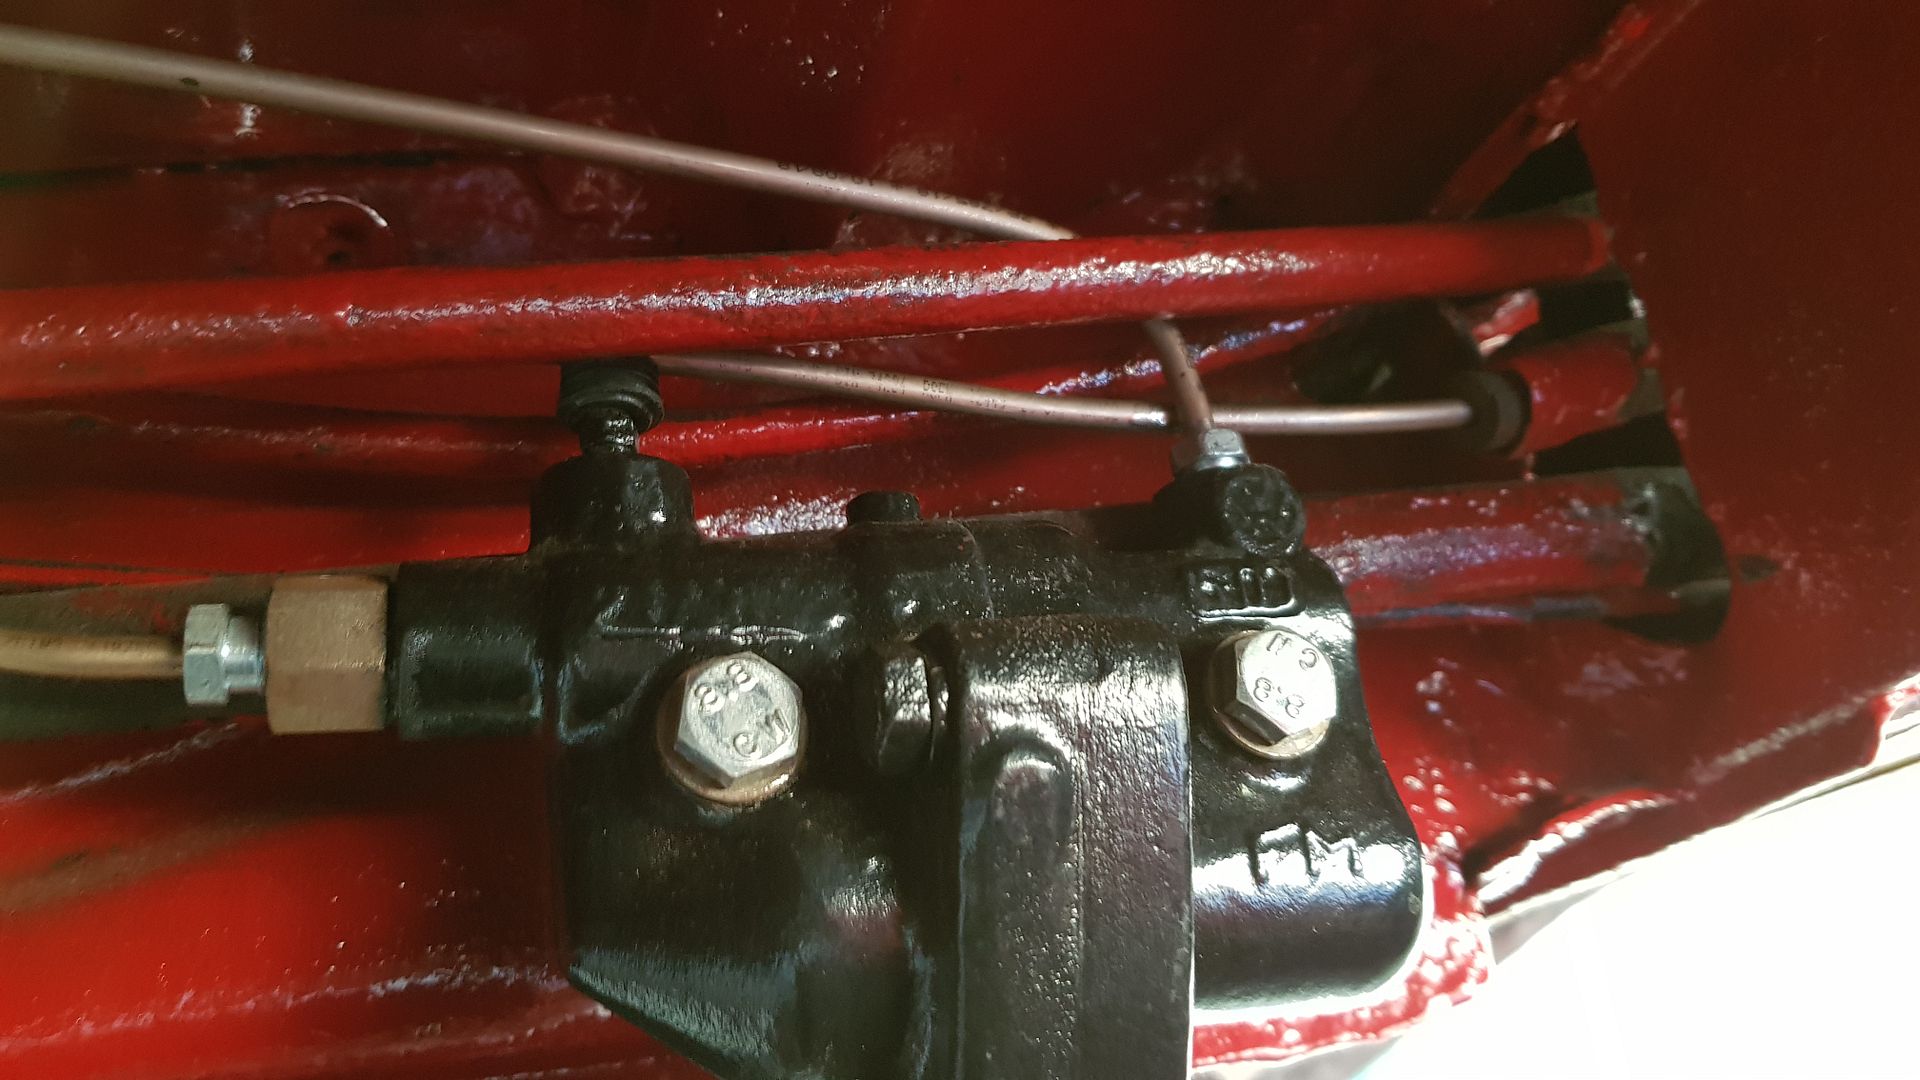
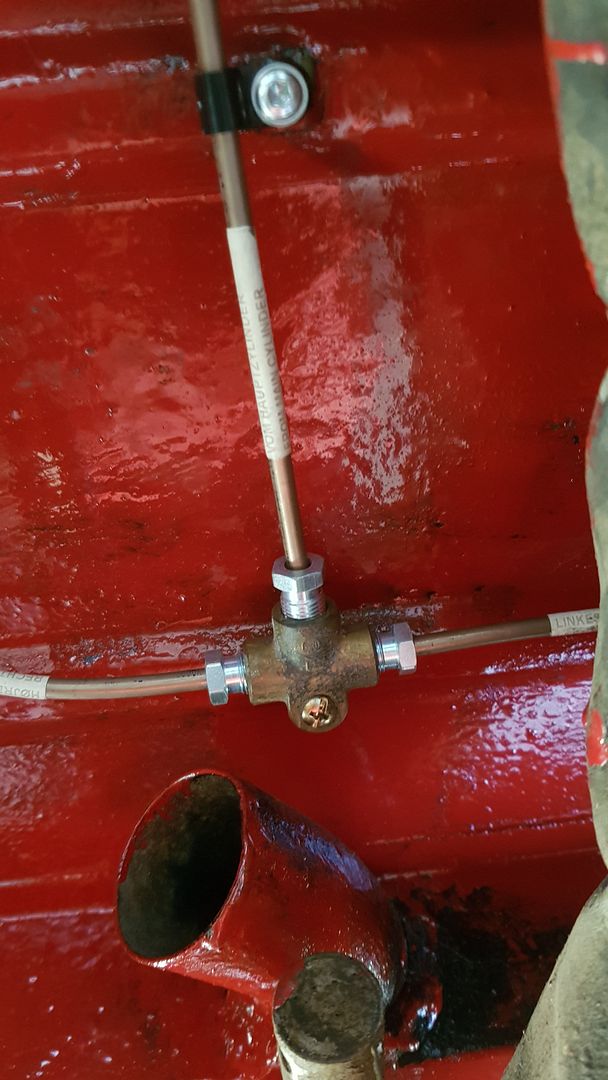
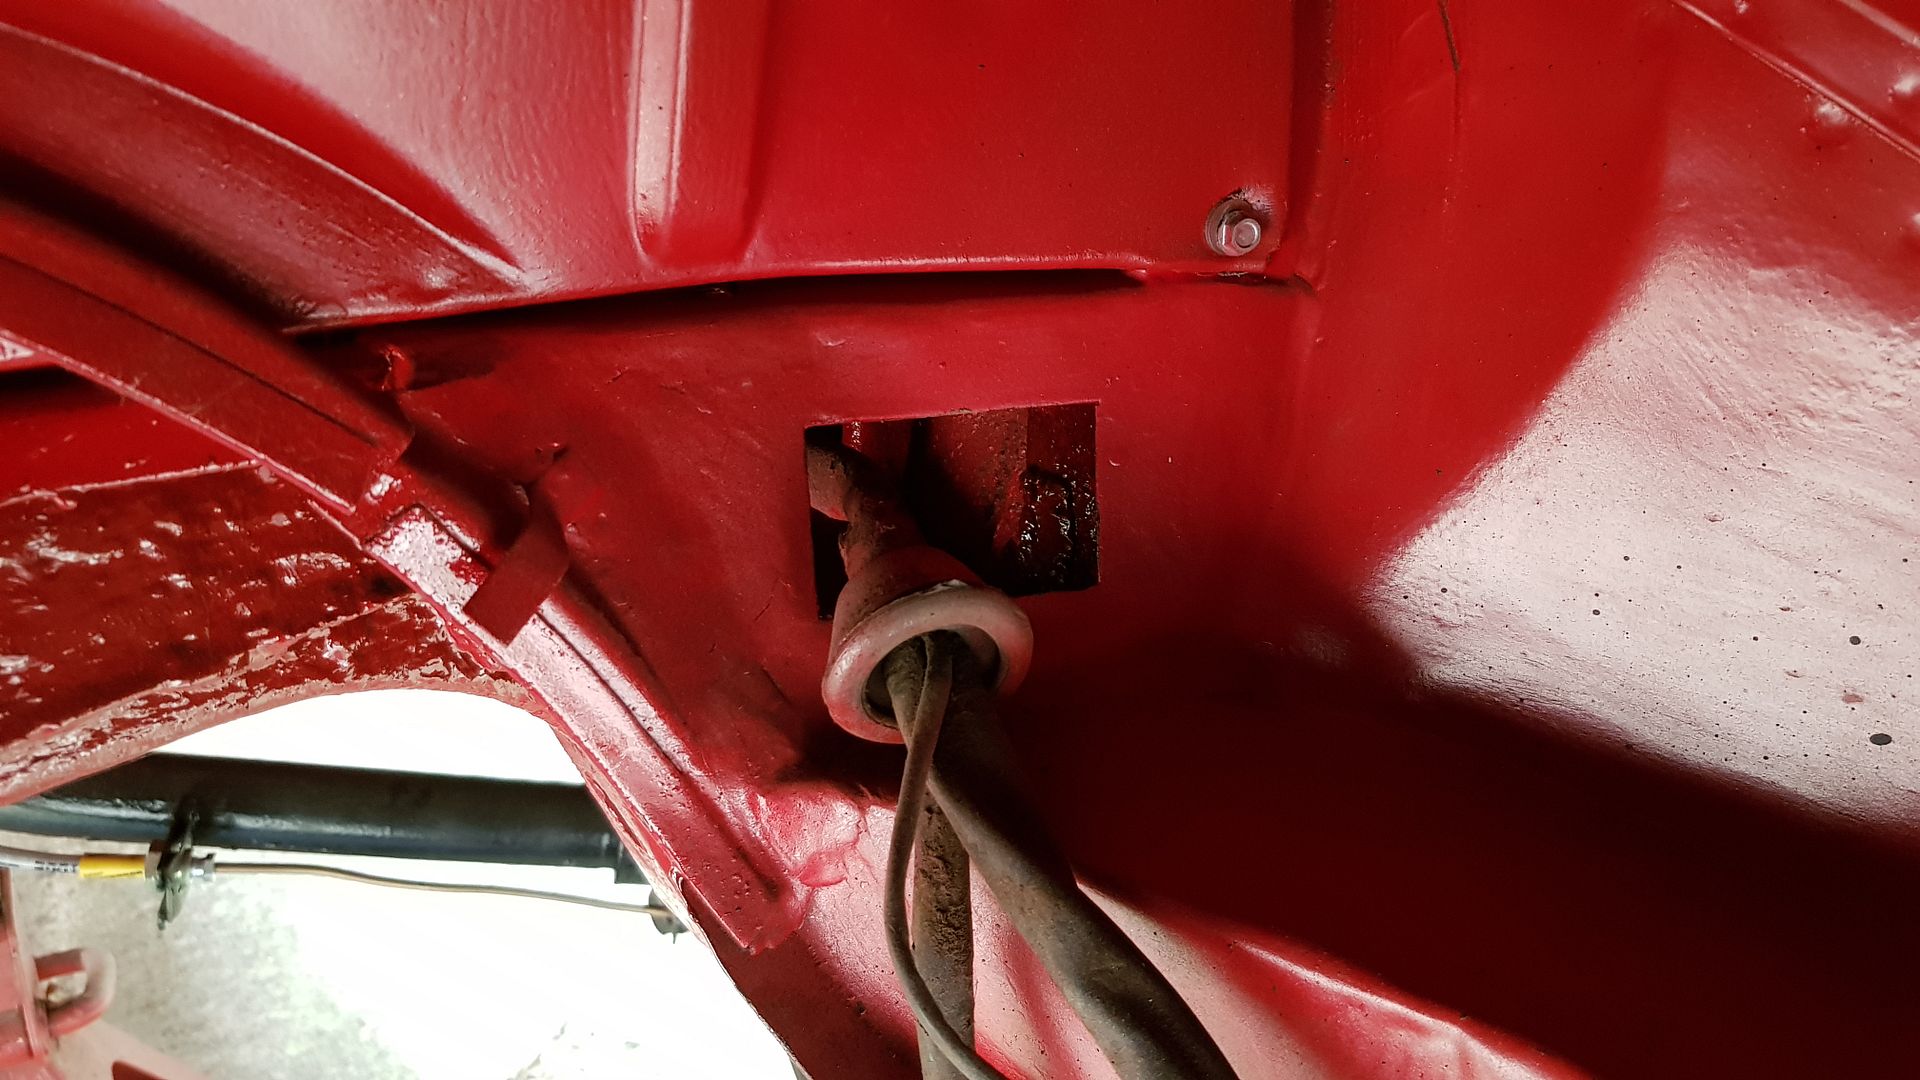
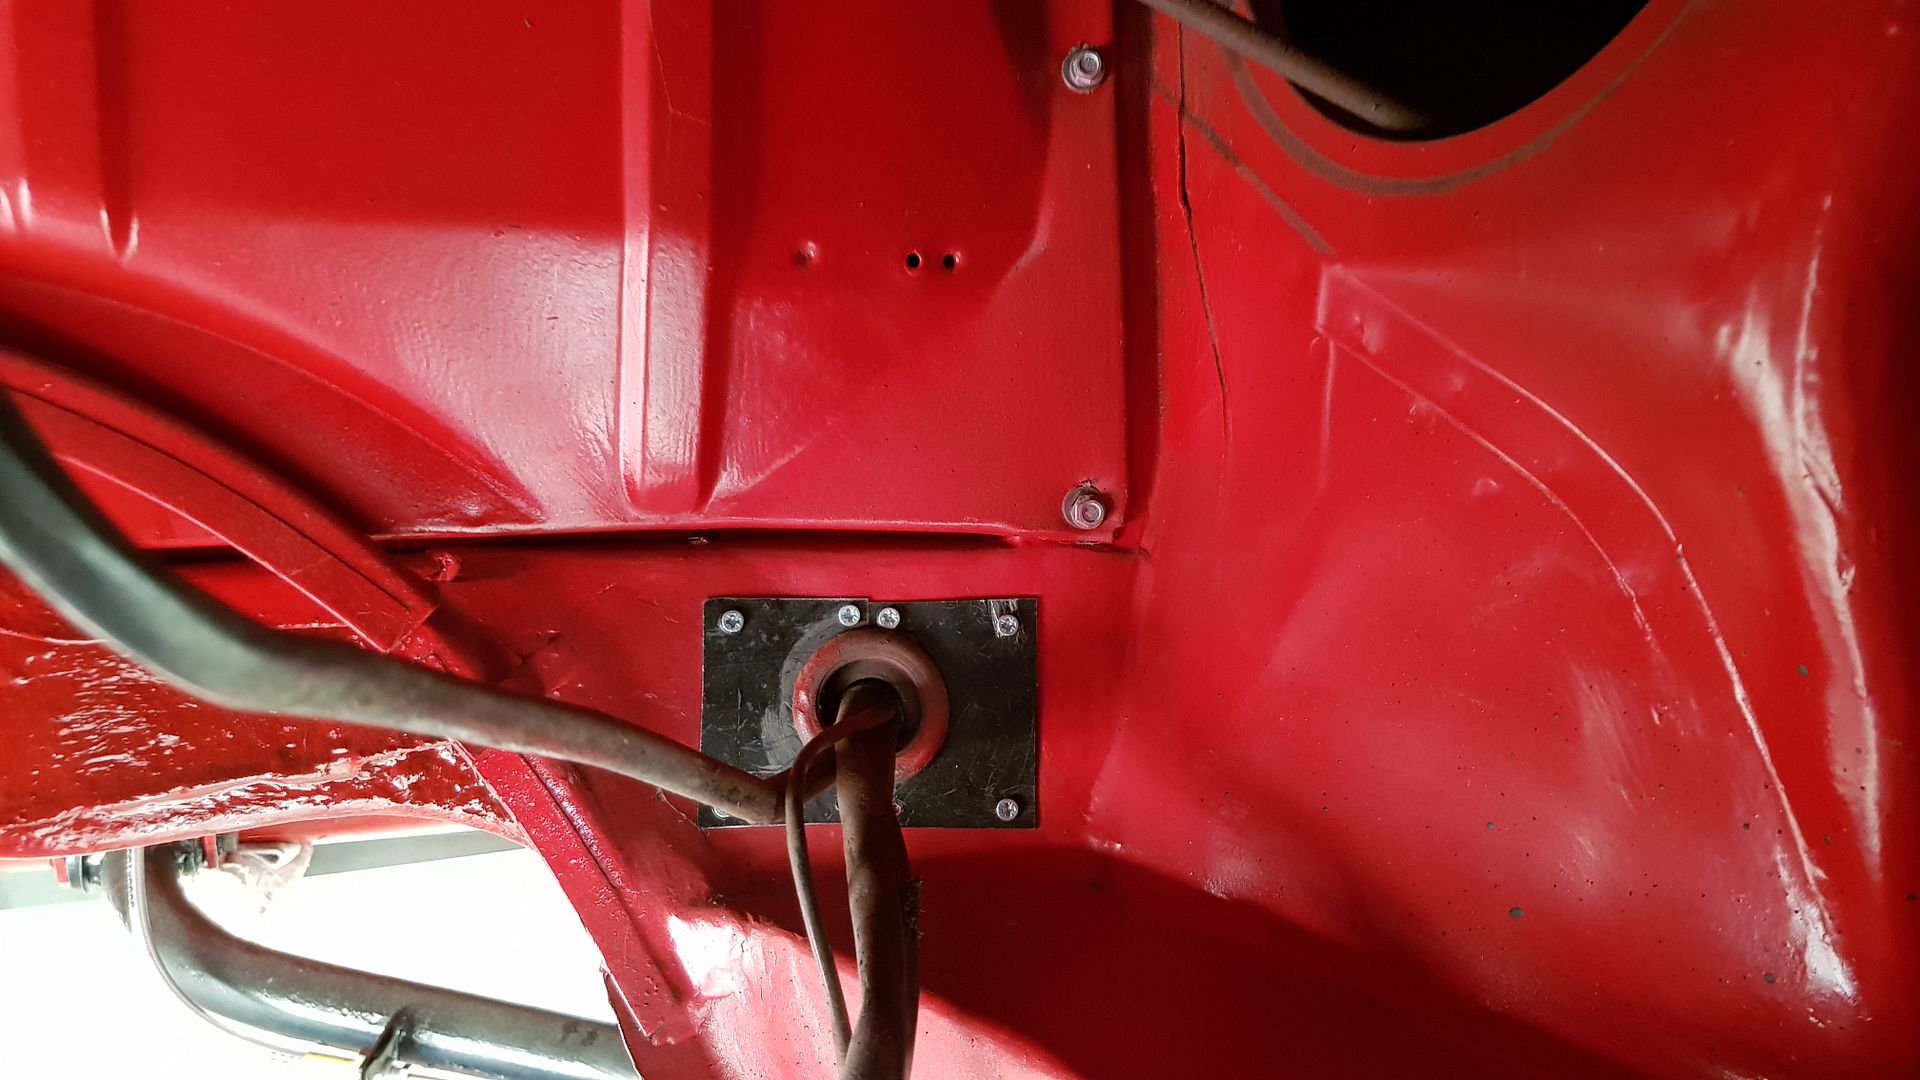
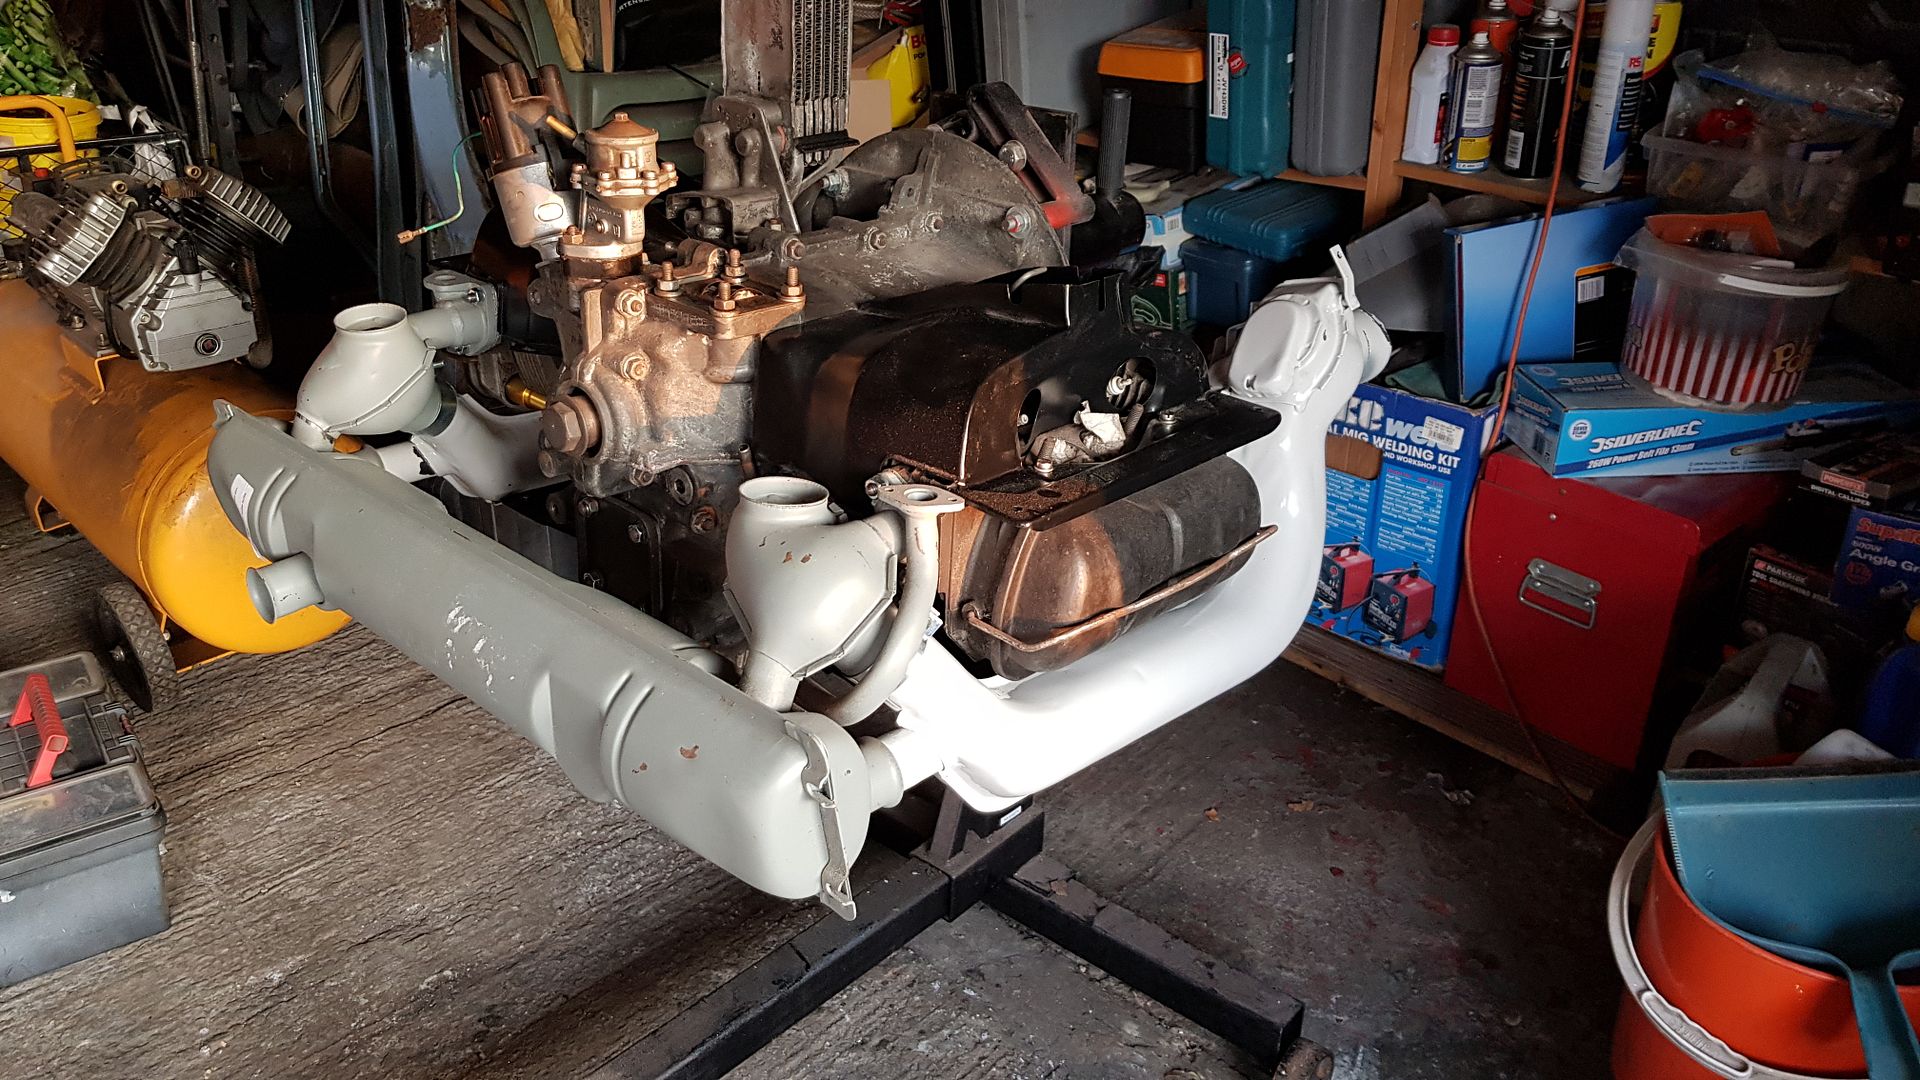
A little update. Mounted the brake pipe bracket to the nearside front suspension and finished adding the hard and soft pipes:

20181103_135107_zpskxioyzct.jpg


20181103_135131_zpsfcd3lzys.jpg


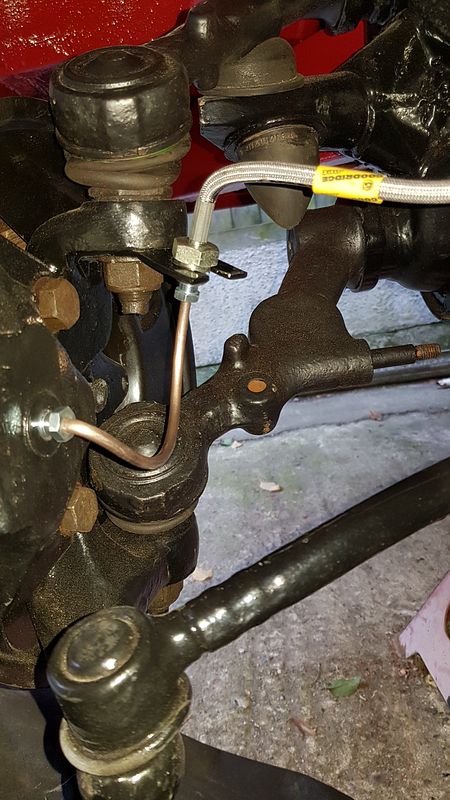
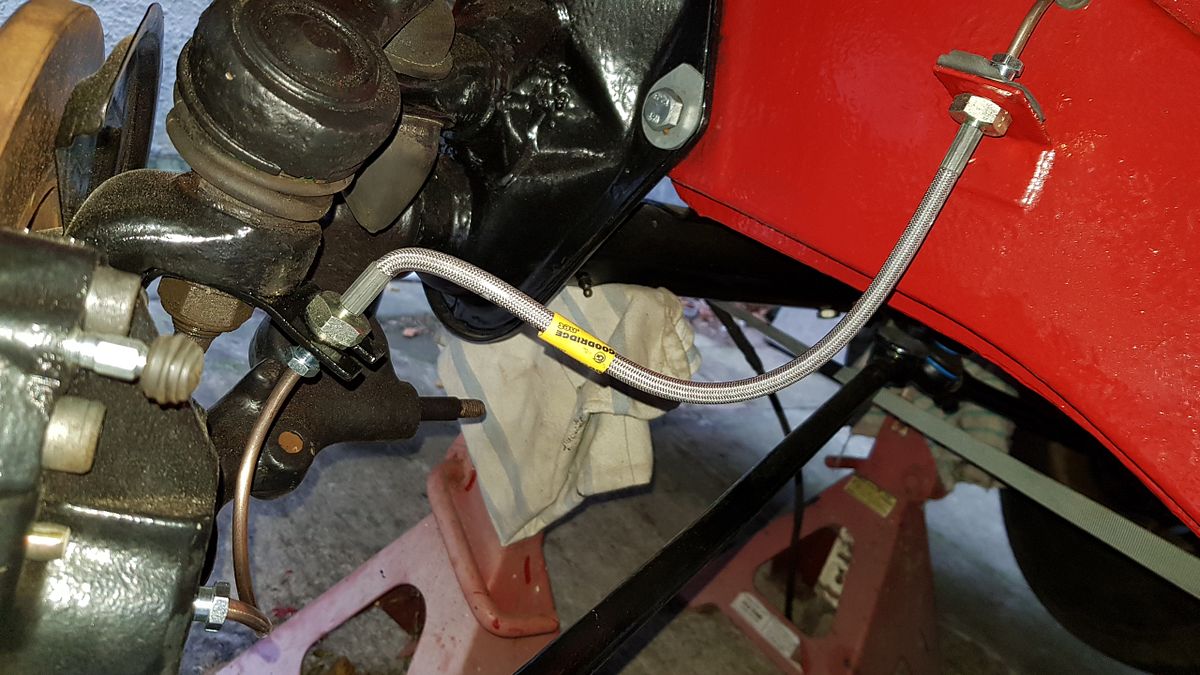
Just need to get the MC to compensator pipe then the final bit will be hooking up the MC to the reservoir in the cab.

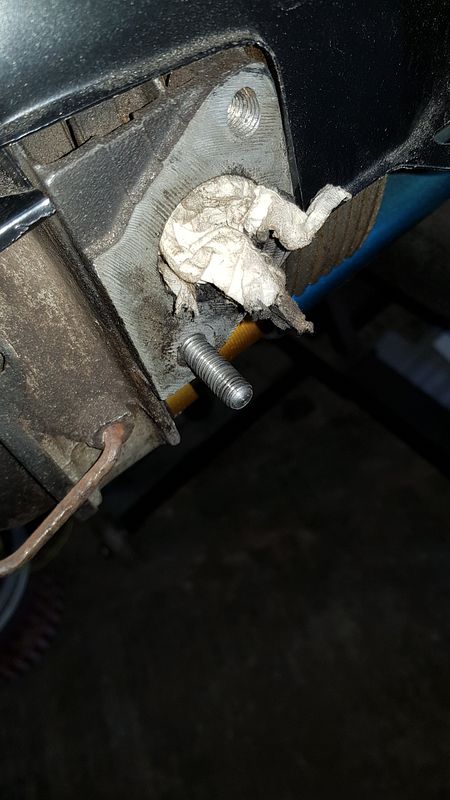
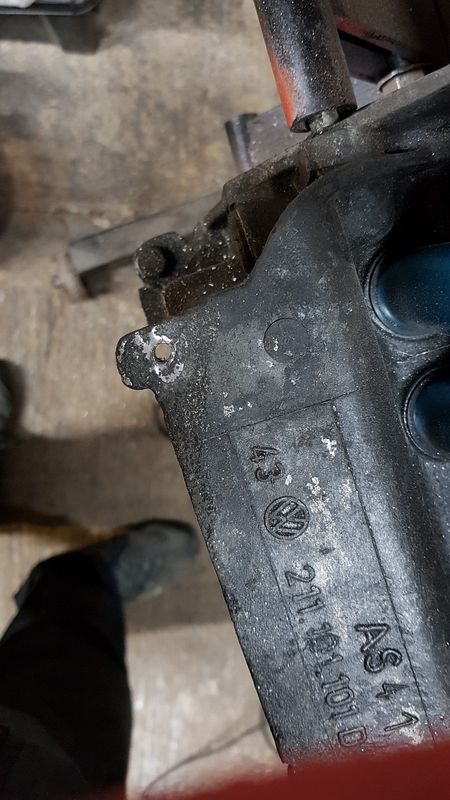
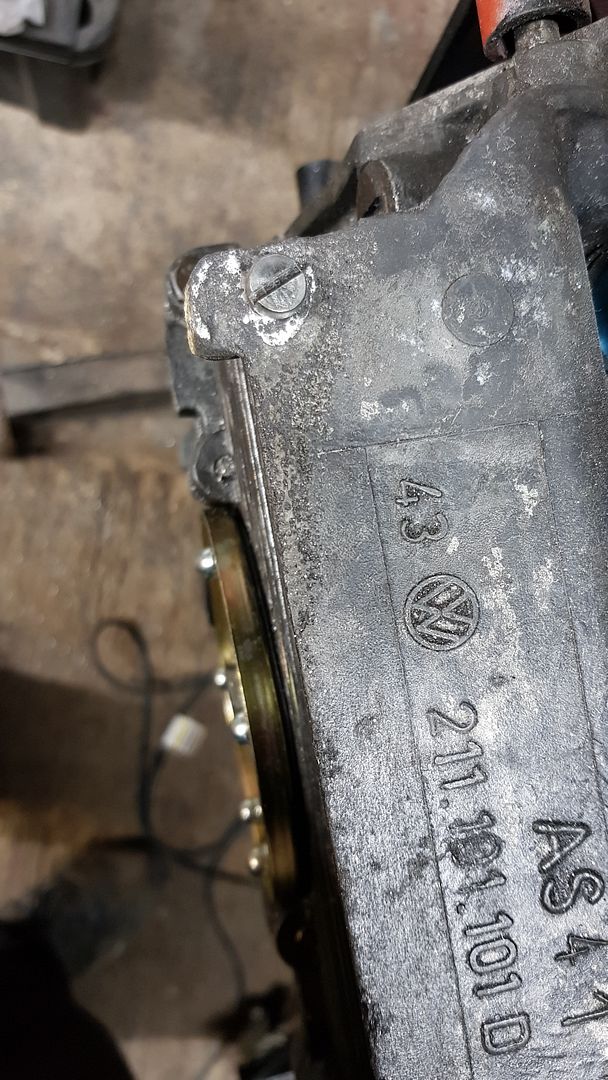
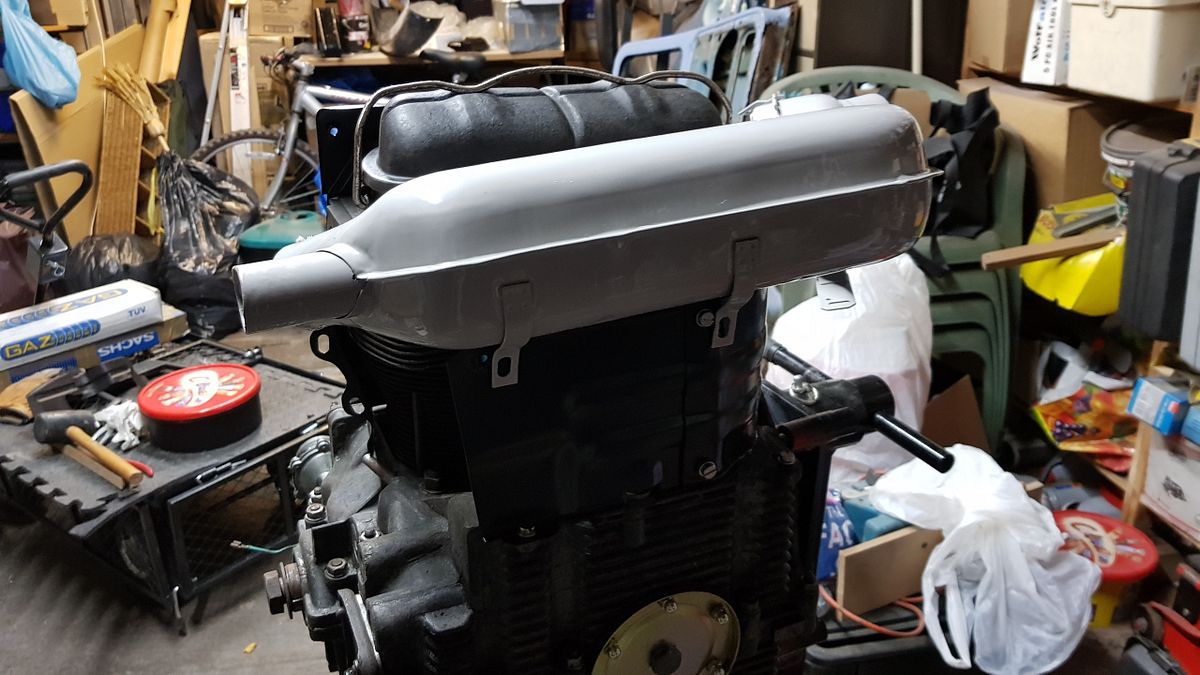
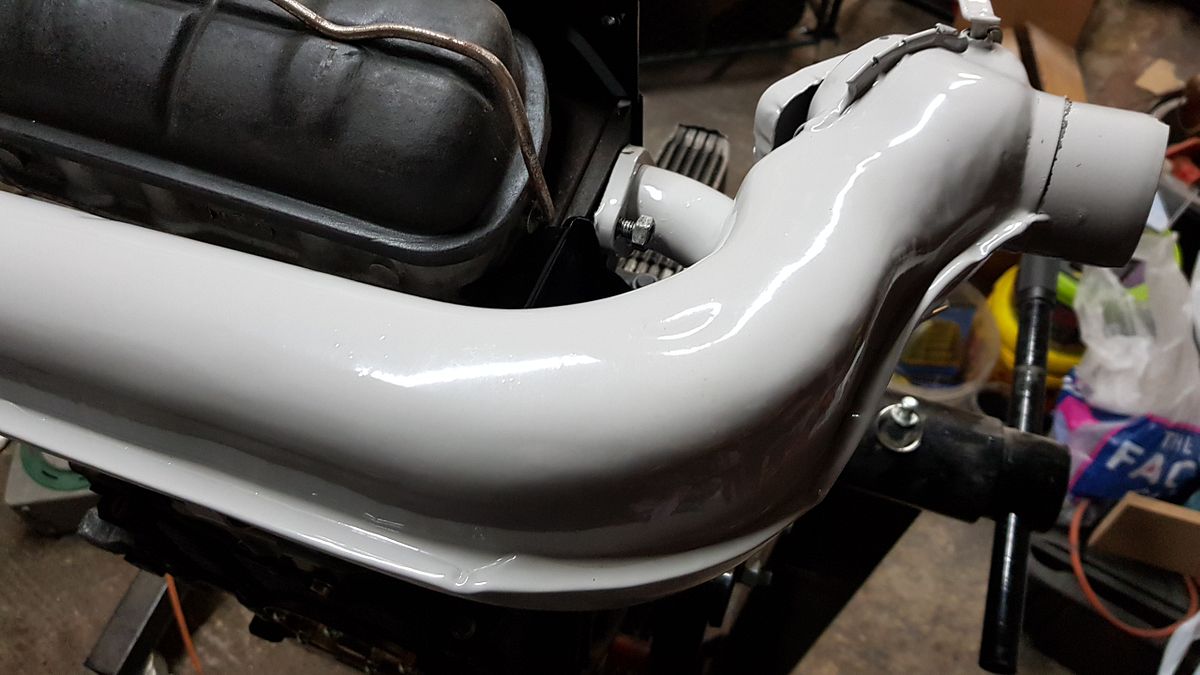
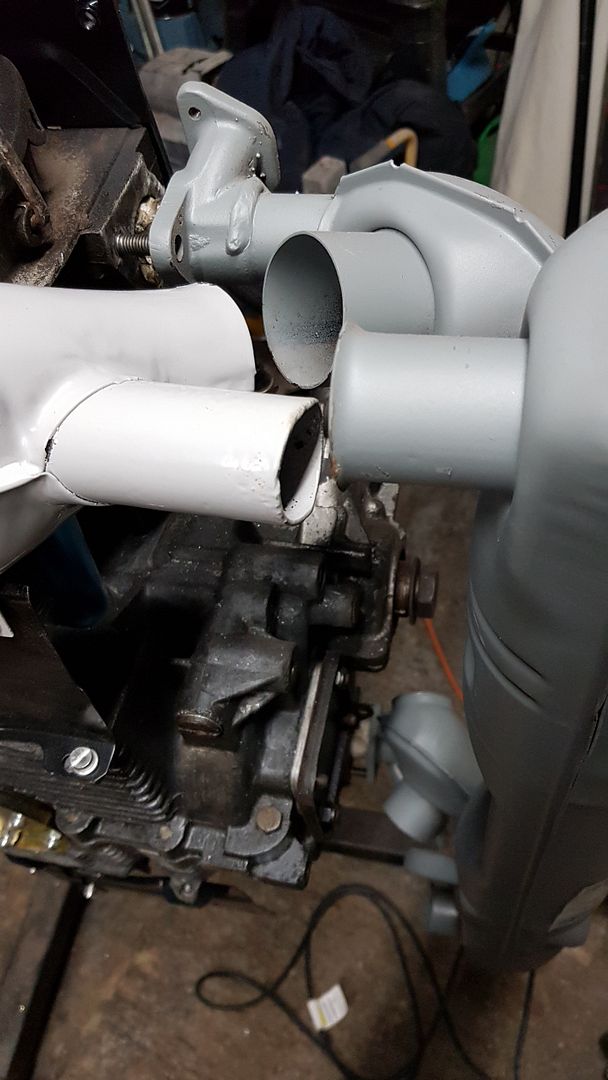
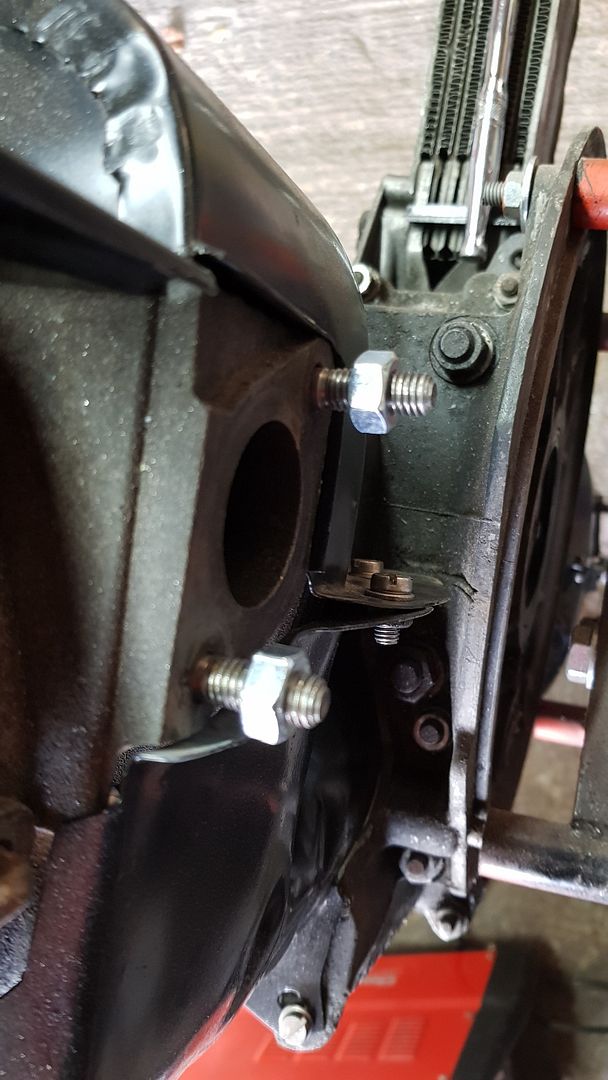
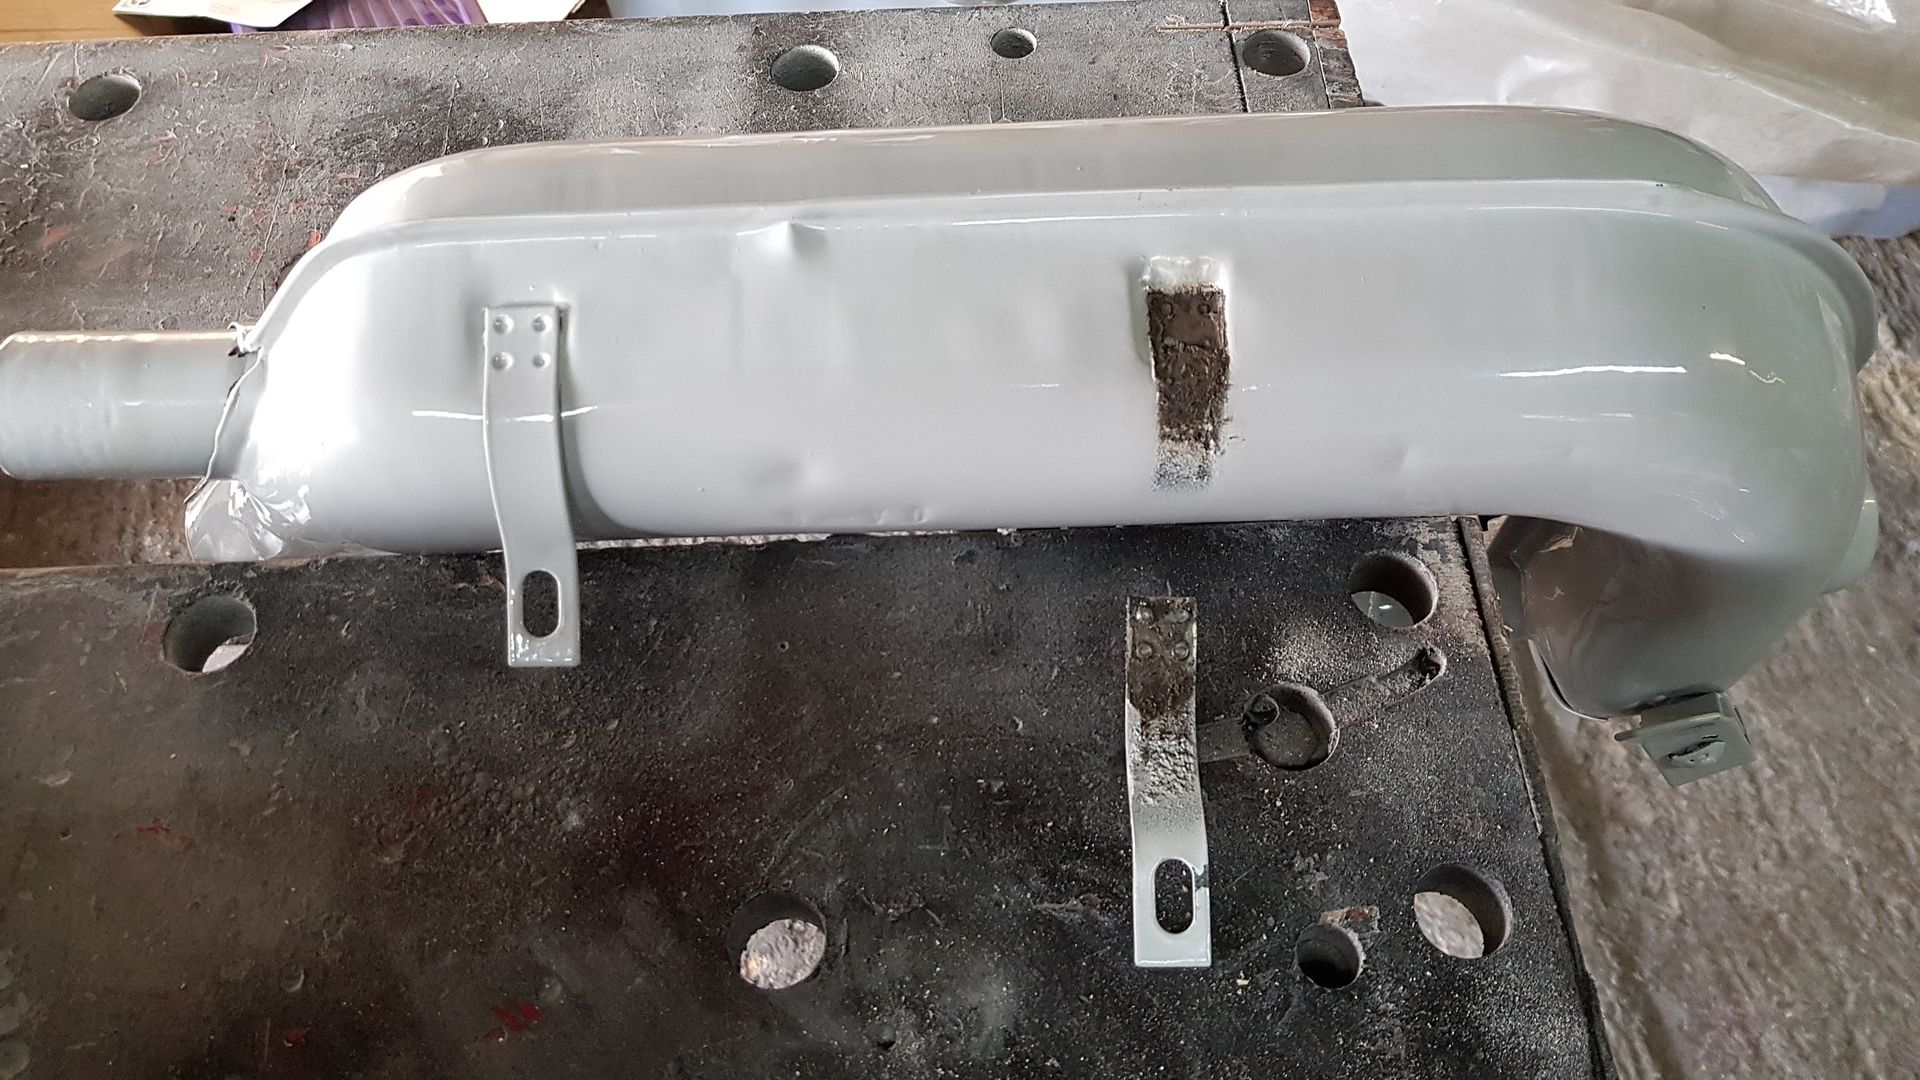
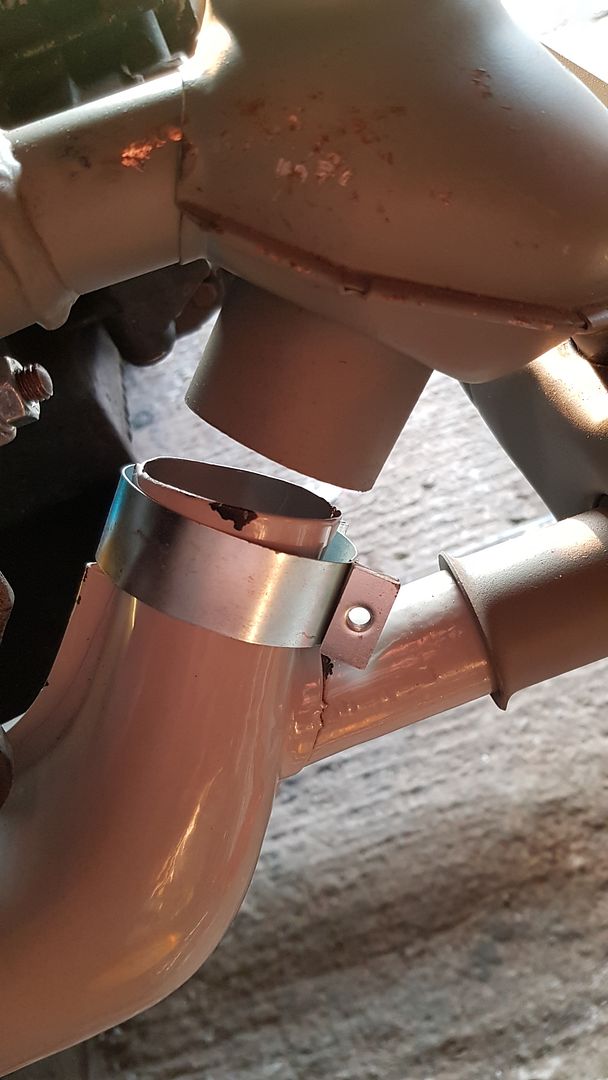
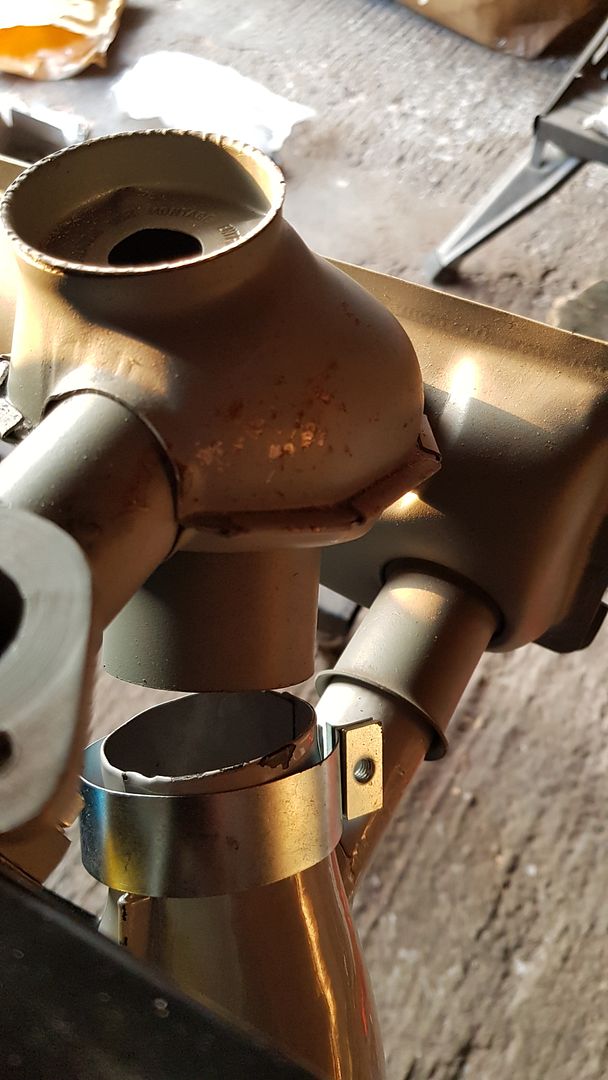
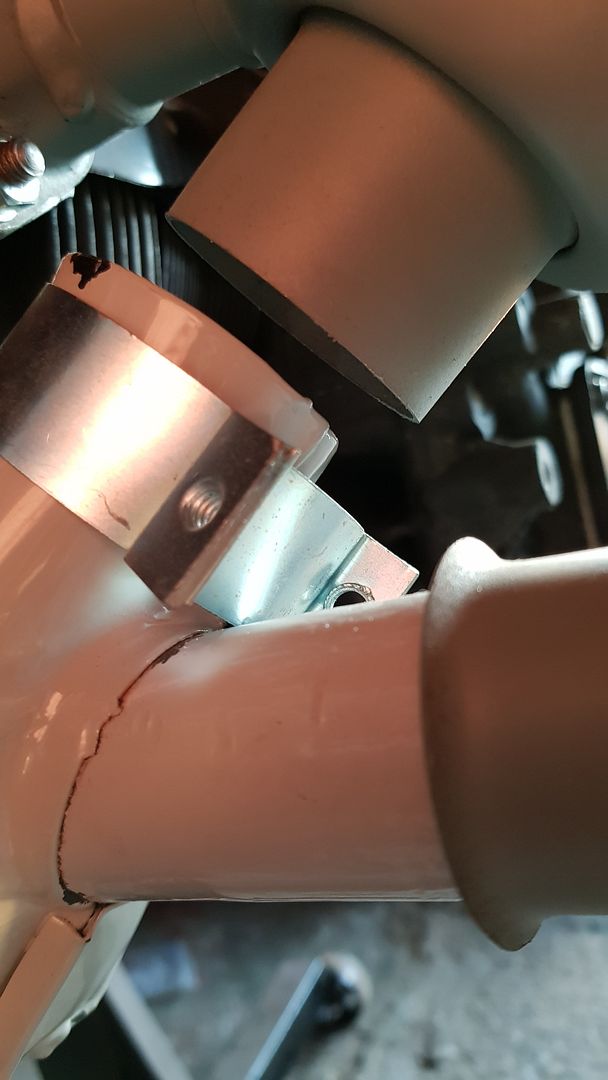
Also added the exhaust studs - 2 of them didn’t mount to well so will need to buy a couple more and try again :(

First one in :)

20181103_140521_zps0bnf4chv.jpg


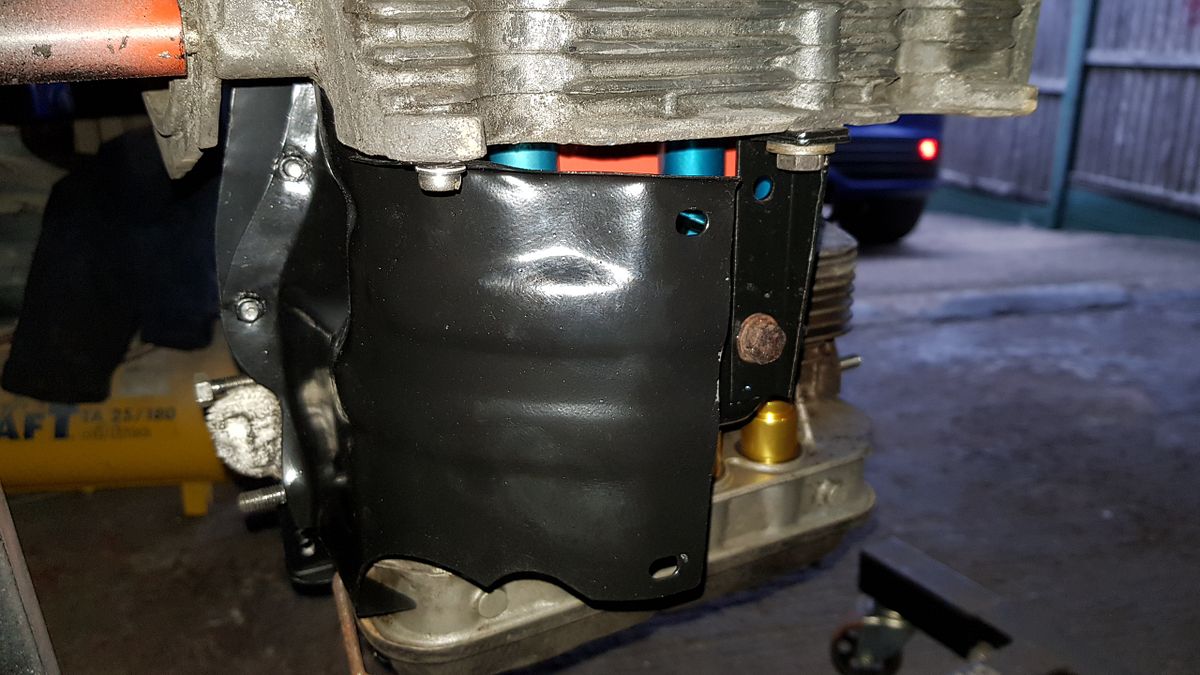
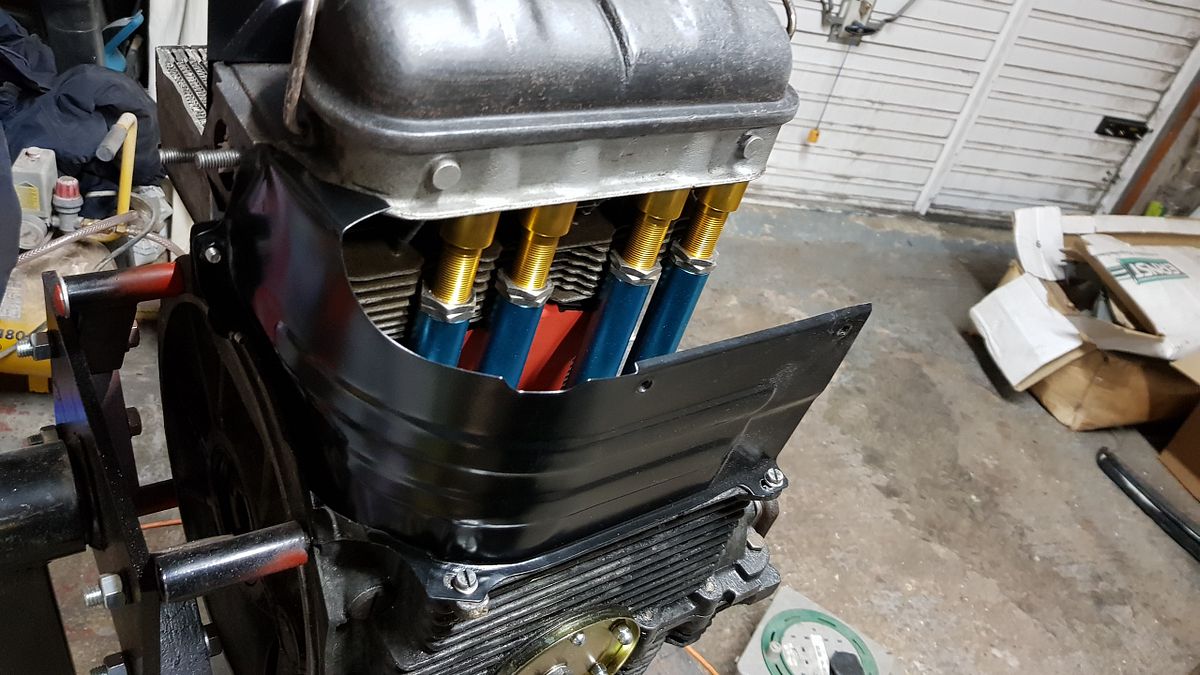
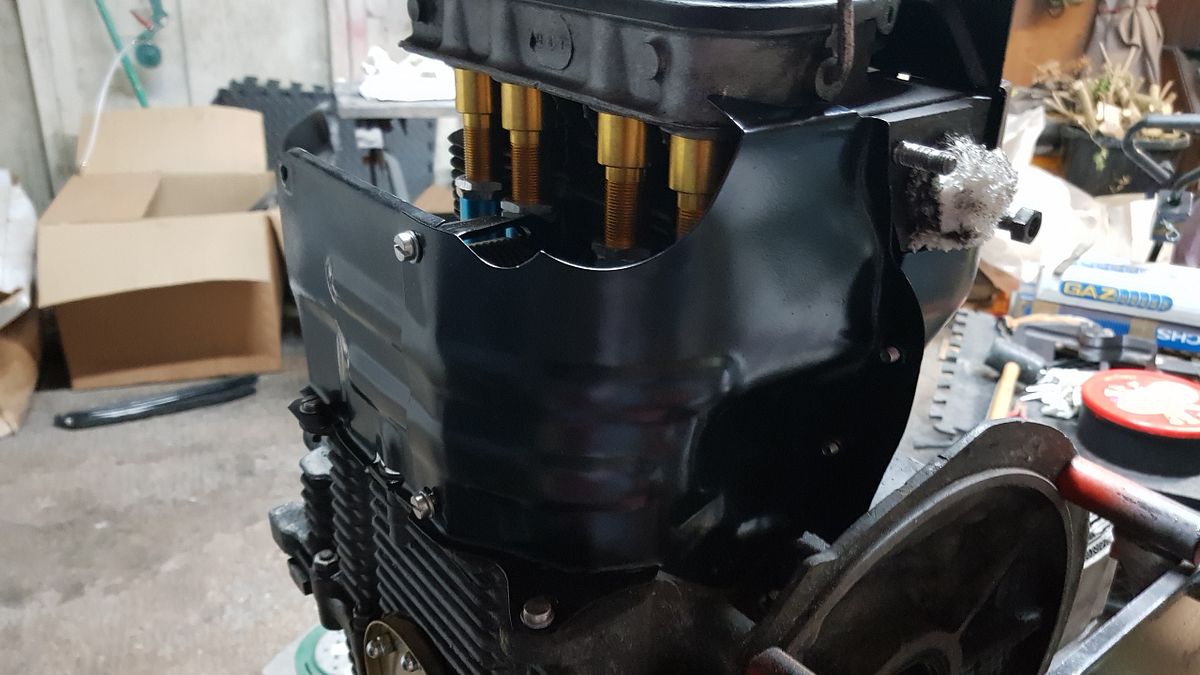
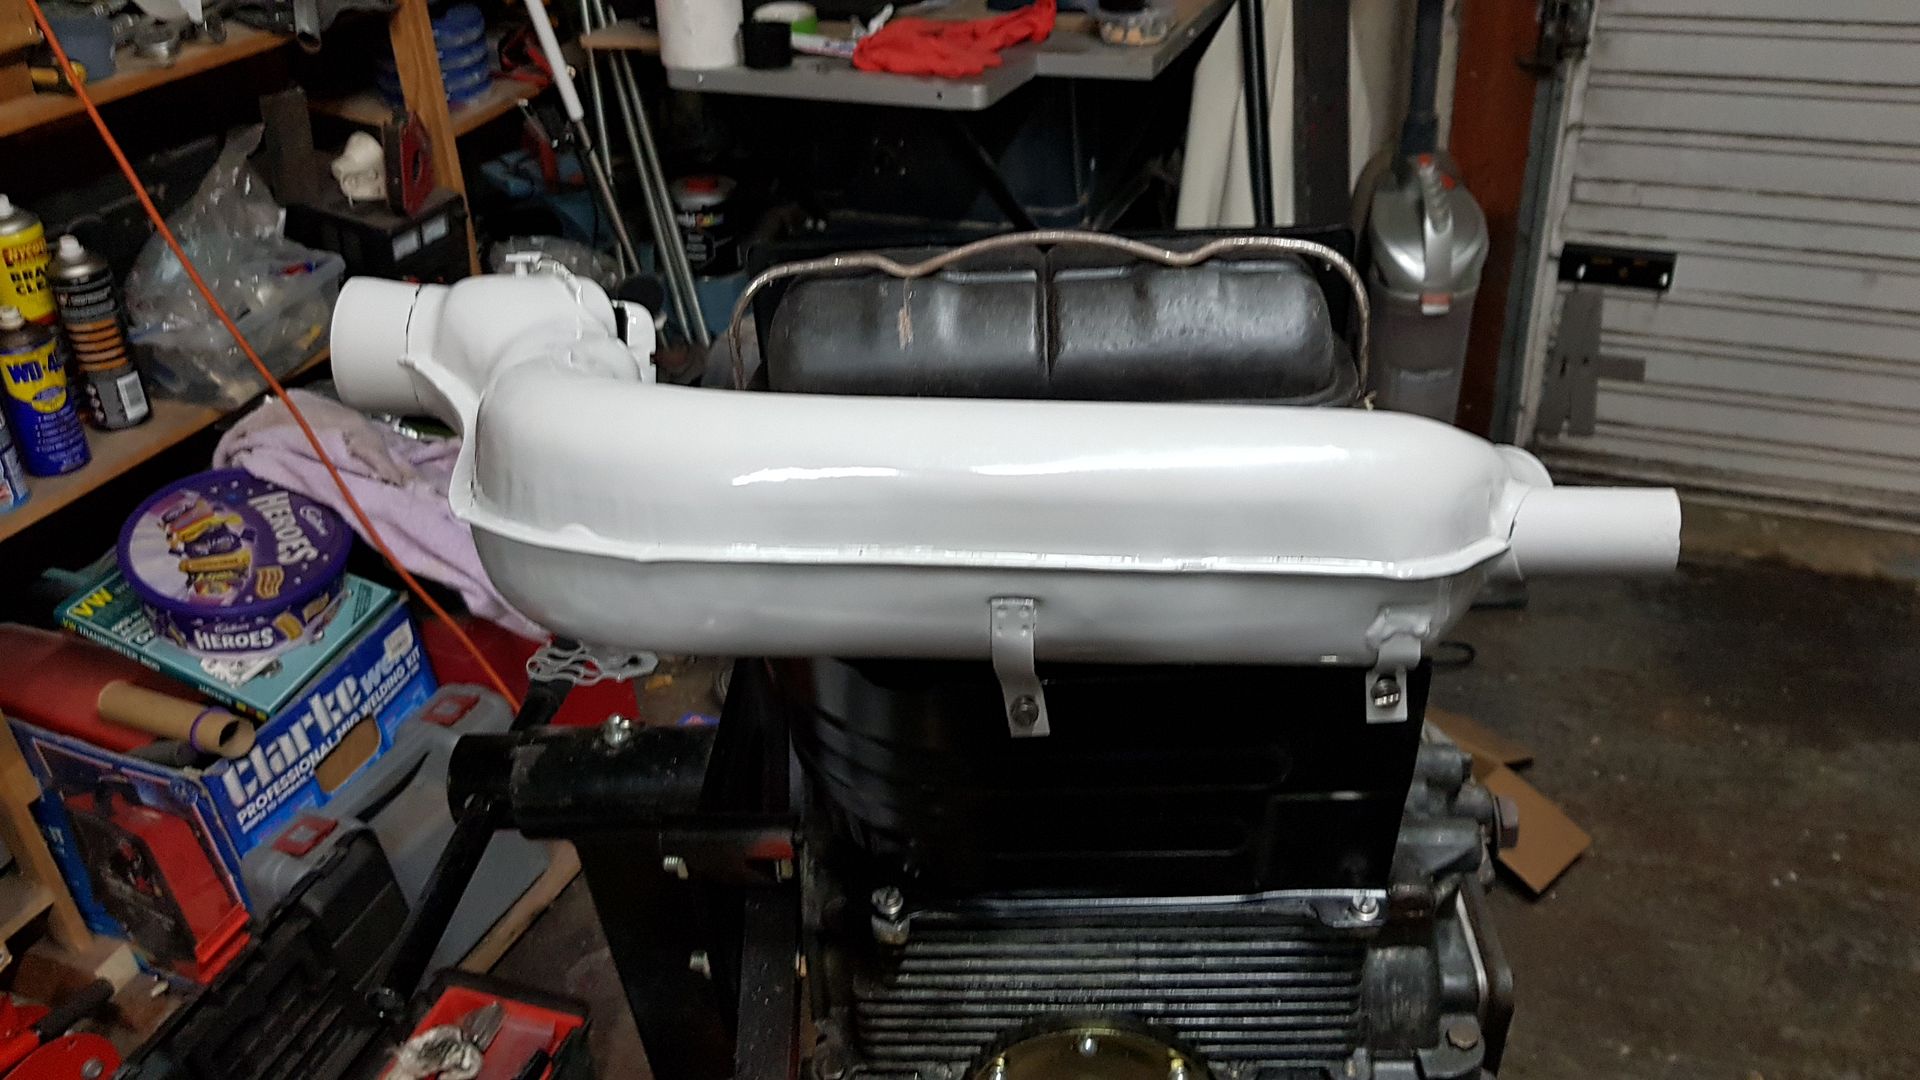
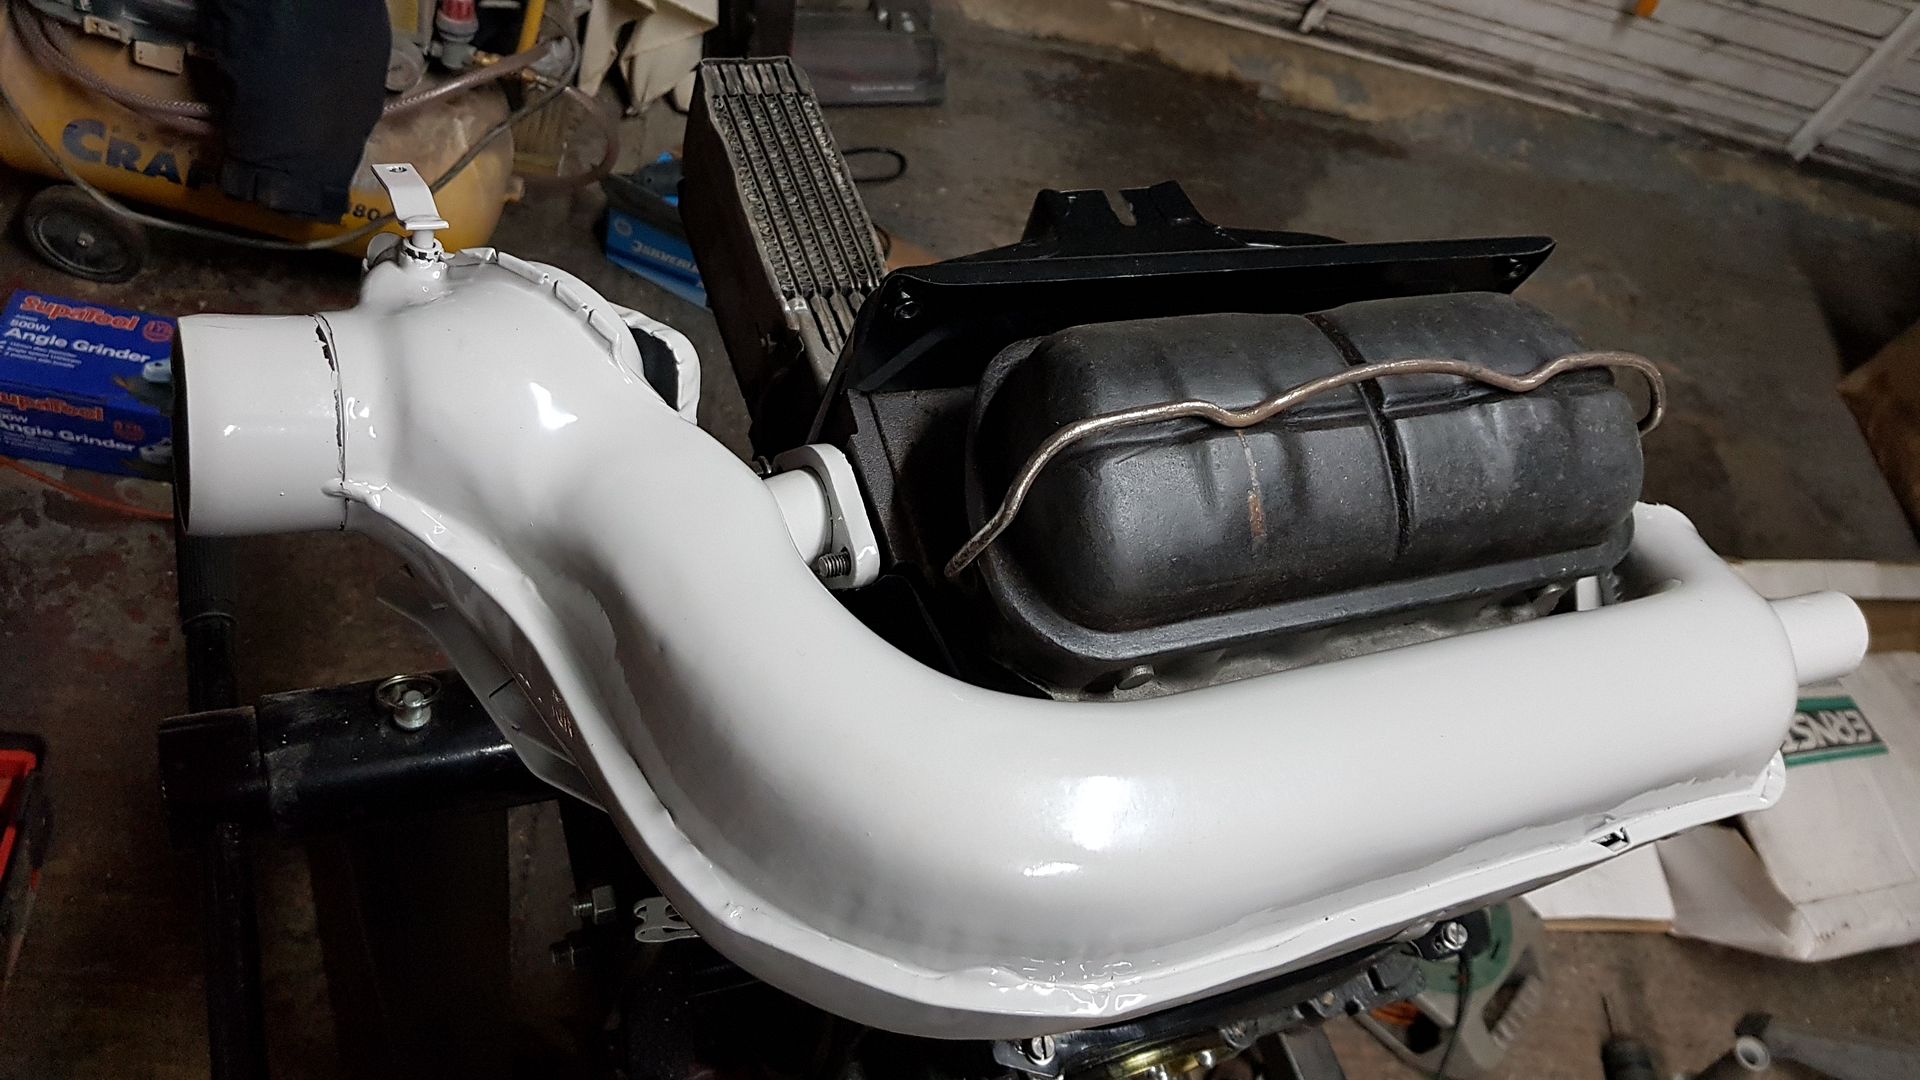
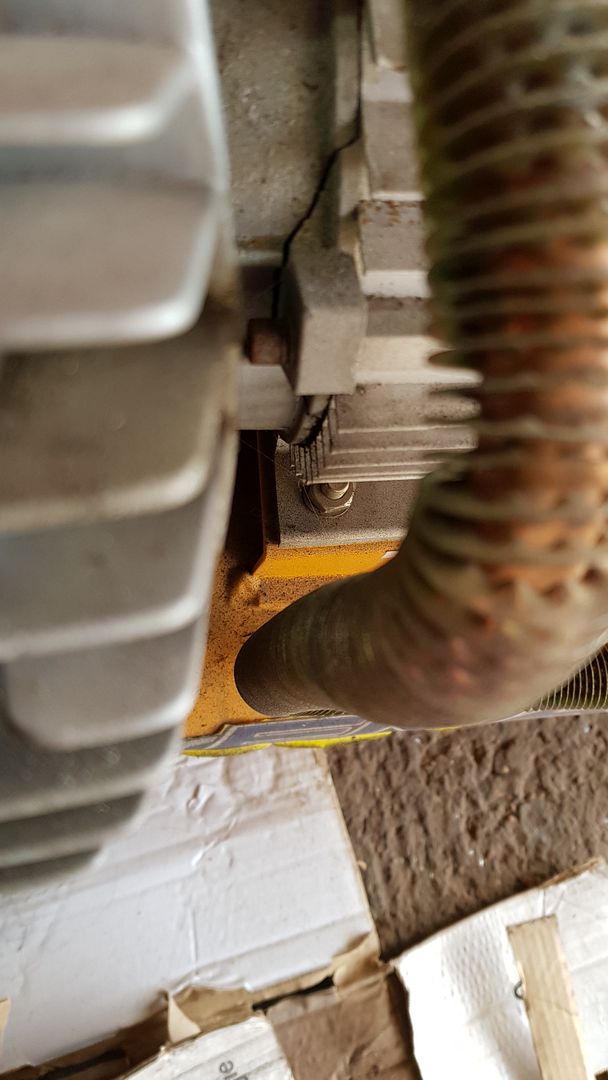
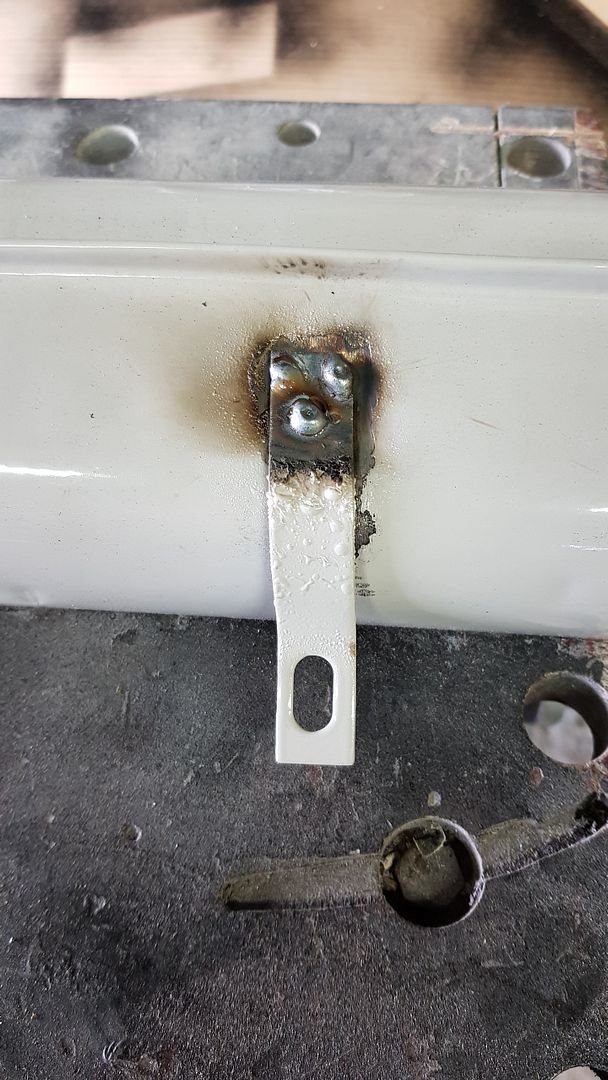
Also started to add the tinware but will have to drill an old nut out of the other side as I had to cut it off a few years back to get the tinware off :(

First one going in:

20181103_151830_zpsbk8gkycn.jpg


Cheers
 
07.11.2018

Continued with tinware - drilled the remnants of the nut out of the block:

20181107_174047_zpshaq7p0vf.jpg


Tapped the thread:

20181107_174444_zpsmzylgirv.jpg

Checked the bolt fits (which it did):

20181107_174422_zpsggibpkd1.jpg


Tinware then added:

20181107_175438_zpswu6qpmko.jpg


Added the final piece to the other side:

20181107_181836_zps27xtqr1d.jpg


Test fit of the offside heat exchanger - not putting it on properly as these are the 2 studs that need to come out and replaced:

20181107_182335_zpsmzpwglxu.jpg


20181107_182341_zpsdcfacdx9.jpg


The nearside tested:

20181107_184653_zps79mekjd5.jpg


20181107_184708_zpsoabgmzex.jpg


Test fit of the exhaust - will need some fettling to get everything to fit properly but getting there:

20181107_185104_zpsetp1rc9p.jpg


Cheers
 
Looking brilliant. I found the heat exchanger connections and gaskets were a bit wait and see what I’d bought when I did them. Depended on the quality of what I sourced. Not sure if it was combatibility, make or just I’ll fitting repro. Bit of jiggery pokery jiggling them about. Mind you, the guy who I bought the bus off originally used cut up baked bean cans. I kid you not 😳. Your recent work is looking really peachy. Great stuff.
 
Thanks - I know what you mean about the quality but I think it will be OK.
Once I get the new studs (and fitted) then will attempt to fit it all properly - wish me luck!
 
A little bit done today - removed the exhaust studs (welded nuts to them) and installed new ones - all good :)

20181111_150128_zpsacc1jv2f.jpg


20181111_150109_zps2zmzoik1.jpg


Due to having other things on the list to do, that was all I managed today on the van :(
 
17.11.2018

Everything is fighting me at the moment and getting pissed off….. :(

Got round to checking over the compressor and found out why it doesn’t work - the engine ha a massive crack in it.

20181117_130551_zpsgs35kdf1.jpg


Tried to weld it up but think it is aluminium so struggled - and then it fractured again so if anyone wants it they can have it.

Started to fit the heat exchangers and one of the tabs broke off.

20181117_142600_zpsoazhs7po.jpg


And, While tightening up one of the nuts for the heat exchanger the thread gave way……
 
gninnam said:
17.11.2018

Everything is fighting me at the moment and getting pissed off….. :(

[...]

And, While tightening up one of the nuts for the heat exchanger the thread gave way……


I know that feeling and how frustrating some tasks can be.... That's probably one of the reasons (besides having the bus in another city, very far from my home) why I'm taking too long to finish my rebuild.
Don't let these small setbacks throw you down. Relax, turn your back for a while or change what you're doing for another task, and afterwards, with a more cleared mind, return and try again....
 
19.11.2018

Started to pull the compressor apart.
This is a picture of the whole:

20181119_185633_zps2wdyqd5v.jpg


20181119_185644_zpsxycjwjuu.jpg


20181119_185701_zpsspb6d4rc.jpg


Undid the bolts that hold the engine to the electric motor and it only moved 5 mm or so.
So, took the end of the engine off (removed oil) and this is inside - very simple:

20181119_194412_zps4y6k8vge.jpg


A view through the gap betwixt engine and leccy motor:

20181119_194452_zps0zdg4hxf.jpg


So - removed the fan shroud on the other side - when I move the fan by hand the pistons go up and down no issue - when I use the electric motor (holding the engine tight to the electric motor casing it runs well. If the engine moves just a fraction then all stops - so I need to stop the movement.

Need to remove the engine, but a circlip is keeping the fan mounted to the shaft that runs all the way to the piston.
Guess what I can’t find…… my circlip pliers. That will teach me to tidy up :(

Working away for the next few days so will have a look for the pliers next week end.
 
graysummers said:
Dropped by. Niggles must be a pain in the butt. But looking back....you’ve had more than this and won the battles. Don’t know how you do it! Keep on keeping on.
You keep me smiling so thanks 8)
 
02.12.2018

Found a few minutes today so tackled the tab that had come off the heat exchanger

Welded on, ground down and then a dash of primer added.

20181202_114557_zpsuprvwft3.jpg


20181202_115505_zpsdnyouprp.jpg


Hope to get it fitted over this week and also find my bloody pliers so I can sort my compressor!!
 
24.03.2019

Good weather so spent some time on the van.
Connected up the last 2 brake pipes:

20190324_121515_zpsrxio5dfv.jpg


20190324_121528_zpsub1kx7xz.jpg


20190324_121535_zpsbxu24nso.jpg


Also made a plate to go over the rectangular hole I made for the wiring to the engine bay.

Before:
20190324_143400_zpsev4nvd4f.jpg


After:
20190324_145317_zpsmbppyoah.jpg


Once the weather warms up will give it a lick of paint.
 
28.03.2019

Started to put the gearbox bits on but waiting on an order from VW Heritage so put the rear support bracket.

20190328_182143_zps645ucbbf.jpg


Will continue the build hopefully next week if/when the delivery arrives
 
30.03.2019

Thought I would continue with the engine build so managed to get the heat exchangers on but the bloody tubes don’t match up very well on one of the sides so the clamp doesn’t work so looking for suggestions and ideas please.

20190330_175017_zpsywxbpfyl.jpg


20190330_175022_zpsmrytrf78.jpg


20190330_175032_zps2jxexhed.jpg


And this is what it looks like so far.

20190330_180147_zpsbcjojtsy.jpg


Off on holiday so not much will happen over the next few weeks.
 
graysummers said:
Looking brilliant. I found the heat exchanger connections and gaskets were a bit wait and see what I’d bought when I did them. Depended on the quality of what I sourced. Not sure if it was combatibility, make or just ill fitting repro. Bit of jiggery pokery jiggling them about. Mind you, the guy who I bought the bus off originally used cut up baked bean cans. I kid you not 😳. Your recent work is looking really peachy. Great stuff.

I typed the above a while back in your thread. Baked bean cans.......😉
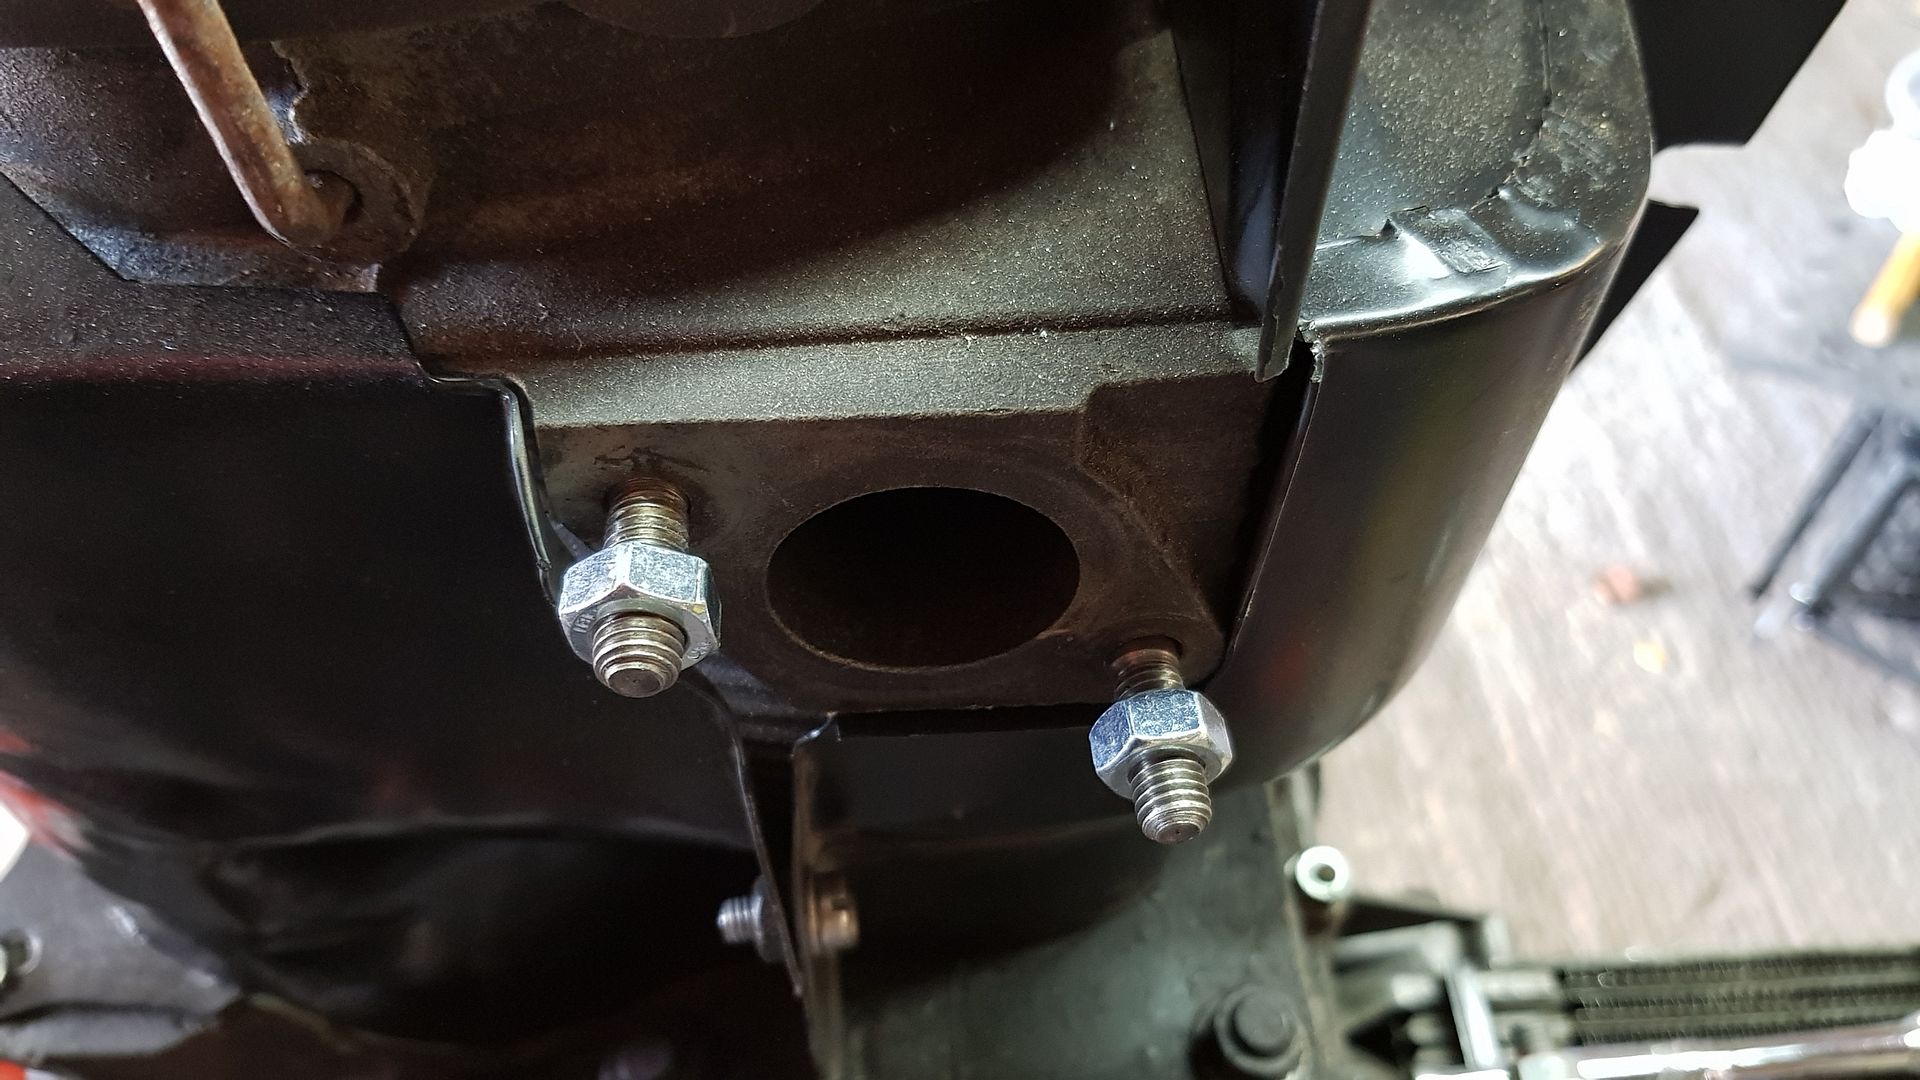
. Seriously. Can you weld a bridging tube. Not sure if that effects the efficiency though. Getting a whole new kit isn’t cheap. And if you have original exchangers with the far superior qualities of having more internal fins......priceless.
 
Yes - they are original heat exchangers.
Away from tomorrow so when I get back I will have a look at the best way to ink them together.
Although I have another problem - on of the exhaust studs no longer grips on the thread in the cylinder head so when I tighten the nut I can hear the stud moving out so will have to drill it larger and tap it so I can fit a 10mm stud,,,,,,,,

How you enjoying the van then??
 
The bus is my daily transport. So it’s a constant in my life. Paul’s engine rebuild has resulted in a beauty. Just bought the engine top half way back when the early renovation was happening. Sounds tight. Pleasure to amble about in. 50 to 55 mph is my gentle limits. Pootling along is a relaxing experience before the chaos on the hospital ward. And driving home after a shift is like a massive breath of relief. Dubs do this for you don’t they? Other than that, I’m just waiting until the brighter weather to get out for a few days and sleepover. Wake up and look over a lake or beach or the like. Loving your progress. Wishing you a brilliant holiday break.
 

Latest posts

Top