Reinstating "original" seats

Early Bay Forum

Help Support Early Bay Forum:

This site may earn a commission from merchant affiliate links, including eBay, Amazon, and others.

Zcat7

Well-known member
Joined
Apr 12, 2010
Messages
662
Reaction score
3
Location
Oxfordshire
Year of Your Van(s)
1972
Van Type
Crossover
My 72 crosser was fitted with non standard seats when I got her and I want to reinstate original style seats so that I can fit an over-seat bunk. Don't know too much about what I need but I believe that there are different seats for for early and late bays (which one for crossovers?), that driver and passenger seats are different and that some type 25 seats fit?

I'm not too bothered about getting the correct year, so long as they are close to original and fit OK. Can anyone tell me my options and what I need to source please?
 
The first thing to do would be to take out your current seats and see what you have in terms of original runners (driver) and brackets (passenger). Get some pictures up and then someone can tell you if you are missing anything.

I'm not 100% sure on the early and late seat differences but I think they have different runner, sure someone will correct me!
 
Not sure about taking the seats out. I'n still using the bus plus it's cold out there! :) I will take some photo's though. From memory the "zig-zag" runner is in place on the driver's side but might have been cut into but it isn't on the passenger side (don't think there is supposed to be one?).
 
So I have the "toothy" runner next to the walk through and the flatter runner on the offside of the drivers seat but there's nothing on the passenger side. Looking at some pics online I see there is supposed to be a pair of brackets in like a "UU" shape toward the bulkhead for the passenger seat but they are missing on mine. Are they the only fittings I need? How do the fronts of the passenger seats attach?
 
You'll also need these for the back of the passenger seat@

https://www.customandcommercial.com/vw-baywindow/baywindow_interior_parts/baywindow_seat_mounting_parts/german_quality_quick_release_seat_bracket_set_bus_68-73_12333/
 
Thanks Chad. As it happens I have the U shaped bracket in my box of spares and had wondered what it was for. I've also found that the other brackets are available from VW Heritage https://www.vwheritage.com/shop/bay...walkthrough/?crumbStartPage=1&crumbStartRow=1 and it looks like they just bolt on, which is good news.
So assuming I find a seat with the other piece of Chad's "hook and loop" what else holds the seat in place and stops it jumping about?
 
The passenger seat is meant to be removeable. The double U.U. is for the rear bar to sit in and it has two slots so you can have two positions as there was no expense spared on comfort in these here vans. You have to get the rear bar into any one of the cut outs that you fancy, then pushdown on top of the back squab with a fair bit of pressure, then lift the front of the seat squab then you can push the back down a little more to allow the hook to engage on the rear of the back squab, then release and it`s all locked in place. Removal is a reverse of installation :roll: I wouldn`t try fixing one up without looking at another original one to get the whole idea first :mrgreen:

Ozziedog,,,,,,,,,,,,,A fat arse keeps most in place :lol: :mrgreen: ;) :mrgreen: :lol:
 
Great, thanks Ozziedog. So not ISOfix compatible then for the baby seat :lol:
Thanks all, that's very helpful.
 
So I got this all sorted. Managed to source a pretty sound driver's seat and very tired passenger seat plus the missing bits for he passenger seat fitment (basically the 2 floor brackets which are available from Butty's Bits/VWH)

Thought I'd share some photos -

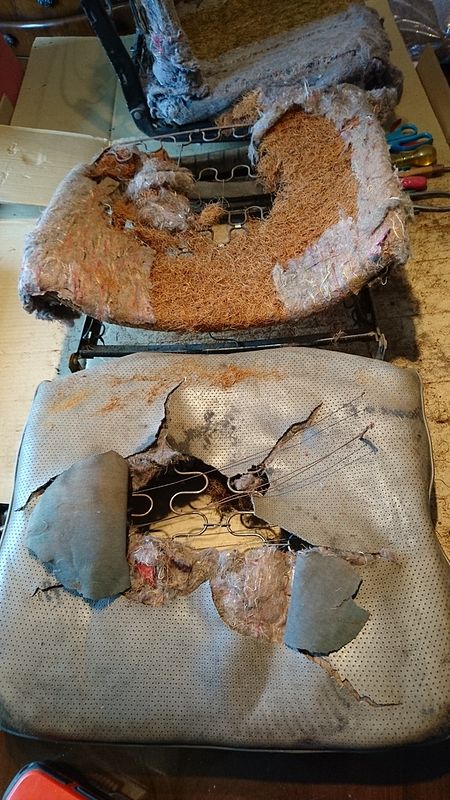
A very sad passenger seat, literally had the stuffing knocked out of it...
DSC_0193_1.jpg

DSC_0194.jpg


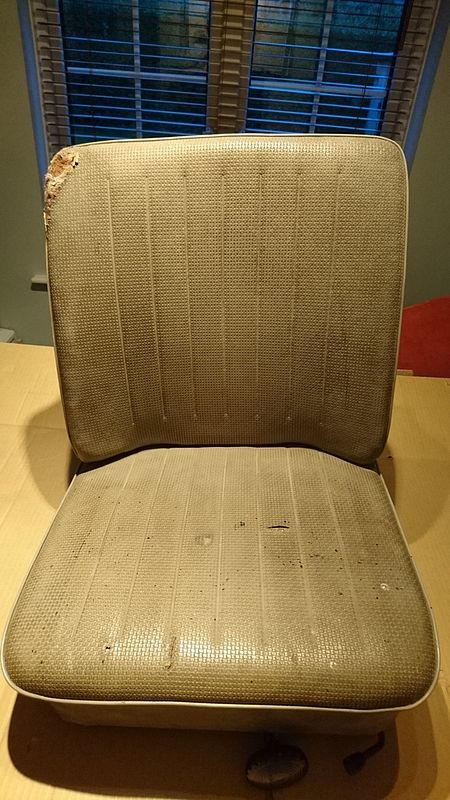
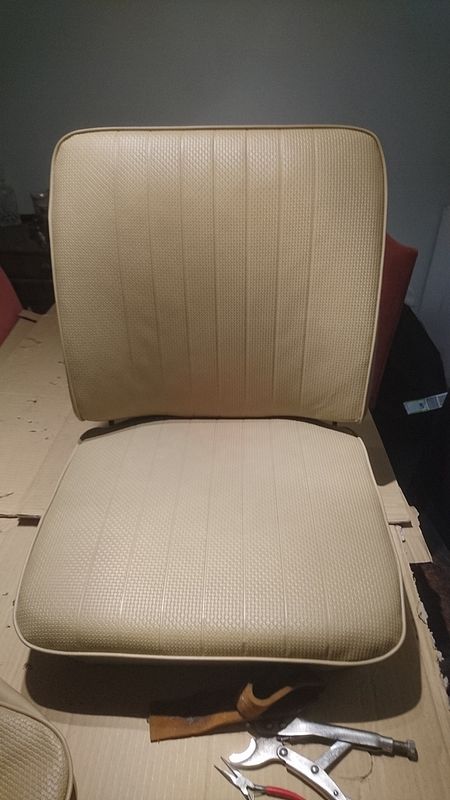
Good driver's seat but damage to the corner
DSC_0167.jpg


Which I repaired with a salvaged piece from the passenger seat
DSC_0207_1.jpg

DSC_0192.jpg


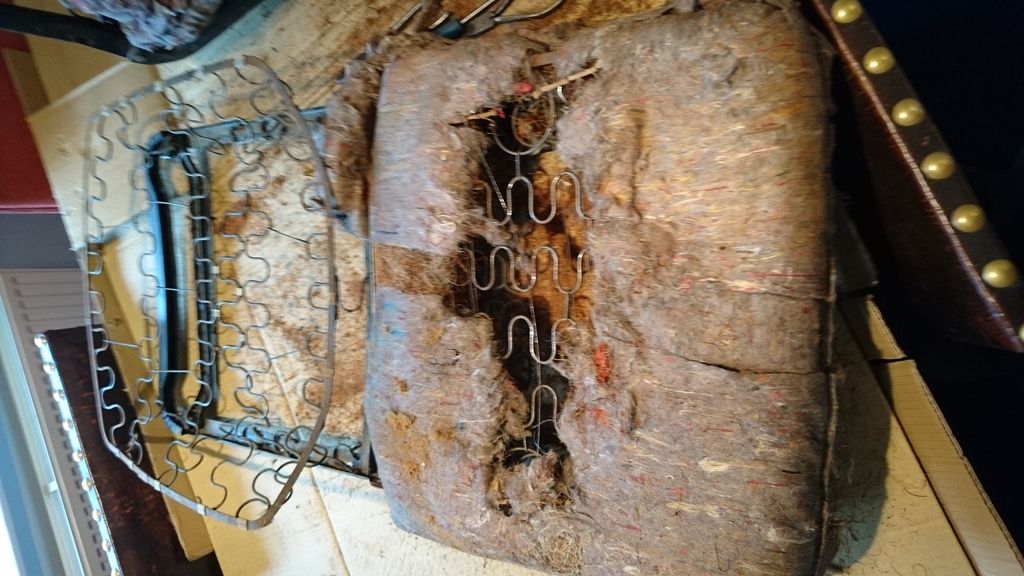
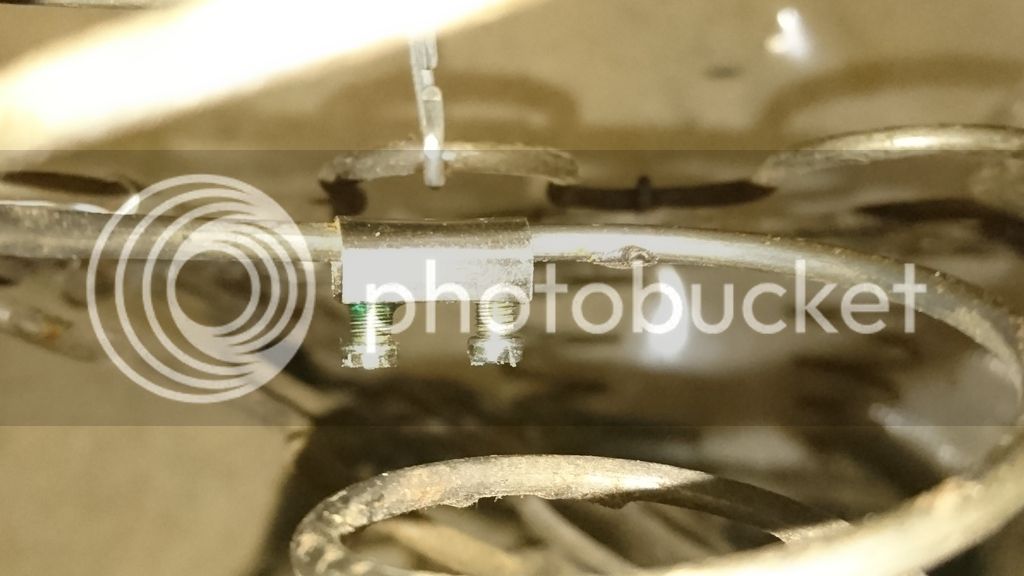
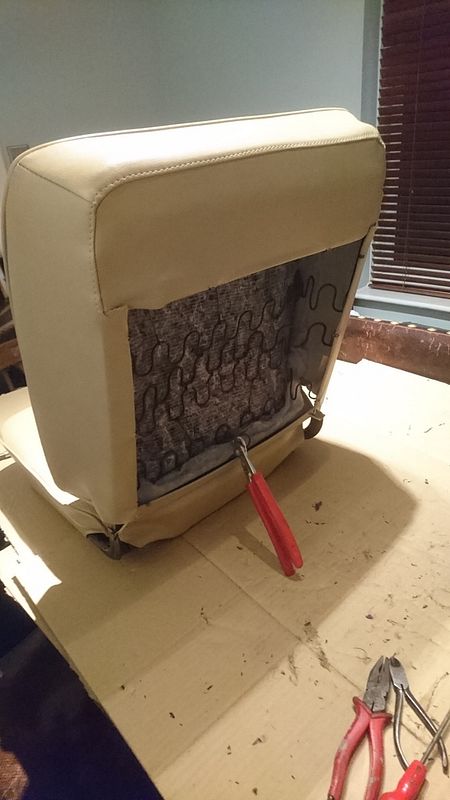
I also repaired a broken spring. I used the main part of an electrical connector block and just stripped off the plastic shroud. I made sure to use a steel one (some are brass) that fitted snug and applied threadlock to the screws; you can see it dripping out on the left one.
DSC_0202.jpg


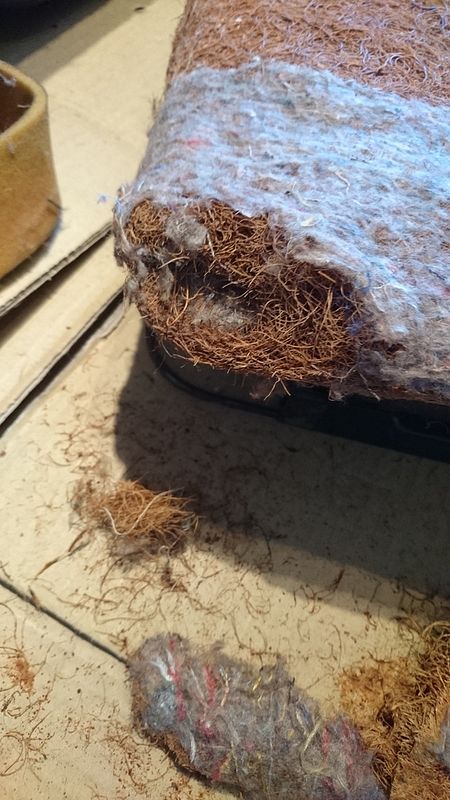
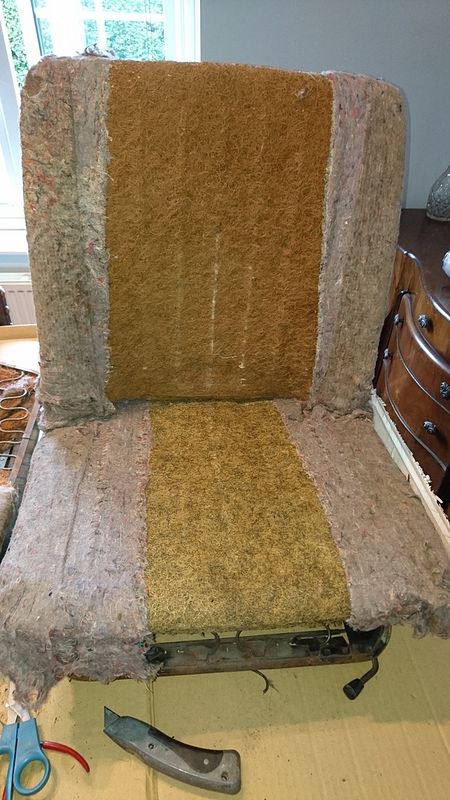
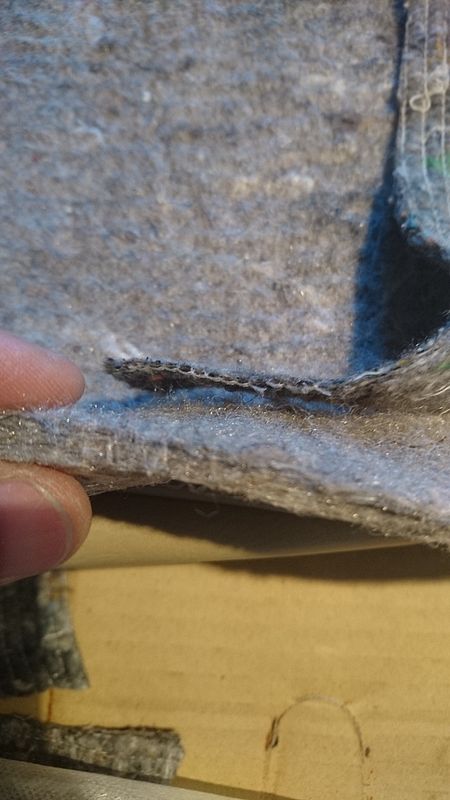
I retained the original horse/coconut hair pads for the driver seat and bought new for the passenger seat. Under both I attached some composite cloth used for protecting furniture during transit - highly scuff resistant. I did buy the stuff that VWH recommend (apparently new from TMI) but couldn't make this work as I found it too thick and it made the matting (both old and new) stand out proud at the sides.
DSC_0375.jpg


You can see the difference in thickness here
DSC_0373.jpg


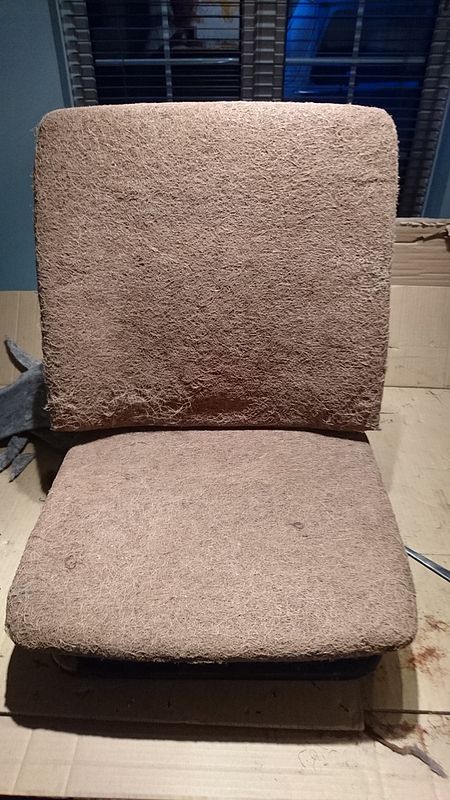
New coconut pads fitted - NOTE I HIGHLY RECCOMMEND YOU TRY THE FOAM ALTERNATIVE! These replacements are not like the matting in the original pads in that they are completely impregnated with a rubberised binding compound and hence are like sitting on a sheet of MDF. I doubt the springs in the frame even play a part in suspending you in the chair, it's that stiff. The original seat is SO much more comfortable...
DSC_0210.jpg


I forgot to take photos of the next stage but I covered them both in 5mm batting or wadding - a white candyfloss type of stuffing that comes in a roll. Dirt cheap on fleabay. It helps smooth out the finish especially around the edges. I used a couple of layers on the new seat pad to try and soften the seat (to little avail...). You can see a bit of it in the shots (lower down) of the open back that you have on the passenger seat

Then it was on with the covers. Advice - Trim your nails and use a Bullworker for a couple of weeks prior as this is a bit of a workout.
DSC_0371.jpg

DSC_0372.jpg


The slight creasing and lumpiness you can see soon came out after I went over the covers with a hairdryer and smoothed it all. It's also important to make sure that the piping seam faces away from the face of the seat covers so that it is tucked down the sides. Mostly easier to do this from the start of installing the cover but can be sorted afterwards.

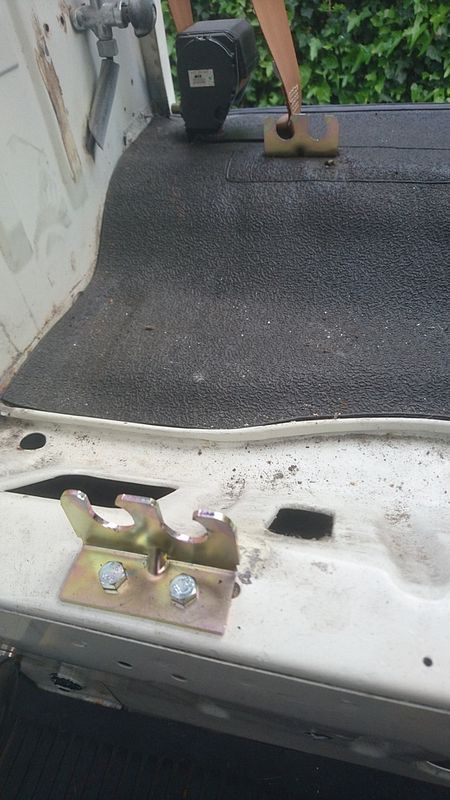
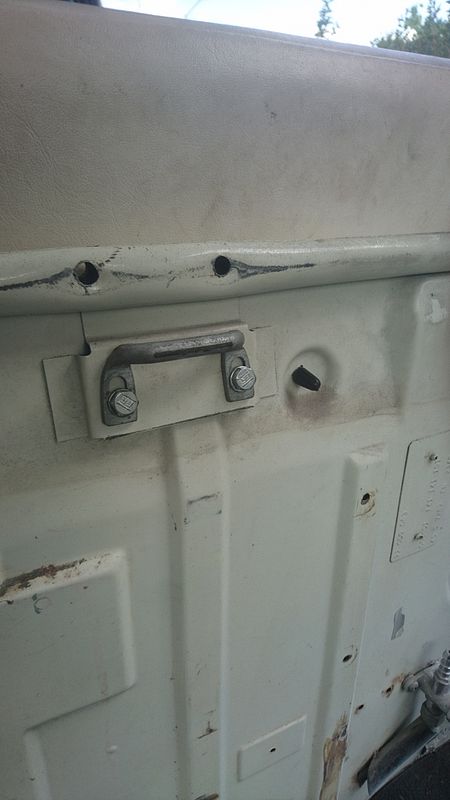
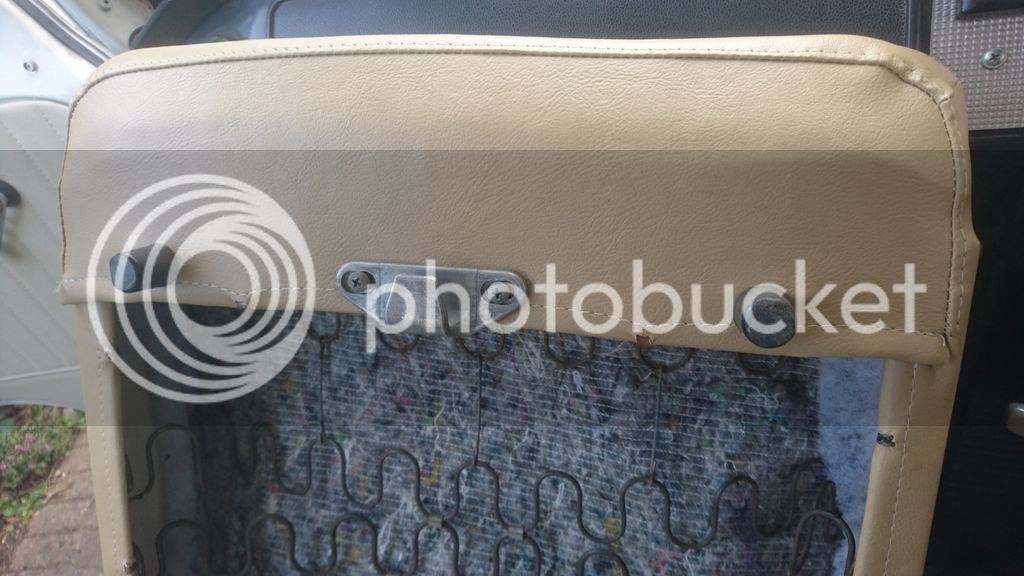
Installed the new brackets and put the seat-back receiver back to where it should be for the first time since 1972! Dormobile repositioned it to where the 2 holes above can be seen as part of the cooker installation and seat conversion
DSC_0405.jpg

DSC_0406.jpg

DSC_0407.jpg


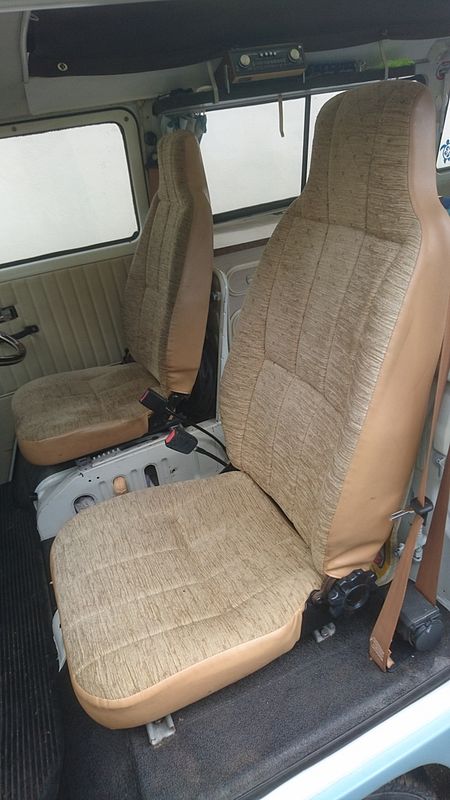
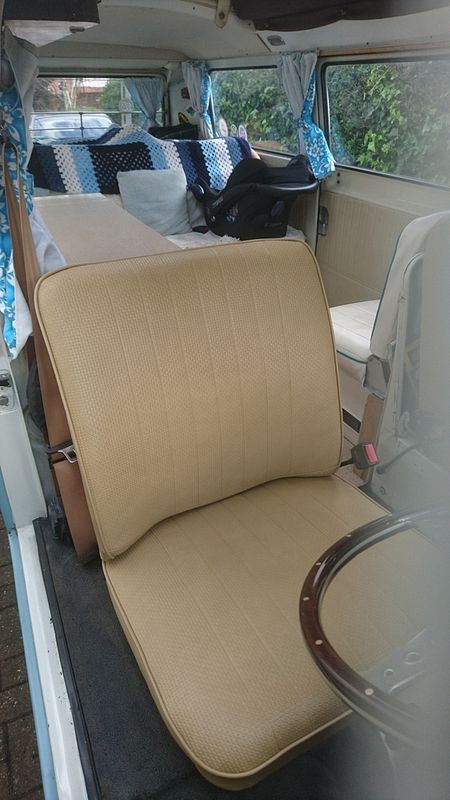
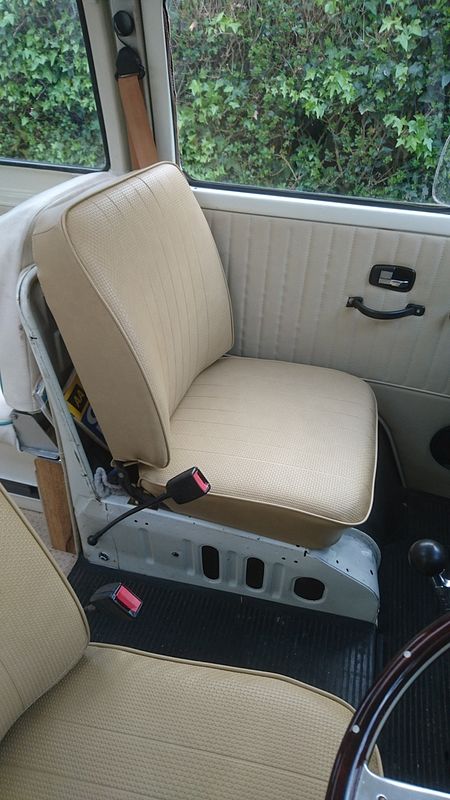
So out with the old...
DSC_0383.jpg


...and in with the new! (well, new-old... you get the idea)
DSC_0403.jpg

DSC_0402.jpg


I like the stock look and now I can fit the cab bunk in :)

Hope it's useful!
 
They look tremendous, and thanks for posting up pics, I've got to do mine this year and this will be really useful.
 
I like the stock look. Had high backs but stick in this one and very happy with them. Great bit of work, looks great
 
Thanks all! :) I'm really pleased with the finish. The covers are TMI ones from VW Heritage btw and the fit and quality is really good. I will be swapping that passenger seat squab at some point though..!
 
Lovely job mate, my '68 came with GTI Recaros which were awful to sit in. I sourced originals and did pretty much the same as yourself, no regrets from me, improved the ride no end :)
 

Latest posts

Top