The bus with no name - 1970 Hulk-green Devon

Early Bay Forum

Help Support Early Bay Forum:

This site may earn a commission from merchant affiliate links, including eBay, Amazon, and others.

Moseley

Well-known member
Joined
Sep 15, 2013
Messages
1,517
Reaction score
89
Location
Worcester
Hello folks,

Since buying our bus as the weather got less summery last year, it has done nothing except throw up problem after problem. By starting this thread, I thought it'd be a good way to capture all of the effort gone into it so far over the winter months and hopefully future updates will see us actually getting out in it, rather than having it sit on axle stands the majority of the time!

Where to begin... we bought the bus as a bit of an investment that'd also give us something of a project to get stuck into. Although I had an idea that it'd be a bit of a money-pit, I think I underestimated that a bit! :lol:

Our hearts were set on an early bay from the outset - we're not fans of the late bay look, and couldn't afford a splitty that would be usable out of the box. The search began... after scouring many for sale ads, and being disappointed by what was on offer at busfest, we weren't getting any closer. Going to view buses often resulted in further disappointment where owners had used pictures from a previous restoration, and they weren't anywhere as good in the flesh. However, all was not lost when a new advert popped up not too far away and off we trotted for a look. It ticked all our boxes - appearing very good structurally, but with a bit of a crappy, homemade interior - the things that we could improve ourselves. The owner let me disappear for a test drive, however, this had a gearstick with more play than I have ever felt with anything, so I just couldn't work out when it was in gear. I was in so much fear of getting stuck on a main road whilst trying to find 1st that I literally just drive up and down his road a couple of times before promptly handing the keys back. :shock:

Despite this, we made an offer there and then, which was accepted, so put down a deposit whilst we sorted out the rest of the cash.

I was genuinely cacking it at how I was going to drive this un-driveable bus the 60-odd miles home. And to add more stress to the situation, unfortunately, whilst following the Mrs home, the main road we needed to take to avoid single-carriage lanes (this was the first bus I had ever driven more than half a mile!!) was shut, and the TomTom then promptly took us through the middle of nowhere, down lots of unmade roads. :x Despite having to stop part way in to relieve some of my frustration at the satnav, we made it home, and here is the beast on it's first day at it's new abode:


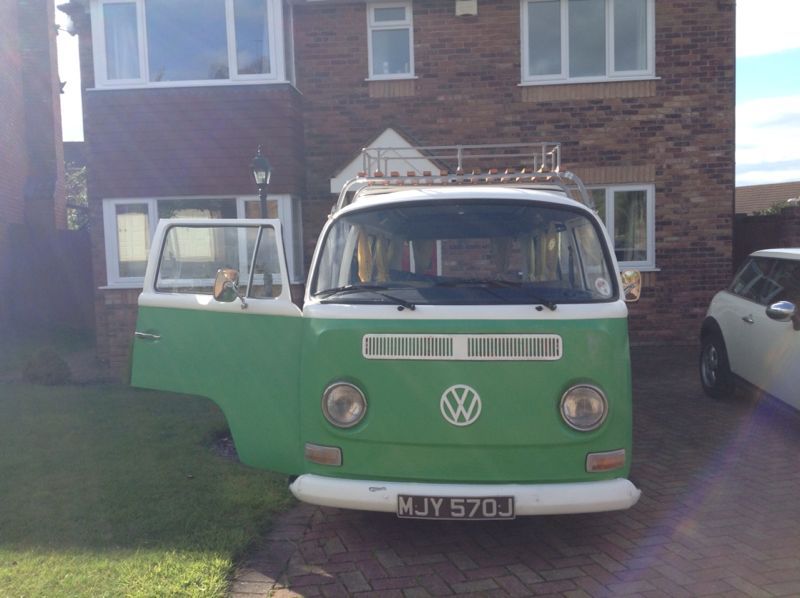
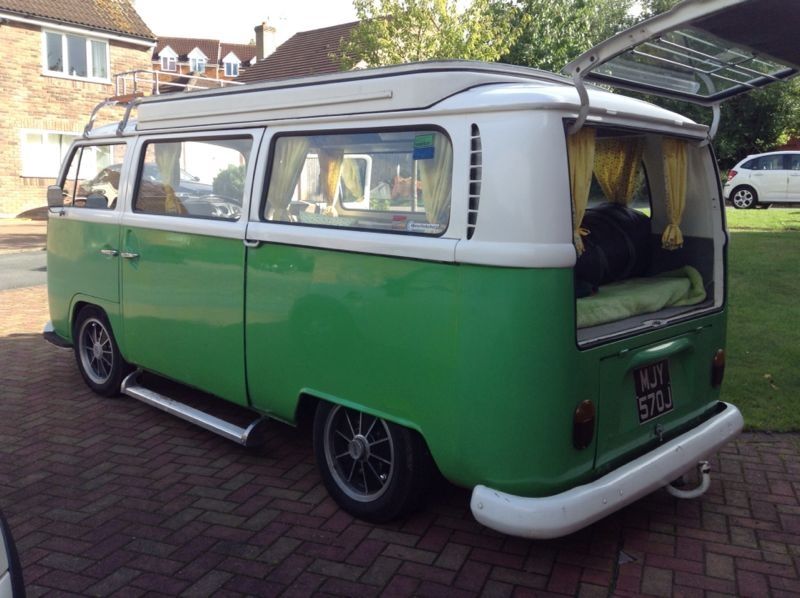
More to follow to the present date... 8)
 
Whilst driving the bus home, I noticed a rotational squeaking noise that matched the speed of the wheels going round. At the time, it was one of those noises that I just put down to it being a 43 year old vehicle, and figured that I would have a look at it over the winter.

Anyway, fast forward a week or so and I was looking for an excuse to use the bus before the weather got crap. I had an old shed dismantled in the garden, so thought it'd be the perfect opportunity to go for a short run out to the local tip. Carefully we loaded it up and set off.

On driving up the road the squeak seemed a little louder than I remembered from when we collected it, and there was the occasional scraping noise thrown into the mix. The Mrs was panicking, whereas I just wanted to plough on and take a look at it later... especially as we had a van full of old shed. Unfortunately, I should have take note of her concerns, because as we got to a faster section of main road, the van suddenly veered to the right as if someone had jammed on the brake on the one wheel. Fortunately, I had got a good grip of the wheel and using a combination of hanging off the steering wheel whilst braking hard, we came to a stop without hitting the oncoming traffic.

I jumped out and had a nose underneath, expecting a suspension arm or something to be hanging off, but couldn't see anything wrong. :?

I managed to limp it into our workshop (by luck was just opposite where we had come to a rest) and then walked home to fetch some tools. I wasn't quite expecting to be carrying out running repairs only 2 miles into it's first outing. And here is what had been the source of the squeaking:


Cue one shafted bearing that had been assembled too tightly, and more importantly, with no grease on the inner bearing. The nearside turned out to be the same as I found at a later date. :roll: Look closely enough and you'll see two rollers had gotten so hot that they had melted together. :shock:

Fortunately, no damage to the spindle had occurred, but as with all things, once you start stripping things, more problems are found.

Firstly, the adjusters were set to their lowest so the ball joints were pretty much permanently on the limits - as others have probably experienced, the ride quality was horrendous to say the least and more like a trampoline on steroids.

Secondly, one of the beam bearings had been tapped home a little forcefully, meaning the casing had crushed and pinned the rollers into one position.

Thirdly, the steering idler has seen some form of overhaul that had led it to being re-assembled with half the vital components missing.

Fourthly, the idler arm had had the threaded section drilled out, meaning it wasn't properly clamping the idler pin.

Fifthly, nearly all the ball joints had split boots or had been bodged together with zip ties.

So this ended up with the garage looking like this:


Whilst this was going on, I decided that I had a fuelled hatred for BRM wheels so found a set of Brazilian Mangel 356 reps.


These promptly got slung in the sand blaster at work, but then needed a further 3 efforts with a shot blaster to get all the chrome off, ready for a unique shade of powdercoat green.


(Green pics to be taken at some point...) :)
 
Just realised that I have clearly failed at my timeline...

At some point after fitting new wheel bearings, but before dismantling all the suspension, we had to park the bus on our driveway so that we could get the garage floor resin coated - nothing wrong with a bit of bling! 8)

Over this period, it rained for a week solid, and one day, whilst walking past it, I saw what I thought was a drip from the roof inside it. Closer inspection revealed that my eyes were not deceived, and there were a few small puddles on the laminate floor... joy. :cry: Looking out of the upstairs window, I could see part of the problem - the classic Devon rooftop swimming pool.

Taking down the headlining revealed that is had been doing it for some time as the ply was completely sodden and covered in mould.

Fast forward a couple of weeks and I decided to do a bit of a roof rebuild, as there was no point starting on an interior until it was water-tight from above.

I've got no pics of the strip down, but we decided to go the whole hog and take everything apart, re-rivet, chuck in some powdercoating and a new canvas. :shock:

After stripping it down and drilling all the rivets, the starting point was removing all the layers of sealant / paint / shite from the aluminium sheet.

This took fecking ages, and this pic summarises our general thoughts of it:


There was silicone sealant, some other white sealant, a layer of roof paint stuff, some kind of bitumen based cack and some white paint for good measure. And it took us bastard weeks to get it all off.


... by which time I decided that it would be easier to just buy a sheet of ally and start again.

Which is what we did.
 
So, the frame that sits under the sheet was a bit worse for wear with some splits and poor repairs over the years. Instead of making a like-for-like replacement, being an engineer, I decided I could go one better and attempt to re-design the roof, making it stronger, longer-lasting and less prone to leaks in the future.

I started off with a load of 19mm 16swg box section.


These were cut so that the long lengths would rivet to the sheet, following it's natural curve. Then straight sections would join the two lengths to create a ladder - these being cut at the ends at a slight angle. (Hard to explain what I mean here, but it may become clear later on).


By doing this, the thinking is that box section is much more rigid than the OE 'C' / 'Z' section. Also, it does away with the rivets holding the 'bows' to the sheet.

I used the sheet off-cuts to make a few corner supports for the frame:


And drilled to suit:


These were then all folded very slightly to match the join between the frame sections:

 
Once the framework was riveted together, I now needed a way to support the middle curve of the sheet, as currently, all the weight would be supported by the two lines of rivets down either side.

I bought a sheet of polypropylene and then got crafty with a wooden template and a router.


You can see the profile that I have cut from them here, the idea being to use two of these bows per horizontal box section piece, and then sandwich it all together with a few nuts and bolts:


And here it is getting bolted together:


And then marking up where the rivet holes need to go on the new sheet and frame using the old one as a template:


You can see here how 'rough' the original sheet was cut compared to a square edge:


And that is where it is up to for now, maybe we'll get out in it at some point this year... :msn4:
 
Would love to see the completed devon roof saves putting on a JK roof cap on top of the old ali one which I have done & now can barely lift the roof up :oops:

? Dont remember any bow in my roof just a flat sheet which I think was welded to the frame supports & no rivets were found apart from what I have put in before getting a JK style roof cap , how are you going to attach it to the outer roof cap will you still need the rubber seal.

Good work good thread :D

Spot something similar below:
IMAG0270_zps4d7841f8.jpg
 
Tony123 said:
Would love to see the completed devon roof saves putting on a JK roof cap on top of the old ali one which I have done & now can barely lift the roof up :oops:

? Dont remember any bow in my roof just a flat sheet which I think was welded to the frame supports & no rivets were found apart from what I have put in before getting a JK style roof cap , how are you going to attach it to the outer roof cap will you still need the rubber seal.

Good work good thread :D

Hi Tony,

Yes that was my thinking - didn't want to use a fibreglass roof cap due to additional weight and looks; but also, I've seen pictures where these can also sag over time if the roof underneath doesn't have enough 'curve support.'

The original roof support had two pieces running the length of the bus which are straight and riveted to the sheet. The curve is maintained to more ally section that runs width ways and are also rivetted to the roof. However, from the factory, these pieces are bent into a slight curve to match the roof - and the nature of them means that over time they are effectively wanting to become straight again - the only thing keeping the roof curved is the outer rim and seal, but then if this is not a completely tight fitting, it is all going to tend to sag.

My idea of using the box section with the plastic in-fill bows should (I hope! :msn4: ) give the roof the support it needs, and it won't have a tendency to sag and invert over time. It also adds minimal weight, and removes all the rivets that run width-ways - further reducing the chance of it leaking. The original seal and outer rim will all be retained, but I have done away with the roof vent to aide getting the bus in the garage (and I accidently snapped it on removal... :msn4: ), and we didn't really see the use for it.

Am I selling my idea well enough?! :lol:

AFAIK everything should be riveted only from new, no welding, so sounds as if someone has tried to repair yours in the past.

Your corner sections do look familiar - I'm hoping that I can use mine to support some pieces of closed cell insulation without having to glue it in place.

Hopefully, once it is all back on the bus, I can insert some riv-nuts into the box frame and use this to attach a headlining to...
 
Great work, looks like your making some good progress!

i'm watching your roof refurb with interest as it's one of the many jobs i have to do. I have not removed it yet so had not seen how they are constructed.

So am i right in saying yours was originally flat and you are giving it a curve to add strength and make the water run off? and if that is the case how will you attach the outer frame to the curved sheet at the ends as the frame is flat all the way around (if you see what i mean)

Really interested in this thanks for posting and keep loads of picture coming :D

Woz
 
woz said:
Great work, looks like your making some good progress!

i'm watching your roof refurb with interest as it's one of the many jobs i have to do. I have not removed it yet so had not seen how they are constructed.

So am i right in saying yours was originally flat and you are giving it a curve to add strength and make the water run off? and if that is the case how will you attach the outer frame to the curved sheet at the ends as the frame is flat all the way around (if you see what i mean)

Really interested in this thanks for posting and keep loads of picture coming :D

Woz

No probs - I'm normally a bit slack with the pics, but was hoping with the roof refurb at least that it may be useful for others. To be honest, I really don't know how it is going to turn out... guess I'll know when I finally attempt to re-assemble it. :|

All the Devon roofs of this style are curved from the factory - including the outer frame. It is only a slight curve, but this is enough to allow the water to run off. The problem over time (as I think our one has done at several points in the past) is that the sheet gradually sinks and becomes flatter, until a point where water can pool on it, and at this pont they tend to just go concave. The original design is flawed as the framework underneath isn't man enough to keep the curve supported over time.

But back to the point about the supports I've made - these were cut using a template taken from the outer frame - so in theory the whole roof should have the correct curve along it's length.

dubbedup67 said:
Nice work dude.
Just an idea.as the van is hulk green how about Bruce for a name?:)

Keep the pics coming.

That was my idea also, but the Mrs isn't keen!! Clearly just going to use it from now on until it sticks. :D
 
Nice looking van (apart from the troubles you have had) and the roof is great.

Keep up the thread :D
 
Well finally, and with the run up to Glastonbury getting ever shorter, it was time to get the last job finished before it came to the dreaded moment of assembling the whole lot and lifting it back onto the van.

First up, spraying the outer roof trim that gives the entire roof it's rigidity, and is pretty vital to the Devon roof! Unfortunately, where a PO had been coating the middle sheet with the cack roof sealant stuff as per above, they had also coated the rubber seal and the outer trim with it. :roll: So getting it sorted properly would mean taking it back to bare metal, and re-spraying. I was hoping to get it powder coated as I absolutely hate painting anything, but the trim is too large to fit in any of our cars. So out came a can of graffiti remover and a paint scraper, followed by 120 grit and a sanding block to get a good key.


Fortunately it was a lovely day, so soon enough it was nice and shiney again:


The next steps were a couple of coats of acid etch, followed by white primer and gloss white paint. Unfortunately, in my haste the shade of white is a little too 'white' as I couldn't source the OE colour quickly enough, but it is a good match with the white vinyl for the aluminium sheet.

Next up, rivetting the new canvas to the sheet, using the original aluminium strips underneath it. Also managed to persuade the Mrs to pop it into the house for a warmer environment to apply the vinyl in.


This was cleaned with solvent cleaner and then the fun part of applying a massive sheet of vinyl to it. :D

Vinyl laid out prior to sticking:


And then started in a corner, only to find out that this is a really cack idea as the vinyl tends to stretch in a non-linear fashion and you end up with creases. We pulled it up, cut of the end, and then started in a straight line.


I thought I had more pics of it being applied, but obviously in my excitement I forgot. It was actually pretty easy to apply, as long as you work slowly and evenly, and it is made a million times easier to do it with a helper as the backing paper can be peeled away nice and straight. 8)

The next few steps I have no photos of due to the hulk-rage I was suffering with. When it came to the fitting of it all with the channel seal; could we get the bastard thing together? It seemed that every time we got one side close to fitting, the other would pop out, or not line, or generally just not want to fit. After wasting 2 or 3 hours trying everything, I thought it best to re-measure it all, just to be certain it was all the right size. As it happens, this probably stopped me from setting fire to the van.

The new channel seal from JK had a thicker section between the sheet and the rim. As such, there was no way it was all going to go together as it stood. So out came the jigsaw, and I carefully trimmed a few mm off the lengths, and at the same time noticed that the 2 ends aren't actually parallel, so also trimmed them to match the rim profile.

Happy that it would all be a snug fit, and with an equal gap between sheet and rim all the way round, it was time to give it another shot. This time, it went together easily.


Easy way to make a man happy. :D
 
In my excitement, I made the error of not fitting the J seal to the rim, or the hold-down hooks to the hinges, and opted to just get it straight on the van. I had the hinges all powdercoated, and cleaned up the solid old grease from the tubes and re-installed them with some fresh grease, and freed off the pivots.


This led to much fun installing the J seal upside down in between some heavy rain showers, but got there in the end. The canvas was then screwed down using some new aluminium strips, and stainless steel bolts and neoprene washers used for the brackets to prevent any water from seeping in and rusting them over time.


With just under 2 weeks left to go until Glastonbury, all that is left to do is to fit the hold-down catches and hooks, and knock up some sort of cabinet so that we can at least have a cooker. Getting there...

Whilst all this was going on, I managed to get it through an MOT with no roof on... it was so pleasant driving around with the big hole above my head that I almost didn't want to put the roof back on! :lol: Now that it is watertight again (hopefully...) we can make a start on bringing the rest of the camper up to a similar standard.
 

Latest posts

Top