71 Early Bay, formerly know as 'SuperDry'

Early Bay Forum

Help Support Early Bay Forum:

This site may earn a commission from merchant affiliate links, including eBay, Amazon, and others.
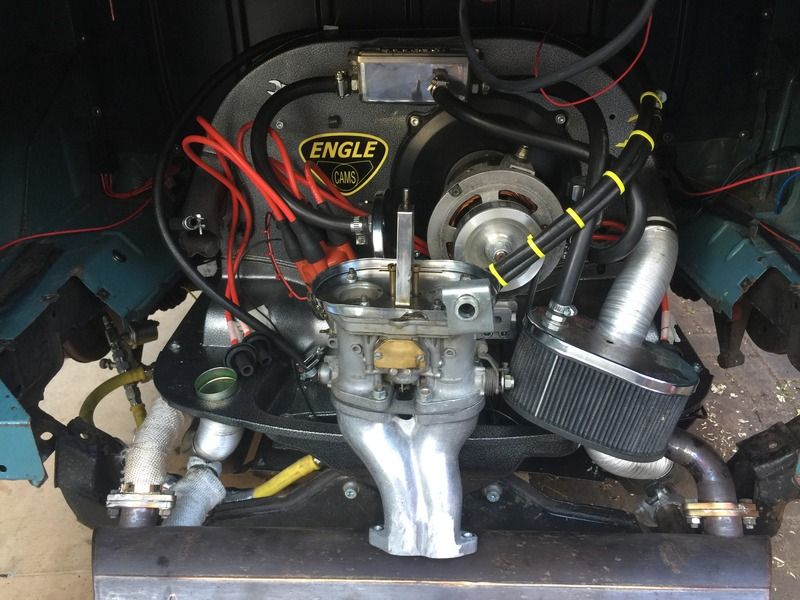
So, it wasn't ready for Bristol Volksfest.
I ordered the jets, venturis etc etc and they arrived in good time, however when I finally got the carb off the 3 & 4 side of the engine I simply couldn't get one of the venturis out.
I had to soak it in oil for 3 days, heat it, then beat the vent out of the carb body.

When it came to the 1 & 2 side I simply couldn't get the carb off the manifold, or, with the engine in place.

After stripping the first carb I managed to lose the bearing that is part of the pump jet, so I had to order new ones, along with pump jet seals and a gasket, to go with all the other stuff.

So this evening, I got the other manifold off by taking the rubber blocks out from the support bar to drop the engine around 2", this was enough give enough access to the other manifold bolts.


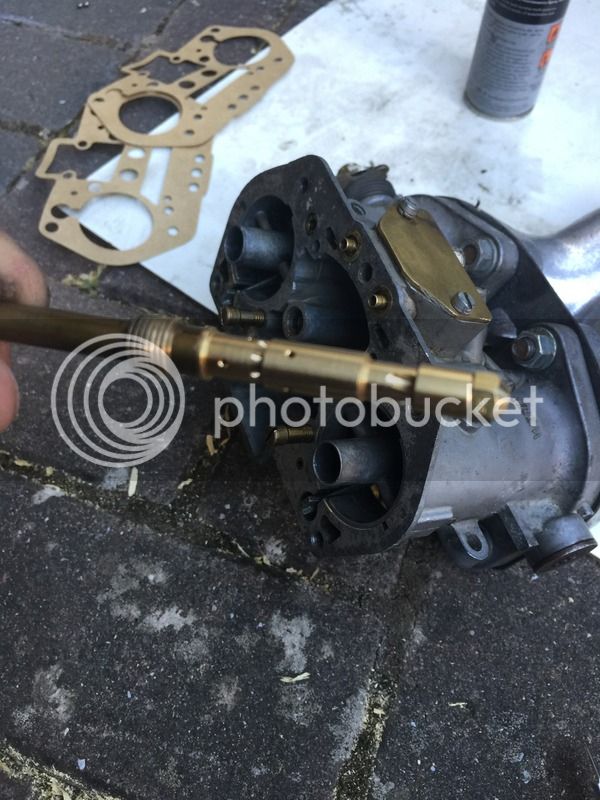
Both carbs were then fully stripped with the Alfasud jets, emulsion tube and venturis binned off.

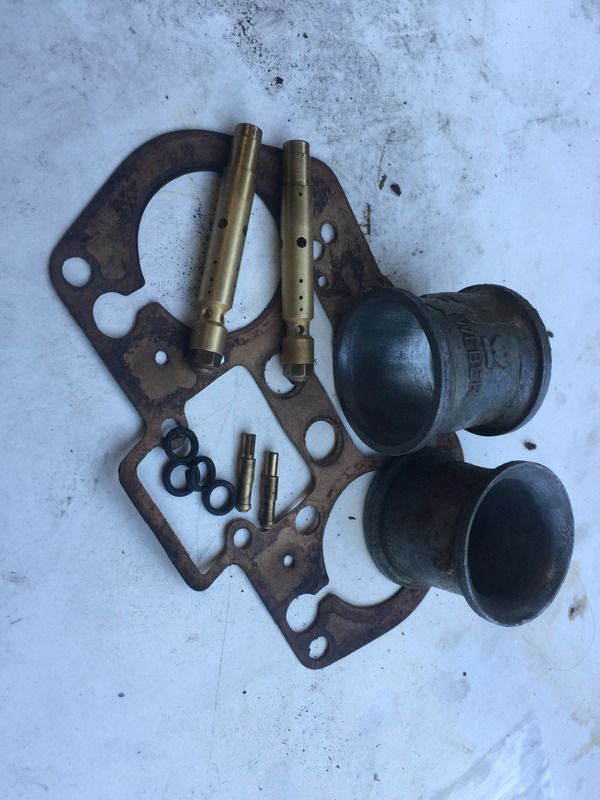
And the new kit took it's place


And here they are, now ready to go back in.


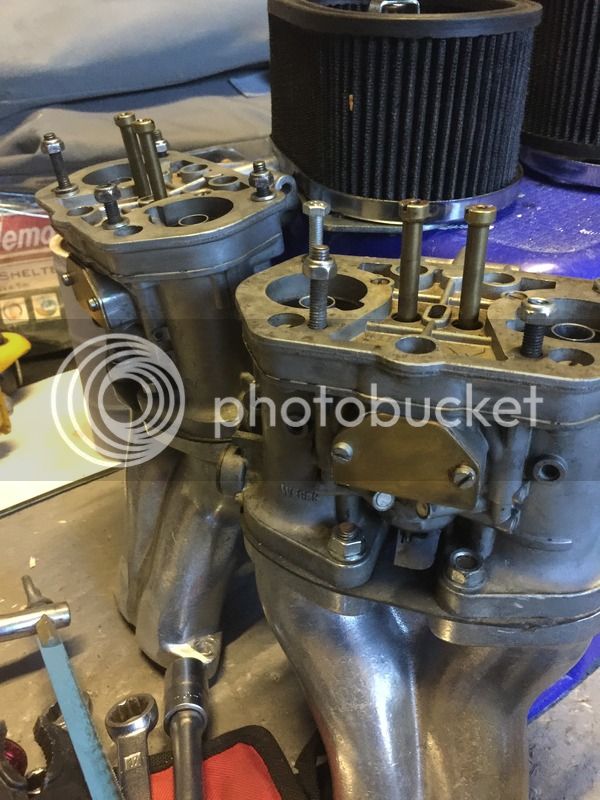
Just need bolting back in place and fingers crossed we're away!

The only issue I have is where I took the outlet off the electric fuel pump to re-route the fuel pumps route from the tank it now weeps fuel. I'll have a proper look at that next time I'm out there, should be Wednesday night.
 
Interested to know if your 71 has the vacuum assisted brake servo. I am adding Weber IDF 40's to my 71 and need to adapt the inlet manifolds to accept a vacuum line. The 71 was apparently the first year to have the front disc brakes and mine are servo assisted.
Cheers
Chris
 
Do you use 11x8mm nuts on the manifold studs? Should’nt have to do all that to take a carb off.
 
CleoMar: My 71 doesn't run the servo.

K@rlos: I need to replace with 11mm nuts, think mine are 13s currently.

Further update:
Turns out the 36IDFs I bought that had been set up for a 1776 hadn't bee, they had actually been taken straight off an Alfa Sud.
New throttle arms, new venturis, new emulsions and new jets, along with new gaskets and idle jet seals, then the floats reset and it's back in place and ready to go.

The linkage has been adjusted nice and tight, although the single core throttle cable is, imho, causing some issues so a 'strand' type has been ordered.

I'm going to recheck the valve gaps too, replace the throttle cable, and fit the Save My Bug dipstick sender. This flashes the oil light if the oil starts to get too warm, and then holds the light on solid if it passes a certain temp.
I plan to install a slimline led warning light to my oil temp gauge and piggyback this off the dash warning light, (when I figure out how!)

Just waiting for a mobile carb guru to come round now and finish balancing/synchronising the carbs, adjusting the idle and mixture and I do believe I am then ready to run it in!!!!!
I've got just over a week to get it done and off the drive before the builders start at Chez Scoops!!!!
 
So, I have a guy coming for 9am tomorrow morning to balance the carbs, and sort the mixture and idle for me.
Who knows, I may be about 'cruising' and commencing the running in tomorrow evening after work!
#ExcitedMuchly
 
Should never assume carbs are right for your application, ALWAYS go through them and check them. Did you not mock the engine up on the bench to check the linkage and everything works correctly?
 
Jesus mate, and i thought i had all the bad luck! hope you get it sorted after the visit from your carb Guru, love this bus mate glad you kept with it, i nearly gave it all up on many occasions but glad i didnt!
 
K@rlos said:
Should never assume carbs are right for your application, ALWAYS go through them and check them. Did you not mock the engine up on the bench to check the linkage and everything works correctly?

I did. And now it's all been adjusted and set up.......although I'm sure he will give it all another little tweak
 
Well the good news.
She drives lovely. Plenty of torque, and sounds spot on.

The not so good news. Did about 10 miles last night and the gear shift went, leaving me with only 3rd and 4th and when I got back I noted oil.
Looks like the crankshaft main seal has let go.
I can’t have got it in 100% square.
Gutted isn’t the word.
I’ve got Thurs and Fri off though so I just hope I can get it sorted in time before the scaffolding arrives on Monday!
 
Get a seal installation tool, you’ll know it’s square then and also use a Scat double lip silicone seal. Have 1 in my 2110, done 1000’s of mile, turns big rpm and not leaked a drop
 
I've ordered a single lip, Viton seal from here

https://simplybearings.co.uk/shop/Se...462/index.html

Saw a thread on VZi. Have also had the suggestion it could be excessive air pressure in the case, although I'm not convinced about that,
 
That can cause it but you’d either have some major blow by passed the rings or no crankcase breathers at all :|
 
Yeah, it's a little 1641, not a full on stroker.
I'm going to check the flywheel to ensure there's no groove or lip on there and swap out the seal for the vitron one. I tend to think it was just a shite seal supplied in the first place.

Ha ha! This bus will end up like Triggers Broom!

The positive is that whist it was playing nicely the engine was blooming lovely. Smooth, responsive and sounded, well, dare I say it, almost arousing!

It's just another little set back, all part of the fun of owning an aircooled eh?
 
As long as you have both rocker covers and the case vented you’ll be ok.
 
Hadn't vented the rockers. Just had the case vented to a breather box and then to the carbs.
 
Right. Update time. (I’ll edit later to add photos).

Pulled the motor on Thursday morning as I had a couple of days off.
Took my time as it was all complete and neat.
Got the flywheel off and sure as I was the crankshaft seal was leaking.
I also had the rear gear coupling to replace as it disintegrated on the test drive!
That was a royal pain in the ass to get the bolt aligned and through the eruthane block. Plus the bloody coating had to be cleaned out of the bore on the cage is it would fit on the linkage shaft!
That done I replaced the crankshaft oil seal but left the o-ring as it was so recently done.
Lightly oiled the CS seal and then got it all back in.
Took it out for a drive. All good.
Checked again later in the day. Dropping oil, although not as much.
Bit more research tells me I should have greased both sides of the CS seal prior to installing, and also fitted it flush with the case, rather than down to the limit. (Opinions)

It’s a pain but it can be simply sorted. I’ve got another seal here (I ordered two)

It goes in to storage tomorrow as I am having scaffolding put up at home for 8 weeks. I’m away for 2 weeks in 2 weeks time but I’m hoping to do it with a mate on his drive one afternoon as with two of us doing it I reckon we could do it in a few hours rather than the day and a half it just took me.
 
Yes both sides should be lubricated and the seal should go all the way home.
 
I've lost my drive now for 14 weeks, but I've got a mate who has said he is happy to help me if we do it on his drive.
I know what the issue is so I'm not too stressed about it.
I had an intermittent earth issue yesterday too where my worry gauges stopped working a couple of times. I think it's where it's been laid up for a few months.
 
Another 12.5 miles done this afternoon. The engine is really smooth and has noticeably more power than the 1584 engine it replaced.
 

Latest posts

Top